Error Code wkgx201hwa: Urgent Troubleshooting Guide
Urgent guide to diagnosing and fixing error code wkgx201hwa on your dryer. Learn immediate steps, common causes, safety tips, and when to call a pro. Easy DryVent offers practical, cost-aware guidance.

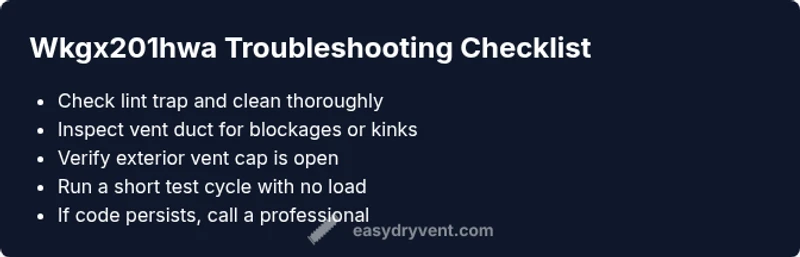
wkgx201hwa indicates a safety fault detected by the dryer's control system, usually tied to ventilation or overheating. Immediate steps: unplug the unit for 60 seconds, check and clear the lint trap, inspect the vent duct for obstructions, and run a short cycle with no load. If the code persists, stop using the dryer and call a technician.
Understanding wkgx201hwa: What the error means for your dryer
The error code wkgx201hwa signals a safety fault detected by the dryer's control logic. In most homes this fault stems from airflow restrictions, overheating, or sensor misreads. When your dryer reads this code, it typically halts to protect itself and your home from potential hazards. For homeowners, recognizing the common pathways of failure helps prioritize fixes without unnecessary disassembly. In practical terms, wkgx201hwa is a warning that the vent path and internal protections are working—now they need your attention. As you troubleshoot, keep the keyword wkgx201hwa in mind so you stay focused on airflow and safety rather than chasing unrelated issues.
Quick-dial Safety: Immediate checks you can perform now
If you encounter wkgx201hwa, safety comes first. Begin with a safe power cycle and a visual audit. Steps include unplugging the dryer, waiting at least a minute, then plugging back in to reset the controller. Next, inspect the lint trap and remove any obstructions. A blocked lint trap and restricted vent are the leading culprits behind wkgx201hwa. While performing checks, keep a flashlight handy to spot clues you might miss with the door closed. These actions are low-risk but high-reward in restoring airflow and preventing overheating.
Likeliest causes for wkgx201hwa and how to verify them
In most cases, wkgx201hwa is caused by lint buildup or vent obstruction (high likelihood). A dusty lint screen reduces airflow, while a blocked vent duct creates back pressure that can trigger overheating and a safety shutdown. Other possible causes include misrouted vent hoses or a damaged exterior vent cap (medium likelihood), and more infrequent faults like a faulty door switch or control board (low likelihood). A systematic check ensures you don’t miss a subtle but critical fault.
How to safely inspect essential components without tools
Begin with the lint screen and blower housing. Remove the lint trap and clean any lint with a damp cloth. Then, inspect the vent hose for kinks or crushed sections, and check the exterior vent cap for blockages such as bird nests or debris. If you notice moisture buildup or a burning odor, stop immediately. The goal is to confirm clear airflow from drum to outside vent while avoiding dangerous shortcuts.
Step-by-step preventive checks you should perform after wkgx201hwa clears
Once you regain function, take a proactive stance. Schedule routine lint removal after every load, inspect duct sections for wear, and ensure the exterior vent is fully open. Consider a quarterly vent inspection if you have pets or live in a dusty environment. These habits reduce the odds of wkgx201hwa recurring and prolong dryer life.
How to document and judge fixes before running a full load
After addressing the obvious airflow issues, perform a controlled dry run. Start with a small, light load and monitor for normal cycling without heat or with the lowest heat setting. Listen for unusual noises or burning smells. If the dryer runs without triggering wkgx201hwa and the cycle completes, you’ve validated the fix. If not, escalate to the professional path and log your steps for the technician.
Other potential causes and how to address them (beyond airflow)
If airflow issues are ruled out, other potential causes include sensor faults, door switch problems, or a deteriorated thermal fuse. A loose wire harness or a failing control board can also trigger safety codes like wkgx201hwa. In these scenarios, avoid DIY fixes that require internal board diagnostics and seek professional assessment to prevent further damage.
Safety first: when to call a professional and typical costs
If any signs of electrical arcing, burning odor, or persistent overheating appear, stop using the dryer and call a qualified technician. Typical service ranges for dryer repairs can vary widely by region and issue, generally spanning from a basic diagnostic fee to more extensive repairs like vent replacement or control-board work. Expect ranges such as a diagnostic visit ($50–$120) and common fixes ($100–$400) depending on parts and complexity.
Maintenance habits to prevent wkgx201hwa in the future
Prevention is simpler than cure. Maintain a clean lint trap, schedule annual vent inspections, and ensure exterior vent openings remain unobstructed. Use a vent brush to clean ducts and check seals around hose connections. By building a routine around lint care and vent maintenance, you reduce the likelihood of wkgx201hwa and improve drying efficiency.
Steps
Estimated time: 45-60 minutes
- 1
Power cycle the dryer
Unplug the unit, wait 60 seconds, then plug it back in to reset the control system. This simple reset can clear transient faults that trigger wkgx201hwa.
Tip: Avoid touching other components while unplugged. - 2
Inspect lint filtration and vent system
Remove and clean the lint trap; inspect the blower housing for lint buildup. Follow with a visual check of the vent hose for kinks or crushes along the path to the exterior vent.
Tip: Use a lint brush or vacuum to reach hidden debris. - 3
Check exterior vent and duct for blockages
Go outside and inspect the vent cap for obstructions. Clear away leaves, bird nests, or dust buildup that can constrict airflow.
Tip: Plastic caps may be blown off by wind—reinstall securely. - 4
Test run with no load
Run a short cycle with the drum empty and on air-dry or the lowest heat. Observe for proper cycling and absence of warning codes.
Tip: Stand by the unit during this test to catch any unusual smells. - 5
Evaluate electrical connections and controls
If the code returns, inspect accessible wiring for signs of wear. Do not open the control panel unless you are trained.
Tip: Only perform exterior checks; avoid internal wiring until professional service. - 6
Decide on professional help
If the fault persists after the above steps, schedule service. A technician will test sensors, boards, and vent integrity with specialized tools.
Tip: Ask for a written estimate and parts availability before consent.
Diagnosis: Dryer displays wkgx201hwa and stops mid-cycle
Possible Causes
- highClogged lint filter or vent obstruction
- highOverheating due to restricted venting
- mediumDoor switch or moisture sensor fault
- lowControl board fault
Fixes
- easyClean lint filter and inspect vent for blockages
- easyClear vent hose and exterior vent cap; ensure unobstructed airflow
- mediumInspect door switch and moisture sensor; replace if faulty
- hardConsult a technician to diagnose control board or wiring faults
Common Questions
What does wkgx201hwa mean?
Wkgx201hwa is a safety fault indicating a ventilation or overheating issue that caused the dryer to halt for protection.
Wkgx201hwa means a safety fault, usually from airflow or overheating, causing the dryer to stop.
Is it safe to run the dryer after seeing this code?
No. Stop the dryer and inspect airflow paths. If unresolved, avoid using it until a professional checks it.
No. Stop and inspect the airflow; if it keeps showing, don’t use it until a pro checks it.
What are the cheapest fixes for wkgx201hwa?
Clean the lint trap, ensure the vent is clear, and examine for kinks in the vent hose.
Clean the lint trap and vent path; check that the hose isn’t kinked.
How long do professional repairs typically take?
Most service calls take about 60-120 minutes, depending on the issue and parts needed.
Most repairs take around one to two hours, depending on the fault.
How can I prevent wkgx201hwa from returning?
Maintain regular lint removal, clean ducts periodically, and ensure exterior vents stay unobstructed.
Keep lint traps clean and vents clear to prevent it from happening again.
What costs should I expect for these repairs?
Diagnostic fees range from $50–$120. Vent work or sensor/board repairs typically range from $100–$450 depending on parts and labor.
Diagnostics are usually around $50 to $120, with vent or sensor repairs often between $100 and $450.
Watch Video
Key Points
- Unplug and reset before inspection
- Prioritize lint trap and vent cleanliness
- If the code returns, stop usage and call a pro
- Maintain routine vent checks to prevent recurrence