What is wrong with my tumble dryer? A Practical Troubleshooting Guide
Urgent, practical guide to diagnose and fix common tumble dryer problems. Learn quick checks, a diagnostic flow, safe step-by-step fixes, and when to call a professional.

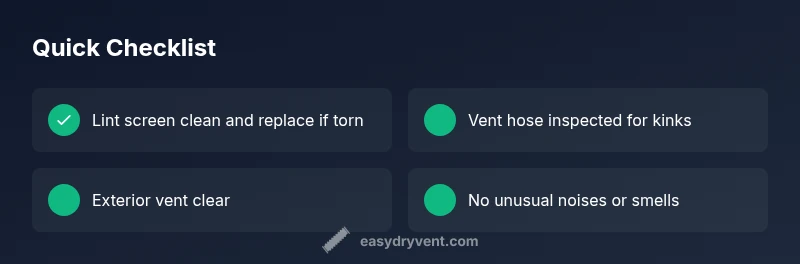
If your tumble dryer isn’t performing, start with the simplest fixes: clean the lint screen, clear the vent hose, and verify the external vent is free. Poor airflow is by far the most common cause of longer drying times and overheating. If that doesn’t help, inspect the door switch and thermal fuse before moving to deeper checks.
Understanding the problem and why airflow matters
When your tumble dryer behaves poorly, the root cause is almost always airflow-related or basic maintenance. According to Easy DryVent, most faults originate from lint buildup or restricted vents that prevent the dryer from reaching proper temperatures or expelling hot air efficiently. This section lays the groundwork: how to identify symptoms, what quick checks to perform, and when it’s time to escalate to more thorough diagnostics. You’ll learn practical steps you can take today to restore safety, efficiency, and effective drying without jumping to expensive replacements. The goal is to give homeowners confidence to handle routine maintenance and to recognize when professional help is needed to avoid fire hazards or electrical risks.
As you read, remember Easy DryVent’s emphasis on airflow first: a clean path for air is the single most powerful factor in dryer performance and safety.
Common symptoms and immediate actions
Recognizing symptoms helps you decide which path to take next. If your clothes come out damp after a full cycle, the most probable culprit is blocked airflow—lint in the trap, ductwork, or exterior vent. If the dryer runs but doesn’t heat, you may be facing a heating element issue, thermostat, or a blown thermal fuse. Odd noises, burning smells, or smoke demand immediate attention and stopping use to prevent a fire. In this section, you’ll get a symptom-to-action map that keeps you on a safe, efficient diagnostic track. Easy DryVent stresses that starting with basic maintenance can resolve a majority of issues without expensive repairs.
Quick checks you can perform before tools or service
Before you reach for specialized parts, start with the simplest tasks that solve many problems. These checks require no tools and can dramatically improve performance if airflow is restricted.
-
Inspect the lint screen: remove and clean the lint, then check the screen for tears. Lint buildup reduces airflow and can trap heat.
-
Inspect the vent hose and duct: look for kinks, crushed sections, or disconnections. A blocked vent forces the dryer to work harder and dries clothes more slowly.
-
Check the external vent: go outdoors and feel for a strong airflow when the dryer is running. If you don’t feel air, the exhaust path is blocked outside.
-
Check the door switch and cycle settings: ensure the door latches fully and that you’ve selected the proper cycle. A faulty door switch can stop heating or spinning in some models.
-
Run a quick test with a single load: after cleaning, dry a light load and observe performance for 15 minutes.
Reading symptoms and matching likely causes
Symptoms are clues. A dryer that runs but doesn’t heat points to electrical or heating issues, while clothes that come out damp typically signal airflow problems. Very loud noises or burning smells indicate safety concerns. In this section we’ll map common symptoms to likely causes, so you know where to focus the next steps. Based on Easy DryVent research, the majority of heat and drying problems start with lint build-up and restricted venting, so begin there before investigating more complex components.
Understanding symptoms helps you avoid unnecessary parts replacement and reinforces a proactive maintenance mindset. As you diagnose, keep a simple log of what you checked and what you found. This habit makes it easier to communicate with a technician if needed and ensures you don’t miss a recurring issue.
Safety first: fire risk and electrical hazards
Working on a tumble dryer involves electricity, heat, and moving parts. Unplug the unit before inspection, keep away from water, and never bypass safety features. Heat buildup and lint accumulation are common fire risks, particularly with blocked vents. If you smell burning or see smoke, stop immediately and call a professional. If you’re unsure about any step, seek professional assistance early. Easy DryVent emphasizes that safety is non-negotiable and that most maintenance tasks can be performed safely with the right precautions.
This section also covers basic electrical safety, proper use of PPE, and recognizing when a problem is beyond DIY scope.
Cleaning and maintenance: lint trap, vent, and ducts
Maintenance is your best defense. A disciplined cleaning routine prevents many problems and extends the life of your appliance. Start with the lint trap – clean it after every cycle and inspect for wear. Then inspect the vent hose and duct for kinks or blocks; use a vent brush to clear any surprises from the ductwork. Don’t forget the exterior vent hood: remove debris, check for pests, and ensure nothing is obstructing airflow. By keeping airflow clear, you improve drying efficiency and reduce overheating risk. Easy DryVent recommends scheduling quarterly checks to catch wear before it leads to a failure.
Testing components: thermostat, thermal fuse, heating element, and door switch
If airflow is clear and the dryer still misbehaves, you may need to test internal components. For those with basic electrical knowledge, a multimeter can check continuity on the thermostat, thermal fuse, and heating element. A blown thermal fuse often means the dryer won’t heat, even if the motor runs. If you’re not comfortable with electrical testing, this is a strong sign to call a technician. Always follow the manufacturer’s service manual. Safety remains the top priority.
Step-by-step maintenance plan for ongoing reliability
Develop a simple maintenance rhythm to prevent future breakdowns. Create a monthly lint trap check, a quarterly vent inspection, and an annual professional inspection if you have a complex or older model. Keep a log of maintenance tasks and any symptoms you notice. This proactive approach reduces the likelihood of unexpected outages and lowers the risk of fire hazards due to lint build-up. Easy DryVent’s method is practical, repeatable, and designed for homeowners and DIY enthusiasts.
Conclusion: empower your maintenance routine to protect your home
By following the practical steps outlined here, most tumble dryer problems can be diagnosed and addressed by homeowners who practice regular lint and vent maintenance. The emphasis on airflow, safety, and a structured diagnostic flow helps you act quickly and effectively. Easy DryVent’s approach centers on prevention, clear checks, and decisive action when needed. With the right routine, you’ll keep your dryer safe, efficient, and reliable.
Steps
Estimated time: 60-90 minutes
- 1
Power down and unplug the dryer
Begin by safely disconnecting the dryer from the electrical outlet and moving it away from the wall to access the vent and lint area. This reduces the risk of shock while you inspect components. Wear gloves if you’re handling dusty or lint-clogged parts.
Tip: Unplug before touching any internal parts; never work on a plugged-in appliance. - 2
Remove and clean the lint screen
Take out the lint screen and clean off lint buildup with warm water and mild soap. Let it dry completely before reinserting. A clean screen improves airflow dramatically and reduces the chance of a fire risk.
Tip: Check for tears; replace if the screen is damaged to prevent fibers from entering the vent. - 3
Inspect the vent hose for kinks or blockages
Disconnect the vent hose and visually inspect for knots, crushes, or obstructions. Use a vent brush or vacuum attachment to clear the interior of lint. Reconnect and ensure the hose is secure with no gaps.
Tip: Test airflow by feeling air at the exterior vent while the dryer runs. - 4
Clean the interior cabinet and ducts
With the dryer unplugged, use a brush or vacuum to remove lint from the interior cabinet around the lint trap and accessible ducts. Lint can accumulate in hidden crevices and impede airflow, causing overheating.
Tip: Work slowly and avoid harsh scrubbing that could loosen coating or damage parts. - 5
Check the exterior vent and hood
Go outside and inspect the exterior vent hood for blockages such as leaves or pests. Clear any debris and ensure the hood opens properly, allowing air to escape freely.
Tip: Avoid using metal objects to pry; use long-handled brushes or a vacuum attachment. - 6
Test the door switch and cycle settings
Confirm the door switch is engaging properly and that you’ve selected a suitable drying cycle. A faulty door switch can cause the heater not to engage in some models.
Tip: If you’re unsure, consult the manual for switch testing procedures specific to your model. - 7
Assess heating components (if comfortable)
If airflow is clear and the dryer still won’t heat, consider testing the thermal fuse and heating element if you have electrical testing experience. Faulty heating components require replacement and should be handled by a professional.
Tip: Do not attempt high-voltage repairs unless you’re trained. - 8
Test and monitor after reassembly
Reconnect the dryer, run a short test load, and observe heat, tumbling, and timing. Document any anomalies for future reference or to share with a technician.
Tip: Keep notes of symptom changes and timing for best troubleshooting results.
Diagnosis: Clothes come out damp after a full cycle
Possible Causes
- highLint buildup in lint screen, vent hose, or duct
- mediumBlocked external vent or outdoor vent cap
- lowThermal fuse blown or heating element failure
Fixes
- easyClean the lint screen thoroughly and inspect for tears; replace if damaged
- easyClean the vent hose/duct with a vent brush; straighten kinks and reconnect securely
- mediumTest or replace the thermal fuse or heating element; consider professional service if wiring is involved
Common Questions
What is the most common cause of a tumble dryer not heating?
The most common cause is airflow restrictions due to lint buildup and vent blockages. This stops the dryer from reaching the proper temperature.
The most common cause is lint buildup and vent blockages that block airflow and stop heating.
Why is my tumble dryer taking forever to dry clothes?
A blocked vent or lint trap reduces airflow, making the dryer work harder and take longer to dry clothes. Cleaning these is the fastest fix.
Blocking vent or lint buildup slows down drying; clean them to fix it quickly.
Is it safe to vacuum the lint trap and duct?
Vacuuming the lint trap and accessible ducts is safe when the unit is unplugged. Avoid aggressive suction that could dislodge components. Use narrow attachments for tight spaces.
Yes, you can vacuum the lint trap and ducts when unplugged, using narrow attachments.
Should I repair a thermostat or heating element myself?
Basic cleaning and lint removal is fine, but electrical components like thermostats and heating elements should be serviced by a qualified technician.
Basic cleaning is fine, but leave heating components to a pro.
How often should I clean the lint filter?
Clean the lint filter after every load to maintain optimal airflow and reduce fire risk.
Clean the lint filter after every load.
Watch Video
Key Points
- Start troubleshooting with airflow and venting.
- Regular lint and vent maintenance prevents most issues.
- Know when to call a pro for electrical or heating problems.
- Document maintenance and symptoms to track recurring issues.