Repair Dryer: DIY Guide to Common Dryer Issues and Fixes
Learn how to diagnose and repair common dryer problems at home with this step-by-step guide from Easy DryVent. Safety-first tips, practical tools, and maintenance strategies to keep your dryer running efficiently.

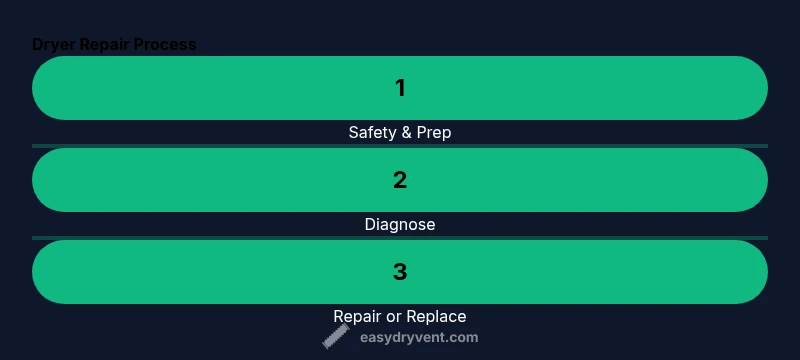
This guide helps you diagnose and repair common dryer problems yourself, from checking the thermal fuse and drum belt to testing the heating element and control components. You’ll learn essential safety steps, the exact tools you’ll need, and clear, actionable steps to determine whether you should repair or replace parts. Easy DryVent provides practical tips for safer, more efficient drying at home.
What you can repair yourself
Repairing a dryer can be within reach for many homeowners, especially when the issue is simple and isolated. The most common repairs involve the belt, heating element, thermal fuse, and drum rollers. Before you start, unplug the unit and disconnect the vent; gather basic tools and a replacement part kit. According to Easy DryVent, many dryer issues stem from routine wear and clogged vents rather than a total appliance failure. With methodical checks, you can save time and money while keeping your laundry routine on track. This guide focuses on fixes that are practical for DIY enthusiasts, while clearly noting when a professional should handle a repair, especially for high-voltage or gas-powered units. Refer to your owner’s manual for model-specific instructions and safety warnings.
Common dryer problems and quick checks
- No heat or very low heat: This often points to a blown thermal fuse or a failing heating element. Confirm power supply and verify the fuse if accessible. If the fuse is blown, replacement is necessary and should be done with the dryer unplugged.
- Clothes come out damp or take too long to dry: Check airflow by inspecting and cleaning the lint trap, vent hose, and external vent. A blocked vent is a leading cause of poor drying performance.
- Dryer tumbles or spins but makes unusual noises: Inspect drum rollers, idler pulley, and belt for wear or damage. Replace worn components to restore smooth operation.
- Burning smell or smoke: Stop the cycle immediately, unplug the unit, and inspect for wiring damage or scorching on elements. This is a safety hazard and warrants professional service if you find damaged wiring.
- Error codes appear on the control panel: Consult the manual or manufacturer website for the meaning of specific codes. Many codes indicate sensor, relay, or control board issues that require targeted testing or part replacement.
- Dryer runs but stops early or trips breakers: Check for overloaded circuits or loose connections. Address electrical issues before continuing use to prevent fire risk.
Safety-first basics for DIY repairs
Safety is non-negotiable when repairing a dryer. Always unplug the unit before any disassembly and avoid handling hot components directly. Wear eye protection and gloves when dealing with belts or heating elements, and keep your work area dry. Use insulated tools and avoid standing on damp surfaces. If your dryer is gas-powered, never attempt repairs that involve gas connections or vents without proper training. When in doubt, err on the side of caution and consult a professional technician. This section emphasizes safe practices to minimize risk while you troubleshoot common problems.
Diagnosis and repair workflow
A structured approach helps you identify issues efficiently. Start with a visual inspection and basic electrical checks, then move to component testing. If you reach a point where you must access live circuits or replace heating elements, ensure you have the right replacement parts for your model and follow the manufacturer’s wiring diagrams. Document every step with photos to reference during reassembly. While some repairs are straightforward, others may require service tools or specialized equipment; never bypass interlocks or safety switches. The goal is to isolate the fault and decide whether repair is cost-effective and safe for your home setup.
Maintenance to prevent future failures
Preventive maintenance is the best defense against unexpected breakdowns. Clean the lint screen after every cycle and perform a vent inspection quarterly. Check the vent for kinks, crushes, or blockages, and ensure the exhaust vent outdoors is clear. Periodically test the dryer’s airflow with a simple diagnostic run and listen for unusual noises that could indicate worn rollers or a loose belt. By keeping vents clean and components in good condition, you’ll maintain efficiency and reduce fire risk.
When to replace rather than repair
If your dryer is over 10-12 years old, or if multiple major components show wear, replacement may be the more cost-effective option in the long run. Energy efficiency and safety concerns, combined with the cost of parts and labor, can make a new unit a prudent choice. Consider the model’s reliability, warranty coverage, and energy ratings when deciding between repair and replacement. Easy DryVent encourages homeowners to weigh immediate repair costs against long-term energy savings and reliability.
Authority and further reading
For additional guidance and safety standards, consult trusted sources:
- U.S. Consumer Product Safety Commission (CPSC): cpsc.gov
- National Fire Protection Association (NFPA): nfpa.org
- Energy Star (for efficiency tips and appliance guidance): energystar.gov
These sources provide safety guidelines and best practices that complement hands-on repair steps.
Tools & Materials
- Flat-head screwdriver(For pry tasks and removing screws from access panels)
- Phillips screwdriver(General screwdriver for fasteners on panels and components)
- Nut drivers set(Different sizes for terminal nuts and duct clamps)
- Multimeter or voltmeter(Test continuity for fuses, heating elements, and controls)
- Replacement parts kit (thermal fuse, drum belt, heating element as needed)(Parts are model-specific; confirm exact parts for your unit)
- Dryer vent brush(For regular vent cleaning to maintain airflow)
- Work gloves and safety glasses(Protect hands and eyes during disassembly and testing)
- Owner’s manual or service guide(Reference wiring diagrams and part numbers)
Steps
Estimated time: 60-120 minutes
- 1
Power down and unplug
Ensure the dryer is fully disconnected from power before you begin any work. This reduces the risk of electric shock during inspection and testing.
Tip: Take a quick photo of the control panel connections before you unplug anything to help during reassembly. - 2
Gain access to key components
Remove the lint screen and access panels as required by your model to reach the belt, heat chamber, and safety interlocks.
Tip: Keep track of screws in labeled containers to avoid losing fasteners. - 3
Test the thermal fuse and heating circuit
With the dryer loosened for access, use a multimeter to check continuity on the thermal fuse and heating element. Replace any open or faulty part with an exact match for your model.
Tip: If you smell burning or see signs of scorching, stop immediately and consult a professional. - 4
Inspect the drum belt and rollers
Look for cracks, fraying, or missing teeth on the belt and wear on drum rollers or idler pulleys. Replace worn parts to restore proper drum rotation.
Tip: Manual testing of the belt with the drum removed can reveal misalignment or hidden cracks. - 5
Check airflow and venting
Inspect the vent hose for kinks and blockages. Clean the lint screen again and ensure the exterior vent is free of obstructions.
Tip: A clogged vent dramatically reduces drying efficiency and increases fire risk. - 6
Reassemble and run a test cycle
Reconnect all components, restore power, and run a short test cycle with items inside to verify heat and tumbling.
Tip: Listen for unusual noises and monitor temperatures to confirm proper operation. - 7
Evaluate the repair decision
If the repair cost approaches or exceeds the value of the dryer, or if multiple major components fail, consider replacement.
Tip: Keep receipts and note warranty status for any replaced parts.
Common Questions
Can I repair a dryer myself, and when should I stop?
Many simple repairs are doable at home, especially belt and lint-related fixes. Stop and seek professional help if you encounter exposed wiring, gas connections, or high-voltage components beyond your comfort level.
Yes, you can handle many common fixes yourself, but stop if you encounter wiring, gas lines, or high-voltage parts you’re not trained to handle.
What are the most common signs a dryer needs repair?
No heat, long drying times, unusual noises, burning smells, or error codes are the most common indicators that a dryer needs repair.
Look for no heat, long drying times, odd noises, or error codes as clear signs to check components.
Is it safe to test a thermal fuse with a multimeter?
Testing a thermal fuse requires opening the electrical path and using a multimeter for continuity. If you’re unsure, consult a professional, as improper testing can cause shocks or further damage.
Testing a thermal fuse needs care; if you’re unsure, get a pro to test it for you.
How long does a typical dryer repair take?
A straightforward repair can take about an hour or two, depending on access to parts and the complexity of the issue.
Most simple repairs take about 60 to 120 minutes, depending on the job and parts availability.
How much does a dryer repair usually cost?
Costs vary by part and labor, but it’s best to estimate based on model, parts required, and whether a single component or multiple parts must be replaced.
Costs depend on parts and labor; get a local estimate for your model and issue.
When should I replace instead of repair a dryer?
If the unit is old, energy-inefficient, or has multiple major failures, replacement may be wiser for safety and long-term savings.
If the dryer is old or has several failing parts, replacement might be more economical and safer.
Watch Video
Key Points
- Always unplug before working on a dryer.
- Regular vent cleaning improves efficiency and safety.
- Test components with proper tools; replace faulty parts only when necessary.
- Know when to repair vs. replace for cost, safety, and reliability.