Dryer Repair: A Practical Home Guide to Safe Fixes
Learn practical dryer repair steps homeowners can safely perform to diagnose common dryer problems, save on replacement costs, and keep your appliance efficient.

You're about to learn how to diagnose and safely repair common dryer problems, from not heating to prolonged cycle times. This guide outlines essential safety steps, practical troubleshooting, and cost-saving fixes you can perform at home using basic tools. You’ll also recognize when to call a professional to avoid injury, fire risk, or electrical hazards.
Overview: Why dryer repair matters
Dryer repair isn't only about keeping clothes dry; it's about safety, efficiency, and saving money. When dryers operate improperly, lint buildup, faulty components, or poor venting can escalate into higher energy use, longer drying times, and even fire hazards. A thoughtful approach to maintenance helps you identify issues early, prevent costly replacements, and extend the life of your appliance. According to Easy DryVent, regular dryer maintenance reduces fire risk and improves efficiency, especially for households with high drying frequency. The Easy DryVent team advocates building a simple check routine into your monthly chores so signs of trouble are caught before they become emergencies. This article equips homeowners with a practical, non-destructive method to diagnose and address common problems without specialist tools or expensive service calls.
Safety First: Before you start
Safety is non-negotiable when repairing a dryer. Always unplug the unit before inspecting any internal components, and avoid operating the appliance with doors or panels open. Wear protective gloves and eye protection, and never bypass safety devices such as thermal fuses or high-limit switches. Work in a well-ventilated area, especially if you will handle lint removal or vent cleaning. Keep a fire extinguisher nearby and never leave a running dryer unattended. If you smell burning plastic or electrical ozone, stop immediately and consult a professional. These precautions reduce the risk of electric shock, burns, and fire. Easy DryVent emphasizes documenting unusual smells or sounds before attempting any repair so you can share precise observations with a technician if needed.
Common dryer problems and quick diagnostics
Some issues are more straightforward than others. A dryer that won’t heat may indicate a blown thermal fuse, a faulty heating element, or a tripped circuit. A unit that tumbles but doesn’t dry should prompt a vent check and lint removal, as reduced airflow is a common cause of poor drying performance. Excessive noise can point to worn drum rollers, a loose belt, or a damaged blower wheel. Burning smells demand immediate attention and a shut-off to prevent fire risk. Start with simple checks like cleaning the lint screen, inspecting the vent duct for kinks, and ensuring the outlet is delivering proper voltage. If the problem persists, proceed to targeted tests for components like thermostats, fuses, and heating coils. The goal is to isolate the issue without replacing multiple parts unnecessarily. Easy DryVent recommends a structured diagnostic flow: observe symptoms, verify power and ventilation, test continuity where safe, and document results for future reference.
Tools, parts, and replacement basics
Before you begin, gather the right tools and replacement parts. A basic screwdriver set (Phillips and flathead), a multimeter, needle-nose pliers, and a flashlight are essential. You may also need a nut driver, Torx bits, and a vacuum with a brush attachment for lint removal. Replacement parts like a thermal fuse, heating element, drive belt, or drum rollers should be on hand if your diagnostics point to the need. Keep a small container for screws and take photos as you disassemble to simplify reassembly. If you’re unsure about wiring or safety-critical components, consult the manufacturer’s service manual or a professional. This knowledge improves repair success rates and minimizes unnecessary part swaps.
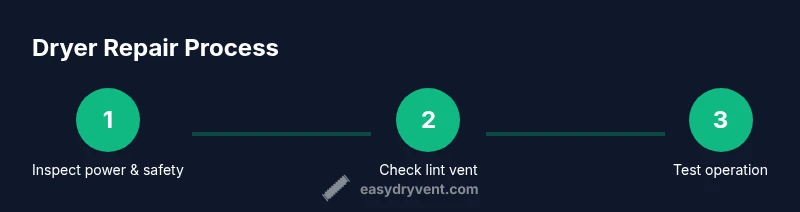
Step-by-step repair workflow (high-level)
A methodical workflow helps you stay organized and safe. Start by disconnecting power and accessing the internal components. Next, inspect the lint filter and vent path for blockages and lint buildup. Then test electrical components for continuity, such as the thermal fuse and heating element, using a multimeter. If any parts fail, replace them with manufacturer-approved equivalents and re-check the circuit. Finally, reassemble the dryer, run a short test cycle, and monitor for proper heat and airflow. This approach reduces guesswork and protects you from the most common repair mistakes.
When to replace rather than repair
Not every problem is worth repairing. If the dryer is old, presents multiple failing components, or has escalating energy costs despite fixes, replacement may be more economical. Compare the cost of parts, labor, and expected remaining lifespan against the price of a new unit with energy-saving features. In some cases, replacement also improves safety and reliability, particularly for gas-powered models or if the appliance has a history of recurring failures. Consider a mid-range model with better efficiency ratings to lower operating costs over time.
Maintenance after repair to prevent recurrence
Post-repair maintenance is essential to extend the life of the repair and improve performance. Schedule a monthly lint trap check and vent inspection, and clean the blower housing and interior drum area to prevent debris buildup. Use a high-quality vent brush to remove any stubborn deposits from ducts, and ensure the vent path is unobstructed from dryer to exterior wall. Periodically verify that the exhaust hood outside is free of debris and that there is no obstruction near the vent opening. Keeping the area around the unit clean and dry minimizes moisture-related issues and helps your repair last longer.
Tools & Materials
- Screwdriver set (Phillips and flathead)(Phillips #2 and flathead for most panels; include Torx bits if your model uses them)
- Multimeter(Used for checking continuity on fuses and heating elements)
- Vacuum with brush attachment(Lint and debris removal from lint trap housing, vent duct, and blower housing)
- Pliers (needle-nose)(Handle small connectors and clamps safely)
- Replacement parts (thermal fuse, heating element, drum rollers, belt)(Only buy if diagnostics indicate failure; verify model compatibility)
- Tongue-and-groove or nut driver(Helpful for stubborn fasteners in tight spaces)
- Work gloves and safety glasses(Protect hands and eyes during disassembly and testing)
Steps
Estimated time: 60-90 minutes
- 1
Disconnect power and access the cabinet
Unplug the dryer and move it away from the wall to access the back panel or top cover. Use proper lighting and let any stored heat dissipate. Remove the access panel if needed and document how wires connect before disconnecting anything.
Tip: Take a photo of wiring before unplugging to simplify reassembly. - 2
Check and clean lint trap and vent path
Remove the lint screen and clean it thoroughly. Inspect the vent duct for kinks, crushing, or blockages. Use a vacuum or brush to clear lint from the duct and the blower housing. A clean path restores airflow and drying efficiency.
Tip: Lint buildup is a leading cause of overheating and longer cycles. - 3
Test thermal fuse and heating element
With the dryer unplugged, use a multimeter to test the thermal fuse for continuity and inspect the heating element for breaks or hotspots. Replace any component that shows open circuit or visible damage.
Tip: Only test with power off; never test energized circuits. - 4
Inspect belt, drum, and rollers
Check the belt for cracks or wear and inspect drum rollers for smooth operation. Replace any worn parts to prevent belt slippage and noisy operation. Lubricate where recommended by the manufacturer.
Tip: A worn belt can cause overheating and poor tumble performance. - 5
Reassemble and run a test cycle
Carefully reassemble any panels. Plug the unit in and run a short, 15-minute test cycle to verify heat, airflow, and drum rotation. Listen for abnormal sounds and monitor for unusual smells.
Tip: Do not leave the dryer unattended during the test run. - 6
Evaluate results and plan next steps
If the dryer performs normally, monitor for a few more cycles. If issues persist or recur, consider professional servicing for in-depth diagnostics or a full component replacement.
Tip: Keep a maintenance log for future reference.
Common Questions
What are the most common signs a dryer needs repair?
Not heating, long drying times, excessive heat, unusual noises, burning smells, or tripping circuit breakers indicate a repair need. Start with lint removal and vent inspection, then test electrical components if symptoms persist.
Common signs include no heat, long dry times, and strange noises. Start with cleaning the vent, then test fuses and heating elements if needed.
Can I fix a dryer that won’t heat by myself?
Yes for basic causes like a clogged vent or lint buildup. More complex failures, such as a faulty heating coil or thermostat, may require professional service to avoid safety risks.
You can fix simple issues like lint buildup, but for heating coil or thermostat failures, consider a pro.
How long does a typical dryer repair take?
Most basic fixes take 1–2 hours, including diagnostics, parts replacement, and test runs. More complex repairs or part availability can extend this timeframe.
Most repairs take about an hour or two, depending on parts and access.
Should I replace the dryer instead of repairing it?
If the unit is old, energy-inefficient, or requires frequent fixes, replacement can be cost-effective. Compare part costs and labor against a new model with better efficiency.
If it’s old or unreliable, replacing may be cheaper in the long run.
Are gas dryers riskier to repair than electric ones?
Gas dryers involve fuel lines and venting, requiring caution and sometimes a licensed technician. Electric dryers are generally safer for DIY fixes but still require care with electrical components.
Gas models need extra caution and sometimes a pro; electric dryers are safer for DIY work if you follow safety steps.
What maintenance helps prevent dryer problems?
Regular lint cleaning, vent inspections, and monthly checks of hoses and seals reduce fire risk and improve efficiency. Schedule routine maintenance to catch wear early.
Regular lint removal and vent checks help prevent most common issues.
Watch Video
Key Points
- Diagnose safely before repairs.
- Keep lint and vent paths clear.
- Replace worn components only when needed.
- Document wiring and steps for future maintenance.
- Regular maintenance reduces repair frequency and costs.