Dryer Not Heating? Quick Troubleshooting Guide (2026)
Diagnose and fix a dryer without heat with safe, step-by-step guidance from Easy DryVent. Learn checks, diagnostic flow, and when to call a pro.

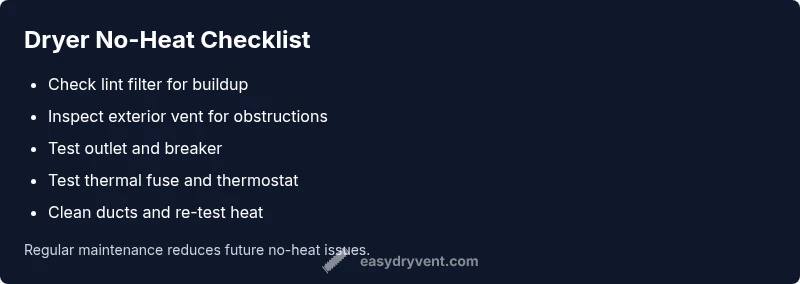
Most likely causes are a blown thermal fuse, a failed heating element, or a faulty high-limit thermostat. First, check the lint filter and vent to remove blockages, restart the circuit breaker, and test a dryer on a separate outlet. If it still won't heat, inspect the cycling thermostat and thermal fuse.
Understanding Why Your Dryer Won't Heat
A clothes dryer relies on a series of safety switches and heating components to generate warm air that dries your laundry. If your dryer runs but produces only cool air, the problem is almost always tied to one of a few key parts: the thermal fuse, the cycling thermostat, the high-limit thermostat, the heating element, or an airflow restriction. According to Easy DryVent, the most common no-heat scenarios involve a blown fuse or a blocked vent that triggers built-in safety shutdowns. In practice, diagnosing these parts involves a systematic approach: verify power, test airflow, and inspect the heating circuit. The goal is to identify the failing component without replacing parts blindly. This guide helps homeowners and DIY enthusiasts determine the likely culprit and the right next step, without risking safety or costly mistakes.
Safety for DIY Diagnoses
Safety first is non-negotiable when troubleshooting a dryer. Always unplug the unit before inspecting any components. If the appliance is gas-powered, avoid attempting repairs on gas lines yourself; contact a licensed technician. Wear eye protection and keep hair and loose clothing away from moving parts. When in doubt, pause and call a professional. The Easy DryVent team emphasizes safety as the foundation of any effective repair plan.
Start with the Vent and Lint Screen
A common reason for no heat is airflow restriction. A blocked lint screen, clogged lint trap, or a vent hose packed with lint reduces airflow, causing the dryer to overheat and shut down the heating system as a protective measure. Remove and clean the lint screen, inspect the vent hose for kinks, and clear the exterior vent cap of any obstructions. After cleaning, run a short test cycle on low heat to confirm whether exhaust flow has improved and whether the unit begins to heat again.
Electrical and Sensor Checks You Can Do
Inspect the power supply first: confirm the dryer is plugged into a functioning outlet on a dedicated circuit. Check the circuit breaker or fuse panel for any tripped breakers. A dryer needs adequate voltage to run the heater; a weak or unstable supply can prevent heat from forming. If the outlet and breaker are fine, you may need to test the dryer's thermal fuse and thermostats with a multimeter or have a professional test them. Thermostats regulate temperature; if a thermostat is faulty, the dryer may run but not heat.
Common Causes in Plain English
The most frequent no-heat causes are a blown thermal fuse, a failed cycling thermostat, or a defective high-limit thermostat. A damaged heating element is less common but possible, especially in older models with heavy use. Ventilation problems—lint build-up in ducts or a blocked exterior vent—are also frequent culprits since they trigger safety interlocks that cut heater power. Understanding these parts helps you decide whether to replace a component or call a technician.
When to Replace vs Repair
If your dryer is many years old and repair costs approach or exceed half the price of a new unit, replacement can be the smarter choice. However, if the dryer is relatively new or in good condition aside from a single faulty component, replacing that part often yields a long service life. Always weigh part availability, warranty coverage, and labor costs. The Easy DryVent approach is to fix the smallest, most likely failing part first and assess overall value after each step.
Steps
Estimated time: 60-90 minutes
- 1
Power off and safety check
Unplug the dryer and ensure the area is dry. If you must access internal components, wear rubber-soled shoes and use insulated tools. Confirm the model's manual for safe disassembly steps and avoid touching live electrical parts.
Tip: Always start with safety; a quick test with a non-contact voltage tester can confirm no power is present. - 2
Test the lint trap and vent
Remove the lint screen and clean it thoroughly. Inspect the vent hose for kinks and ensure the exterior vent is clear. Reassemble and run a short test cycle on low heat to observe heat production.
Tip: A clean vent can dramatically improve performance and reduce fire risk. - 3
Inspect the circuit and outlet
Check that the dryer is on a dedicated 240V supply if required by your model. Test the outlet for voltage with a multimeter or a plug-in tester. If you see an issue here, avoid using dangling adapters or extension cords.
Tip: Never run a 240V appliance on a shared or damaged outlet. - 4
Check the thermal fuse and thermostats
If you can access these components, test continuity with a multimeter. A blown fuse or faulty thermostat will typically show open circuits. Replace as needed following the manufacturer’s instructions.
Tip: Only replace components with the same part number to maintain safety ratings. - 5
Assess the heating element
For electric models, the element can burn out over time. Use the multimeter to check for breaks in the element circuit. If the element is open or damaged, replace it and re-test.
Tip: Heating element parts are more likely to fail in older units; consider model age when deciding on repair vs. replacement. - 6
Reassemble and run a full test
Reassemble all panels securely, plug in the unit, and run a full drying cycle. Monitor heat carefully and listen for abnormal noises or smells. If heat still does not appear, consult a technician.
Tip: Document any parts replaced and tests run for warranty or future service reference.
Diagnosis: Dryer won't heat
Possible Causes
- highBlown thermal fuse
- highTripped circuit breaker or bad outlet
- mediumFaulty cycling thermostat or high-limit thermostat
- mediumFailed heating element
- lowRestricted lint vent or exterior vent obstruction
Fixes
- easyReset breaker and test the dryer on a separate circuit to ensure adequate power
- mediumInspect and replace the thermal fuse if found open-circuit or burned
- mediumReplace thermostats that fail continuity tests or show abnormal readings
- hardTest and replace the heating element if it shows signs of breakage or burn marks
- easyClean or replace the venting to restore airflow and prevent overheating
Common Questions
Why won't my dryer heat even though it's running?
Usually the thermal fuse or a thermostat has failed, or there is an airflow restriction. Start with lint and vent checks, then test fuses and thermostats. If you’re uncomfortable with electrical components, contact a professional.
If your dryer runs but doesn't heat, the fuse or thermostat may be bad, or airflow is blocked. Start with lint and vent checks and test safety components; call a pro if unsure.
Can a blocked vent cause no heat?
Yes. A clogged vent reduces airflow, causing the dryer to overheat and trigger safety shutoffs that cut heating. Clean the vent thoroughly and test again.
A blocked vent can stop heat by triggering safety shutoffs. Clean the vent and try again.
Is a faulty heating element common?
Heating elements fail more often in older models but can occur. Test for continuity with a multimeter and replace if open or burned.
A bad heating element happens mainly in older dryers; test and replace if needed.
Should I hire a technician for no-heat diagnosis?
If you’re uncomfortable testing electrical components or if tests indicate a damaged fuse or thermostat, a professional is the safest route.
If you’re not comfortable with electrical tests, or components look damaged, call a pro.
How long does a typical heating repair take?
Repair time varies by model and part availability; plan for about an hour to a couple of hours for parts replacement and testing.
Most repairs take about an hour or two depending on parts.
What safety steps should I always follow?
Unplug the unit, avoid water near electrical parts, and wear protective gear when handling heating components. Do not bypass safety features.
Always unplug first and don’t bypass safety features.
Watch Video
Key Points
- Check for airflow blockages first to restore heat.
- Test electrical supply and safety devices before component replacement.
- Replace faulty thermal fuse or thermostat if tested defective.
- Evaluate repair vs replacement based on dryer age and part availability.
- Always prioritize safety and consider professional help when needed.