Why Is My Dryer Not Getting Hot? A DIY Troubleshooting Guide
Learn practical steps to diagnose and fix a dryer that won't heat. Safe checks, common causes, and when to call a professional—brought to you by Easy DryVent.

A dryer that won’t heat is most often caused by a failed heating element, a blown thermal fuse, or a tripped safety switch, but power issues and vent blockages can also stop heat. Start with safe checks: unplug, inspect the outlet, reset the breaker, and clear lint from the lint screen and vent. If the dryer still won’t heat, call a pro.
Understanding the problem: whys my dryer not getting hot
If you’re wondering whys my dryer not getting hot, you’re not alone. A dryer can fail to heat for several reasons, ranging from simple power issues to more involved component failures. According to Easy DryVent, the most common causes are vent blockages, a blown thermal fuse, or a failed heating element. This section explains how heat is generated in your dryer and what symptoms to look for to narrow down the problem. Recognizing the difference between a heating element failure and a vent restriction helps you target the fix more quickly and safely.
Safety first: what you can safely check yourself
Safety is the first step. Always unplug the dryer before any inspection, and never bypass a safety device like a thermal fuse. If you smell burning or hear buzzing from components, stop and call a professional. According to Easy DryVent, most hazards during DIY checks come from dealing with high heat or energized parts. By understanding basic safety, you protect yourself and your home while you diagnose whys my dryer not getting hot. Keep the area dry and away from water sources, and use insulated gloves when handling exposed wires.
Key safety reminders from the Easy DryVent team: never work on a dryer while it is connected to power, and never bypass thermal protection to test heating components.
Quick checks you can perform safely
Start with the simplest checks before diving into components. First, verify the outlet provides power to the dryer, and confirm the circuit breaker hasn’t tripped. If the dryer runs but doesn’t heat, move to lint-related checks. Clean the lint screen, then inspect the exterior vent for obstructions. A blocked vent can cause the dryer's internal safety features to shut off heat to prevent fires. Also, ensure the door switch is engaging properly and that the drum rotates freely. These quick checks address many whys my dryer not getting hot scenarios and can be completed in under an hour.
From Easy DryVent’s perspective, lint buildup and vent restrictions are frequent culprits that block airflow and stop heating.
Common causes explained
There are several root causes behind a dryer not heating. The heating element or coils may fail over time, especially in older models. A blown thermal fuse is another common issue that cuts power to the heating circuit when overheating occurs. A faulty cycling thermostat or high-limit thermostat can prevent the heater from cycling on. Vent blockages force the dryer to overheat and shut heat off for safety. Finally, power supply problems—such as a 240V supply not being fully available due to a tripped breaker or a faulty outlet—can leave the dryer running without heat. Understanding these causes helps you decide which check to perform next and whether professional help is needed. Easy DryVent emphasizes testing each component step-by-step to avoid guessing.
Diagnostic flow: symptom-to-diagnosis
When the symptom is a dryer running without heat, follow a logical path:
- Check for power issues and verify the outlet provides the correct voltage.
- Inspect the lint trap and vent for clogs and restrictors.
- Test the thermal fuse and heating element with the correct tools.
- Evaluate the cycling and high-limit thermostats for proper operation.
- Confirm the door switch and control module are functioning. If you can’t verify these safely or the problem persists, it’s time to seek professional service. Easy DryVent recommends a methodical approach to avoid unnecessary part replacements and to prioritize safety.
Preventive maintenance to avoid future issues
Preventing a repeat of not heating starts with regular maintenance. Clean the lint trap after every load, and schedule vent cleaning every 6–12 months depending on usage and dryer model. Inspect hoses and exterior vents for kinks or damage. Use proper load sizes to maintain airflow and avoid overheating. Keep the area around the dryer free of clutter and combustible materials. By implementing simple preventive steps and routine inspections, you reduce the chance of future not-heating issues and keep your dryer running efficiently.
When to call a professional
If you have tried the safe checks and the dryer still won’t heat, it’s time to call a professional. A certified technician can verify electrical supply, test heating elements with specialized equipment, and replace components like the thermal fuse or heating coils safely. When in doubt about wiring or gas connections (for gas dryers), seek professional service. Easy DryVent advises homeowners to seek professional help for any repairs involving electrical work, gas lines, or internal wiring beyond basic testing.
Steps
Estimated time: 45-75 minutes
- 1
Power down and unplug the dryer
Always unplug the appliance before starting any inspection. Remove nearby items that could obstruct access to the filter, duct, or rear panels. This first step minimizes the risk of shock when you test electrical components.
Tip: Use a headlamp or flashlight to clearly see the back panel and cord connections. - 2
Verify proper power and voltage supply
Check that the outlet is delivering power and that your dryer’s plug matches the outlet. If you have a 240V dryer, confirm both hot legs are live. If the outlet or circuit breaker trips, fix the electrical fault or call a licensed electrician.
Tip: Never bypass a breaker or use an extension cord for a high-draw appliance. - 3
Inspect the lint path and vent blockages
Remove the lint screen and vacuum out lint from the cavity. Inspect the vent hose for kinks, tears, or crushing. Clean any lint that reduces airflow and test to see if heat returns after cleaning.
Tip: A clogged vent is the most common cause of reduced heat and longer drying times. - 4
Check the door switch and control functions
Test the door switch with a multimeter or by gently tapping the switch while attempting to start a cycle. If the switch is faulty, the dryer may run without heating. Confirm the control panel is sending a heat signal to the heating circuit.
Tip: If you hear the drum turning but no heat, the door switch is a common culprit. - 5
Test the thermal fuse and heating element
Carefully locate the thermal fuse and heating element assembly per your model’s manual, then test with a multimeter for continuity. Replace any part that shows open-circuit results.
Tip: Thermal fuses rarely fail suddenly without warning; expect heat to cut off gradually if the fuse is failing. - 6
Assess thermostats and cycling components
Test cycling and high-limit thermostats for proper operation. A faulty thermostat will prevent the heater from cycling on and off as needed. If a thermostat is defective, replace it and re-test heat output.
Tip: Thermostats are sensitive; use the manufacturer’s spec when selecting replacements. - 7
Reassemble and perform a heat test
After replacing any components, reassemble the dryer, plug it in, and run a heat cycle with a light load to confirm heat returns. Do not run the dryer with a hot or smoking component.
Tip: Watch for unusual smells or smoking during the first test run. - 8
Document and maintain for future issues
Keep notes on what you tested and replaced. Schedule regular vent cleaning and lint trap maintenance to prevent recurrence. Record model-specific maintenance tips for quick future reference.
Tip: A simple maintenance log reduces future service calls.
Diagnosis: Dryer runs but does not heat
Possible Causes
- highPower supply issue (one leg of 240V missing)
- highVent blockage or lint buildup causing shutdown of heat
- highBlown thermal fuse or overheated safety fuse
- mediumFaulty heating element or coils
- mediumFaulty cycling or high-limit thermostat
- lowDoor switch or timer control fault
Fixes
- easyTest outlet and circuit breaker to ensure proper 240V supply and reset any tripped breakers
- easyClear lint from lint screen and clean the vent path to exterior; ensure exterior vent is open
- mediumReplace blown thermal fuse or defective heating element; this typically requires a professional
- mediumTest and replace cycling/high-limit thermostat as needed; this is a mid-level repair
- easyCheck door switch and timer control; replace if defective
Common Questions
Why isn't my dryer heating even though it runs
Common causes include a blocked vent, a blown thermal fuse, or a faulty heating element. Start with power and vent checks, then test components if you’re comfortable with electrical work.
If your dryer runs but won’t heat, start with the vent and fuse checks, then test heating parts if you’re comfortable with electrical work.
Can a clogged vent really stop heat from reaching clothes
Yes. A clogged vent restricts airflow, causing the dryer to overheat and shut off the heating circuit for safety. Regular vent cleaning helps maintain heat output.
A clogged vent can prevent heat by triggering safety shutdowns due to restricted airflow.
Is it safe to check the heating element myself
Only if you have experience with electrical testing and proper tools. If not, hire a qualified technician to avoid shock or further damage.
It’s safer to have a pro check the heating element if you’re not trained in electrical testing.
How much does a thermal fuse replacement cost
Costs vary by model and region; refer to a professional for an accurate quote. Do not operate the dryer if the fuse is blown.
Prices vary; consult a technician for a precise quote and safe replacement.
Why would heat return after I reset the dryer
Resetting can clear minor electrical glitches, but persistent heat loss usually indicates a failed component needing replacement.
A reset may help briefly, but ongoing heat loss means a component needs checking.
When should I replace the vent
If the vent hose is crushed, kinked, or collapsed, replace it to restore airflow and heat efficiency.
If the vent is damaged, replace it to restore safe airflow and heat.
Watch Video
Key Points
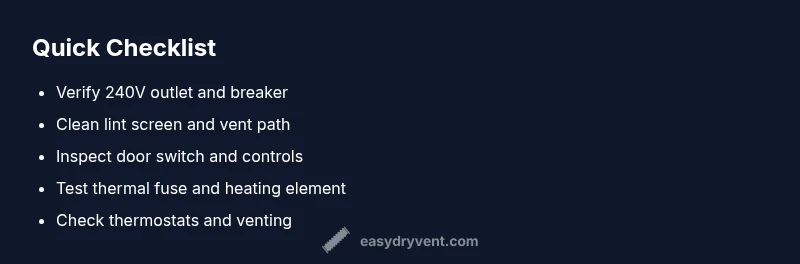
- Identify the most likely heat-blocking causes first
- Keep vents clean to restore airflow and heat
- Do not skip safety steps or bypass protective components
- Use a step-by-step approach to diagnose and fix non-heat issues
- Call a professional for electrical or gas connections and major repairs