Dryer Timer Not Working? Urgent Troubleshooting Guide
Quickly diagnose and fix a dryer timer not working. Step-by-step fixes, safety tips, and prevention guidance from Easy DryVent for homeowners and DIY enthusiasts.

Commonly, a dryer's timer not advancing is caused by a faulty timer motor or control board, which prevents the cycle from advancing. Start with a quick check: confirm power at the outlet, inspect the door switch, and try a different cycle to see if the timer advances. If it doesn't, you likely need a timer replacement or control module.
Quick Diagnosis and Immediate Checks
According to Easy DryVent, a dryer's timer not advancing is a common issue that homeowners can begin diagnosing safely. Start with the easiest checks: ensure the dryer is plugged into a live outlet and that the circuit breaker hasn’t tripped. Inspect the door switch, which tells the dryer to start or stop cycles; a faulty switch can block timer progression. Try a different cycle or reset the dryer by unplugging for 60 seconds and plugging back in. If the timer still doesn’t advance, the problem is likely in the timer assembly, timer motor, or the control board. Remember to work with the unit unplugged and avoid touching live electrical components. Easy DryVent Analysis, 2026, indicates timer-related failures remain a frequent repair topic for homeowners who aren’t advanced electricians, underscoring the need for careful, staged testing. If basic checks pass but the timer remains stuck, move on to diagnostic steps and safe, measured fixes.
How a Dryer Timer Works
A dryer timer coordinates the sequence of heat, tumble, and cool-down cycles. The timer motor advances the dial as the cycle progresses, while selector knobs or electronic controls tell the timer which program to run. Wear on the timer contact switches, or a failing timer motor, can prevent the cycle from advancing and leave the drum spinning without heat, or never starting at all. Understanding this helps you decide whether you’re dealing with a mechanical timer, an electronic control, or a peripheral issue like a door switch or thermal fuse. Recognize that some modern models use digital boards instead of a traditional dial, which shifts the fault to the control module rather than a mechanical timer. This knowledge guides your next steps toward targeted fixes rather than generic “buy a new dryer” solutions.
Common Causes for a Timer Not Advancing
Several issues can halt timer progression: a faulty timer motor or defective timer assembly, a stuck relay on the control board, or a blown thermal fuse that interrupts power to the timer circuit. A door switch that doesn’t register “closed” reliably can prevent the timer from advancing. Loose wiring or corrosion at timer contacts can also cause intermittent or no movement. In some models, the selector knob itself can be damaged or misaligned, sending the wrong signals to the timer. By distinguishing these causes, you can decide whether a DIY timer replacement is feasible or if professional service is warranted. If you hear the timer motor running but the dial doesn’t advance, focus on the timer assembly; if nothing happens at all, inspect wiring and control components.
Diagnostic Flow: Symptom to Solution
This flow helps you move from symptom to actionable solution without skipping steps. Symptom: timer does not advance. Diagnosis: verify power, test door switch, inspect wiring. If power and door switch are solid, test the timer motor and contacts. Solutions range from a simple switch replacement (easy) to timer assembly replacement (medium) or control board repair (hard). If a mismatch between cycle selection and actual operation occurs, the control module may be at fault. Always unplug before testing, and document findings to inform a technician if needed.
Step-by-Step: Fix #1 – Timer Motor or Timer Assembly (Most Common)
- Power off and unplug the dryer. Safety first to avoid shock. 2) Access the timer assembly by removing the front or back panel per the model’s service manual. 3) Inspect the timer motor belt and gears for wear or dislodged alignment; replace if worn. 4) Check timer contacts for burning or pitting; clean with a contact cleaner if safe to do so, or replace the timer assembly. 5) Reassemble, plug in, and run a test cycle to confirm the timer advances. 6) If issues persist, move to Step 2 (control board or knob replacement). Tip: label screws and take photos during disassembly to simplify reassembly.
Step-by-Step: Fix #2 – Replacing the Control Board or Selector Knob
- Confirm model and obtain the exact control board or knob replacement. 2) Disconnect power and remove the control panel. 3) Disconnect wiring harnesses carefully, noting their positions. 4) Install the new board or knob, reconnect harnesses, and reseal the housing. 5) Power up the dryer and run test cycles across multiple programs to ensure consistent timer progression. 6) If the problem recurs, consider a professional diagnosis for deeper board-level issues. Pro tip: when replacing a control board, test for scorch marks or melted wiring to prevent future failures.
Safety Warnings and When to Call a Pro
Electrical components can carry dangerous voltages even when unplugged. Always unplug before inspecting any internal parts and wear insulated gloves if available. If you smell burning insulation, see visible arcing, or the dryer trips the breaker after your attempts, stop and call a licensed technician. A professional can verify board integrity, verify proper voltage, and ensure the appropriate part is installed. Prevention through regular maintenance reduces the risk of deadly faults; never bypass safety switches or use heat-resistant tape to patch damaged wiring.
Prevention Tips to Extend Timer Life
Schedule regular dryer maintenance: clean lint traps after every load, inspect venting for obstructions, and keep the timer area free of dust. A clogged vent can cause overheating that stresses the timer and control circuits. If you notice frequent cycling issues, address lint buildup and vent cleanliness promptly. Use a quality, manufacturer-recommended lubricant on moving timer parts if specified, and avoid slamming the door or forcing cycles when the timer stalls. Regular maintenance and gentle use extend the life of timer assemblies and control boards. “According to Easy DryVent, steady maintenance saves both time and money.”
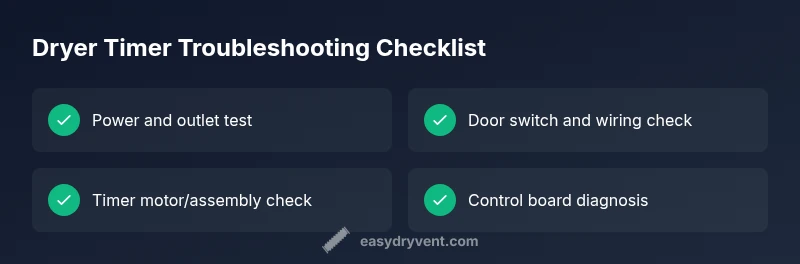
Final Troubleshooting Quick Recap
- Start with power, door switch, and basic cycle tests.
- Distinguish timer motor/assembly from control-board issues.
- Use the diagnostic flow to choose safe, incremental fixes.
- Prioritize safety and know when to seek professional help.
- Implement prevention steps to minimize future timer problems.
Steps
Estimated time: 60-90 minutes
- 1
Power down and prep for inspection
Unplug the dryer and disconnect power. Remove accessible panels to reach the timer assembly, per your model’s service manual, keeping track of screws and connectors as you go.
Tip: Take clear photos of wiring before disconnecting to simplify reassembly. - 2
Inspect timer motor and timer assembly
Look for signs of wear, burning, or misalignment in the timer motor or its gears. If the belt or gears are worn, replace the assembly.
Tip: Only use manufacturer-specified replacement parts to ensure compatibility. - 3
Check timer contacts and wiring
Inspect the timer contact points for pitting or corrosion. Clean with a non-residue contact cleaner or replace the timer if contacts are damaged.
Tip: A dirty contact can mimic a dead timer—don’t rush to replace the timer without cleaning first. - 4
Test cycle progression
Reassemble enough to safely power the unit and run a test cycle. Observe whether the timer advances through stages as expected.
Tip: If the timer still stalls, proceed to Step 5. - 5
Consider control-board or knob replacement
If the timer and contacts are sound but the cycle still won’t advance, the control module or selector knob may be at fault. Replace with OEM parts and test again.
Tip: A faulty control board often explains timing issues across multiple programs.
Diagnosis: Dryer timer not advancing through cycles
Possible Causes
- highFaulty timer motor or timer assembly
- mediumDefective door switch or wiring
- lowControl board or selector knob failure
Fixes
- easyTest power and outlet stability; swap to a known-good outlet and reset breaker
- easyInspect door switch and front panel wiring for loose connections; replace if damaged
- mediumReplace timer motor or timer assembly if worn or burned
- hardReplace the control board or selector knob if signals are not being relayed correctly
Common Questions
Can a dryer timer be repaired without professional help?
In many cases, a mechanical timer or timer motor can be replaced by a confident DIYer with the right parts and model-specific instructions. However, electrical safety and proper diagnosis are essential, so if you’re unsure, hire a professional.
Yes, many timer issues can be fixed at home if you’re comfortable with appliance repair and follow safety steps; otherwise, a professional is recommended.
How do I tell if the timer motor is dead?
If the timer won’t advance and you hear the timer motor running without dial movement, the motor or its contacts may be failing. Check the gears and belts for signs of wear and perform a component test if you have the right tools.
If the motor runs but the dial doesn’t move, that points to a motor or contact issue rather than the cycle timer itself.
Should I replace the timer or the whole control board?
Start with the timer motor or assembly if you hear the motor advancing but the cycle stalls. If the board fails across multiple cycles, it’s usually the control board. Replacement decisions should balance cost, model compatibility, and the failure pattern.
Is your model showing multiple cycling problems? It’s likely the board; if only one program fails to advance, the timer itself might be the culprit.
What safety precautions should I take before troubleshooting?
Unplug the dryer before any inspection, avoid water near electrical components, and use insulated tools. If you’re not experienced with electrical work, consider hiring a professional for safety.
Always unplug first and keep your hands dry. If in doubt, call a pro for safe repairs.
Are there signs that a timer failure affects drying performance beyond not advancing?
Yes. You may notice uneven drying, longer cycles, or the dryer getting unusually hot in some parts of the cycle. These signs often point to timing or heat-control issues that should be diagnosed.
If cycles run too long or don’t heat consistently, timing or control problems could be the cause.
Watch Video
Key Points
- Check power and door switch first before diving into components
- Identify whether the issue is mechanical timer or control board related
- Use a structured diagnostic flow to avoid unnecessary part replacements
- Safety always comes first; know when to call a pro
- Prevention reduces timer-related failures over time