Why Did Dryer Stop Working? A Practical Troubleshooting Guide
Is your dryer not running? This practical guide helps homeowners diagnose common causes—from power issues to vent clogs—with safe, actionable fixes. Act fast.

Most often, why did dryer stop working? The issue isn’t a failed motor but a fixable culprit. Start with power: confirm the outlet and circuit breaker are intact, then test the door switch. Next, inspect for vent blockages and a dirty lint screen. If those basics don’t help, a blown thermal fuse or a tripped safety limiter is a common next cause.
Why Your Dryer Stopped: Quick Diagnosis
If you’re wondering why did dryer stop working, start with the simplest checks. In many homes the problem isn’t a seized motor but a quick fix away: a tripped circuit, a faulty door latch, or a clogged vent. According to Easy DryVent, addressing basic power and safety barriers often restores operation quickly. The Easy DryVent team has seen countless cases where the dryer restarted after these early checks. Before you dive deeper, unplug the unit and follow basic safety practices. Then verify the basics: is the outlet live, is the circuit breaker intact, and is the dryer’s door latch engaging when closed?
If these checks pass, you’re ready to move to more specific causes and safe, practical remedies.
Common Causes You Can Inspect Quickly
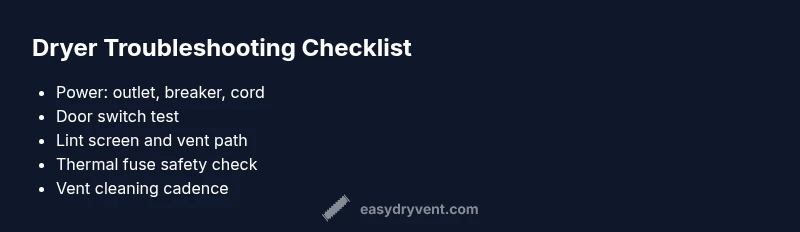
Most start-up problems fall into a few predictable categories. Use this quick checklist to narrow down the culprit:
- Power issues: A tripped breaker, blown fuse, or a worn cord can prevent starting.
- Door/lid switch: A faulty switch tells the dryer the door is open, so it won’t begin or will stop mid-cycle.
- Vent and lint problems: A clogged vent or clogged lint screen can trigger overheating and automatic shutdown.
- Safety devices: A blown thermal fuse or a faulty high-limit switch can trip, cutting power to protect the unit.
Tackling these areas first saves time and helps you decide whether a DIY fix is feasible or a pro is needed.
Quick Home Diagnostics You Can Run
These checks are safe to perform with the dryer unplugged unless explicitly noted otherwise. They help you confirm the most common causes before calling for service:
- Confirm power: Plug into a known-good outlet and reset the circuit breaker. Listen for a hum when you press Start.
- Test the door switch: With the door open, press the switch and try starting the machine; if it doesn’t respond, the switch may be faulty.
- Inspect the lint screen and vent: Remove lint from the screen, then check the vent path for kinks or blockage from the dryer to the outside wall.
- Check for overheating: If the dryer feels unusually hot after a short run, do not continue; overheating can trip safety devices and damage components.
When to Call a Pro and What to Expect
If the basic checks don’t restore operation, it’s time to call a professional. A qualified technician can safely test electrical circuits, door switches, thermal fuses, and ventilation using proper diagnostic tools. DIY fixes are great for simple items, but complex repairs—such as fuse replacement or motor inspection—require trained hands to prevent injury and avoid further damage. While you wait, unplug the unit when not in use, avoid running it if you hear unusual noises, and keep pets and children away. The technician will provide a written estimate, a scope of work, and a warranty on parts and labor so you know what to expect.
Steps
Estimated time: 60-90 minutes
- 1
Power safety check
Unplug the dryer and inspect the outlet and circuit breaker. If the outlet is dead, restore power before continuing. Verify the dryer's plug is firmly seated and the cord shows no signs of damage.
Tip: Always unplug before handling electrical components. - 2
Inspect the door switch
Close the door and press the switch manually; if the drum doesn’t respond, the switch or wiring may be faulty. Wiggle connections gently to check for looseness while the unit is unplugged.
Tip: Use a flashlight to check for loose wires and corrosion. - 3
Test the start button and controls
Ensure the Start/On button engages and the control panel responds; a non-responsive control can indicate a faulty switch or board issue. If available, use the model’s diagnostic mode to read error codes.
Tip: Consult the user manual for exact testing steps. - 4
Check the thermal fuse path
If you can access the fuse, test continuity with a multimeter; replace if open circuit. Only perform if you’re comfortable with safety procedures and the unit’s back panel is securely fastened.
Tip: Power must be disconnected and the back panel secured before testing. - 5
Clean and inspect ventilation
Remove lint from the screen and inspect the vent hose for kinks or buildup; clear obstruction improves airflow and reduces overheating risk. Reconnect hoses firmly after cleaning.
Tip: Do not use metal tools to poke lint loose; use a vent brush or a vacuum attachment. - 6
Run a test cycle
Reconnect power and run a short cycle to verify operation; listen for unusual noises or smells. If the dryer still won’t start or overheats, stop and call a pro.
Tip: Document any codes or symptoms to share with the technician.
Diagnosis: Dryer won't start or stops unexpectedly
Possible Causes
- highPower issue (outlet, circuit breaker, or cord)
- mediumDoor switch or lid switch faulty
- mediumThermal fuse blown or high-limit switch activated
- lowVent blockage or lint buildup causing overheating
Fixes
- easyReset breaker and try a known-good outlet; inspect power cord for damage
- mediumTest door switch with a multimeter and replace if open circuit
- hardReplace the thermal fuse following manufacturer instructions; disconnect power first
- easyClean lint screen and vent path; remove obstructions and ensure exterior vent is clear
Common Questions
Why did my dryer stop working all of a sudden?
A sudden stop often points to a power issue, a tripped circuit, or a safety device. Start by verifying the outlet and breaker, then test the door switch. If these checks are fine, inspect the vent path for blockages and consider the thermal fuse as a next step.
A sudden stop is usually a power or safety issue. Start with the outlet and breaker, then check the door switch and vent.
My dryer tumbles but won’t heat. What should I check?
No heat typically points to a faulty heating element, thermal fuse, or high-limit switch. Check the fuse path first and inspect the vent for overheating signs. If those items test okay, a professional should evaluate the heating circuit.
If it tumbles but doesn’t heat, the fuse or heating circuit is the likely issue. Inspect the fuse path and vent for overheating signs.
Can a clogged vent cause a dryer not to start?
A clogged vent usually causes overheating and shutdown rather than a failure to start. However, restricted airflow can trip safety devices, effectively preventing operation until cleared. Clean the lint screen and vent path as a first step.
A clogged vent can trigger safety shutdowns, preventing startup until cleared.
Can a faulty door switch prevent the dryer from starting?
Yes. The door switch tells the dryer the door is closed; a faulty switch can stop startup. Test continuity and replace if needed. This is a common DIY check if you have the right tools.
A bad door switch can stop the dryer from starting. Test and replace if needed.
How long does a typical dryer repair take?
Repair time varies with the issue and your skill level. Simple checks may take 30–60 minutes, while complex parts could require a few hours or a professional visit.
Time varies; simple checks are about 30 to 60 minutes, more complex repairs take longer.
Should I call a professional to replace a thermal fuse?
Replacing a thermal fuse involves electrical components and vent considerations. If you’re not confident, it’s safer to hire a licensed technician who can test the circuit and ensure proper ventilation.
Replacing a thermal fuse can be dangerous; consider hiring a professional if you’re unsure.
What’s the safest first step when a dryer stops?
Unplug the unit and inspect the cord, outlet, and breaker. Then check the lint screen and vent for obvious blockages. These steps prevent injury and guide you toward the right fix.
First, unplug and inspect wiring, then check lint and vent for blockages.
Is it worth buying a new vent kit?
A new vent kit can improve airflow and efficiency, especially if the existing ducting is old or damaged. Compare kit quality and length to fit your space, and follow local code requirements.
A new vent kit can improve performance if your current ducting is worn.
Watch Video
Key Points
- Check power and safety first to restore operation quickly
- Clear vent paths and lint screens to prevent overheating
- Use home diagnostics before dialing a pro
- Reserve complex fixes for professionals