Dryer Running but Not Heating: Practical Troubleshooting Guide
If your dryer runs but won’t heat, you’re facing unsafe, inefficient drying. Easy DryVent guides you through safe troubleshooting, common fixes, and maintenance tips to restore heat and protect your home.

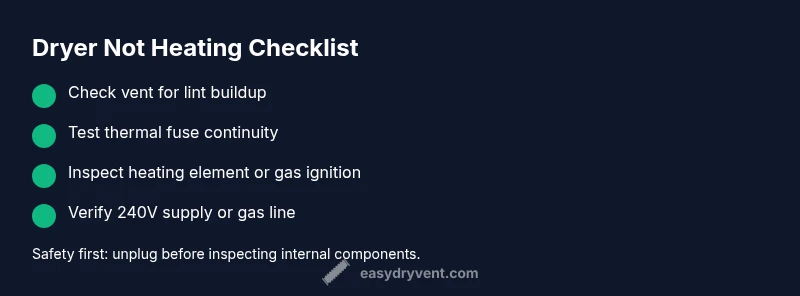
Most likely causes for a dryer running but not heating are a blown thermal fuse, a faulty high-limit thermostat, or a vent restriction. Start with safety checks: unplug the dryer, inspect the vent for lint, and verify the outlet provides 240V (for electric models) or gas supply for gas models. If you find a blown fuse or an obvious vent clog, address that first; otherwise proceed with deeper diagnostics.
The urgent reality: heat is essential and your dryer can still run without it
When clothes tumble but stay damp, you’re facing a common safety and efficiency issue: the dryer running but not heating. The heat is what actually dries the fabric, so a lack of heat prolongs cycles, wastes energy, risks mildew in damp loads, and raises fire concerns. According to Easy DryVent, many heating problems begin with simple airflow restrictions or a blown safety fuse. This guide covers how to diagnose the issue, perform safe checks, and apply practical fixes that homeowners can handle without specialized tools. You’ll learn to distinguish between electrical faults, vent problems, and thermostat-related failures while keeping safety front and center.
Important note: never bypass safety devices or operate a dryer with a damaged cord or cracked housing. Always unplug before inspecting internal components, and call a professional if you’re unsure about electrical work or gas connections.
Now, let’s explore the most common causes and how to confirm them in your own home.
Common causes behind a dryer running but not heating
There are several reasons a dryer might run yet fail to heat. Each cause has a different path to resolution, so starting with the simplest check saves time and reduces risk. The list below covers electric and gas dryers, focusing on what typically goes wrong in residential units:
- Vent restrictions and lint buildup can choke airflow, making the dryer run longer without heating. A clogged vent is one of the most frequent culprits for no-heat symptoms.
- Blown thermal fuse or failed high-limit thermostat cuts off heat to prevent fires. These safety parts are designed to fail open, stopping heat when temperatures get unsafe.
- Heating element failure in electric models or a faulty gas valve/igniter in gas models stops heat production entirely. These components can degrade over years of use.
- Power supply issues or a tripped circuit breaker can reduce the voltage available to the heating circuit, resulting in no heat while the drum still spins.
- Faulty cycling thermostat or moisture sensor can prematurely halt heat cycles, especially in modern, sensor-driven machines.
If you’re unsure, perform the quick checks first (outlet power, vent clearance, and visible wiring) before diving into component testing.
Safety first: what not to do and when to call a pro
Safety is non-negotiable when dealing with heat, electricity, and gas. Never operate a dryer with exposed wiring, a damaged cord, or a heating element that shows signs of scorching. Do not attempt to bypass temperature protection devices, and avoid running a gas dryer in an unventilated space. If you notice a burning smell, unusual noises, or smoke, shut off power immediately and call a professional.
For homeowners comfortable with basic diagnostics, many non-destructive checks (like vent removal, lint screen inspection, and simple voltage tests) can be done safely. When in doubt about wiring, gas lines, or internal components, schedule a service visit. Easy DryVent recommends professional help if you cannot safely test heating elements, gas valves, or high-voltage circuits.
Quick checks you can perform before service
Before pulling apart your dryer, try these safe, non-invasive checks:
- Unplug the unit and inspect the vent hose for lint build-up; clean or replace if restricted.
- Verify the power supply: electric models require a 240V outlet; test the outlet with a compatible meter or test the dryer on a known good circuit.
- Inspect the lint filter for obstructions; a clogged filter can reduce airflow and heat efficiency.
- For gas models, check that the gas valve is open and the appliance is receiving gas flow; a failing gas supply will prevent ignition.
- Run a quick test with the drum turning but heat off to see if any heat kicks in after a boost test from the timer; note any error codes if your model displays them.
Diagnosing the heating fault: a practical workflow
If quick checks don’t reveal the issue, use a structured diagnostic flow to identify the root cause. Start with the simplest, most likely problems (vent, fuse, thermostat) and progress to component testing only if needed. Document any error codes and symptoms as you go; this helps when consulting manuals or a technician. Easy DryVent emphasizes that systematic checks save time and improve safety outcomes.
Step-by-step: fix the most common cause (thermal fuse)
- Disconnect power and remove the back panel to access the thermal fuse. 2) Visually inspect the fuse for a melted or broken element; you may also test continuity with a multimeter if you have one. 3) If the fuse is blown, replace it with a model that matches your dryer’s specifications. 4) Reassemble, clear any lint from the vent path, and run a short heat test. 5) If heat returns, monitor the cycle for signs of overheating or repeated fuse failures. 6) If the fuse remains intact but heat is still absent, move to thermostat and heating element checks.
Pro tip: always replace both the high-limit thermostat and the thermal fuse together if you’re already inside the housing; this reduces the chance of repeated failures.
Maintenance tips to prevent future heating issues
Prevention is cheaper than repair. Schedule regular vent cleaning (at least every 12-18 months for homes with pets or frequent use) and inspect lint traps after every load. Use perforated vent hoses where possible to maintain airflow. Keep the area around the dryer clear of dust and clutter, and consider a dryer vent inspection as part of annual home maintenance. Easy DryVent also recommends testing the dryer’s heat function after any maintenance to confirm safe operation.
Steps
Estimated time: 60-90 minutes
- 1
Power down and safety check
Unplug the dryer and disconnect from power. Remove the front panel or access panel as required by your model to expose internal components without touching live parts. Inspect for obvious signs of damage, and ensure there is no water near the base.
Tip: Always wear safety glasses and gloves when handling electrical components. - 2
Check power and outlet reliability
Test the outlet for proper voltage with a multimeter or by plugging into a known-good outlet. If the outlet is flaky, fix the wiring or reset the circuit breaker before continuing.
Tip: Make sure the dryer is on a dedicated circuit to prevent voltage drops. - 3
Inspect vent and lint trap
Remove and clean the lint trap; inspect the vent hose for kinks and blockages. A restricted vent often causes heat loss, leading to a no-heat condition despite the drum spinning.
Tip: Use a vent brush or compressed air to clear stubborn lint from the vent line. - 4
Test the thermal fuse and high-limit thermostat
Locate these components on the blower housing or rear panel. Use a multimeter to test continuity; replace if open circuit.
Tip: Replace both if you’re already inside the housing to prevent repeated failures. - 5
Check heating element or gas ignition
For electric dryers, inspect the heating element coil for breaks. For gas models, confirm the igniter and gas valve function; listen for ignition cues during a cycle.
Tip: Do not touch heating elements when powered; they can remain hot for minutes after use. - 6
Reassemble and test heat
Put the dryer back together, perform a short heat test, and run a full cycle with a damp load to confirm heat stability. Monitor for overheating or unusual smells.
Tip: Keep a close eye on the cycle the first time you test after repairs.
Diagnosis: Dryer runs but not heating
Possible Causes
- highVent restriction or lint buildup
- highBlown thermal fuse or failed high-limit thermostat
- mediumHeating element failure (electric) or gas valve/igniter issue (gas)
- lowPower supply issue (insufficient voltage or circuit reset)
- lowSensor or cycling thermostat fault
Fixes
- easyUnplug the dryer and clean/inspect the vent and lint trap; after clearing, test heat again
- mediumTest for continuity on the thermal fuse and high-limit thermostat; replace if open
- mediumInspect the heating element (electric models) or gas valve/igniter (gas models); replace faulty parts
- easyVerify 240V supply to electric dryers or gas supply to gas dryers; fix wiring or gas issues as needed
- easyReset or recalibrate cycling thermostat as per model guide; consult manual if available
Common Questions
Why is my dryer running but not heating?
No heat usually means a safety device or airflow issue. Check the vent, lint trap, and fuse first. If these are clear, test the thermal fuse and thermostat, then inspect the heating element or gas ignition if needed.
A dryer that runs but has no heat is usually caused by a vent or safety switch failure. Start with the vent, then test the fuse and thermostat.
Can a clogged vent cause no heat?
Yes. A clogged vent restricts airflow, making the dryer run longer without heating properly. Cleaning the vent often restores heat and efficiency.
A clogged vent is a common cause of no heat. Cleaning it can restore airflow and heat.
Is it safe to bypass a thermal fuse?
No. The thermal fuse protects you from fires by cutting power if temperatures get too high. Bypassing it is dangerous and should only be done by a professional.
Never bypass a thermal fuse; it’s a critical safety device.
How much does a repair cost for not heating?
Costs vary with the model and parts. Typical repairs involve fuse or thermostat replacements, vent cleaning, or heating element replacement. Get a professional diagnosis before ordering parts.
Costs vary; get a diagnosis to identify the exact part and labor needs.
When should I replace the dryer instead of repairing it?
If the unit is old, inefficient, or has multiple failing components, replacement may be more cost-effective than frequent repairs. Compare repair estimates to the cost of a new energy-efficient model.
If many parts are failing or the dryer is old, replacement might be best.
What maintenance prevents heating problems?
Regular vent cleaning, lint trap care, and periodic professional inspections prevent most heating problems. Keep the area around the dryer clear and follow manufacturer maintenance guidelines.
Routine vent cleaning and lint care prevent most heating problems.
Watch Video
Key Points
- Identify heat loss causes early for safer diagnosis
- Start with vent and fuse checks before deeper repairs
- Never bypass safety devices; call a pro if unsure
- Prevent recurrence with regular vent maintenance