Dryer Repair in Phoenix: A Safe DIY Guide for Homeowners
Learn practical, safety-focused dryer repair strategies for Phoenix homes. Easy DryVent guides homeowners through vent checks, belt and fuse basics, and maintenance to keep dryers efficient and safe.

By the end of this guide you will be able to perform safe, basic dryer repair in phoenix, diagnose common malfunctions, and complete essential maintenance. You’ll start with vent checks, confirm electrical safety, and identify issues like a worn belt or overheating fuse. Easy DryVent provides practical, home-friendly steps to save time and keep your dryer running efficiently.
Why Dryer Repair in Phoenix Is Unique
According to Easy DryVent, the Phoenix climate and busy laundry cycles create unique wear patterns on residential dryers. Dryers in hot, dusty, or high-humidity environments accumulate lint and heat differently than in milder areas. Homeowners often run back-to-back loads during peak monsoon and summer seasons, which can stress belts, fuses, and motors. A well-maintained dryer in Phoenix not only dries clothes efficiently but also reduces energy waste and the risk of fire. In this section we’ll explore how local conditions — from vent location to outdoor temperatures — impact performance and maintenance priorities. By understanding these factors, you can tailor a maintenance routine that minimizes downtime and maximizes safety.
- Climate effects: High summer temperatures can increase dryer exhaust heat and stress components.
- Load patterns: Frequent heavy loads require stronger venting and more frequent lint removal.
- Vent accessibility: Roof or exterior vents may accumulate dust and pollen; routine cleaning is essential.
In short, a Phoenix-specific maintenance mindset helps you catch problems early and extend your dryer's life. The Easy DryVent team emphasizes practical checks you can perform without special tools, while reserving advanced work for qualified technicians when needed.
Common Problems You Might See in Phoenix Homes
Phoenix-area dryers face common issues that homeowners can recognize and address with basic tools. Here are frequent symptoms and probable causes:
- Longer-than-usual drying times: Poor airflow due to lint buildup in the vent hose or exterior vent, or a clogged lint trap.
- Overheating: Tripping thermal fuses or worn belts can cause heat to build up, potentially damaging the drum or wiring.
- Drum not turning: A worn belt or a stuck drum roller can prevent the drum from rotating.
- Noisy operation: Worn idler pulley, drum wheels, or loose components can create squealing or grinding sounds.
- Frequent cycling on/off: Faulty thermostat or heating element may cause intermittent heating cycles.
When you notice any of these symptoms, start with a safety stop: unplug the machine and inspect obvious blockages, then proceed to more detailed diagnostics. Always consider the age of the unit; older models may justify belt or fuse replacements rather than ad-hoc fixes. The Phoenix climate can accelerate lint accumulation, so proactive cleaning is a wise habit.
Real-world tip: keep a small notebook to track which symptoms occur after certain loads or times of day. This helps you spot patterns and communicate clearly with a technician if needed.
Safety First: Power, Grounding, and Venting Checks
Before you touch any components, prioritize safety. Unplug the dryer from the wall outlet and confirm the cord is not energized. If you have a gas-powered dryer, shut off the gas valve and ensure you’re in a well-ventilated area. Check that the circuit isn’t shared with high-draw appliances, which can cause nuisance tripping. Ground fault interrupters (GFCIs) should remain on if used nearby.
Venting is the second critical safety area. A blocked vent creates excessive heat, increases fire risk, and reduces dryer efficiency. Inspect both the interior vent path (from the drum to the exhaust) and the exterior vent cap. Use a flashlight to look for lint, debris, or bird nests. If you see a visible blockage, clean it using a vent brush or flexible cleaning kit. When in doubt, avoid forcing lint out through tight bends—use professional-grade tools or seek professional help.
In this Phoenix-focused context, also verify that outdoor vent termination is not blocked by vegetation or dust, especially during windy or monsoon seasons. Keeping the area around the vent clear reduces backdrafts and ensures consistent airflow. Safety note: always wear gloves and eye protection when poking into vent paths or panels.
Step-by-Step Diagnostic Flow
A structured diagnostic approach helps you avoid guesswork and unnecessary parts replacements. Start with the simplest, safest checks and progress to electrical tests only if the basics check out:
- Power and basic function: Unplug, inspect the cord for cracks, and reseat the plug. Plug back in and perform a short test run with a light load to observe behavior.
- Lint and airflow: Remove the lint filter, vacuum the cavity around it, and inspect the dryer vent hose for kinks or crushing. Use a vent brush to clear the interior line.
- Exterior vent check: Go outside and examine the vent cap for obstructions. Clean or replace if needed.
- Belt assessment: If the drum doesn’t rotate freely or if you hear thumping, you may have a worn belt. Remove back panel to inspect the belt for cracks or fraying.
- Thermal fuse and thermostat testing: Only perform electrical tests if you are comfortable. With the unit unplugged, use a multimeter to test continuity across the thermal fuse and the thermostat. Replace if your readings indicate an open circuit.
- Final test: Reassemble, run a damp-load cycle, and observe for proper heat, rotation, and dryness.
If any step reveals a fault beyond basic cleaning and inspection, schedule professional service. The goal is accurate diagnosis with minimal risk to you or your home.
Venting, Lint, and Airflow in Dry Climates
A key Phoenix maintenance tip is to keep lint away from hot surfaces and ensure consistent airflow. Lint is highly combustible, and even a small accumulation can create dangerous heat levels when combined with a dryer’s operating temperature. Regular cleaning reduces energy usage and extends the life of the dryer’s heating element and blower.
Practical steps:
- Clean the lint screen before every load and wipe the cavity around it monthly.
- Inspect the vent hose for kinks and crush points; replace if necessary.
- Use a flexible vent cleaning kit to reach inside bends; never use metal rods that could damage the hose.
- Schedule a thorough external vent clean at least twice a year, especially if you have pets or frequent lint from fabric softeners.
In dry climates, airflow is king. Adequate venting prevents overheating, reduces drying times, and lowers the chance of fire. Documentation from Easy DryVent emphasizes practical, repeatable actions homeowners can perform without specialized equipment, which is especially valuable in Phoenix’s environment.
Maintenance Routine for Phoenix Homes
Establishing a consistent maintenance cadence pays dividends in the life of your dryer. A simple weekly check complements a deeper monthly and seasonal routine:
- Weekly: Quick lint trap cleaning, wipe down the drum opening to remove any residual lint, and ensure the exterior vent cap is free of debris.
- Monthly: Inspect the vent hose for damage, clean reachable sections of the vent path, and listen for unusual noises during operation.
- Seasonal (every 3-4 months): Inspect belt tension and condition; verify the heating element’s resistance if you have the tools and knowledge; test the thermal fuse with a multimeter if you’re comfortable.
- Biannual professional check: For older units or if you notice persistent issues, schedule a professional inspection focused on wiring safety, motor bearings, and safety interlocks.
A practical Phoenix-specific tip is to align maintenance with monsoon and heat waves. After heavy wind or rain, recheck exterior vent integrity to prevent debris from entering the vent path. This habit minimizes downtime and reduces risk.
When to Replace Parts vs Call a Pro
Not every symptom warrants expensive repairs or DIY risk. Here’s a practical decision framework:
- Safe-to-try repairs: Cleaning lint, replacing a belt you can reach, and reseating electrical connections inside lockable panels that are clearly labeled.
- Components likely requiring professional service: Electrical control boards, high-heat components (thermistors, high-limit switches), gas valves, or interior damage behind the drum.
- Replacement parts you can consider after diagnosis: Lint filter, belt, seals, or hoses that show obvious wear.
If you’re uncertain, use a staged approach: complete simple cleaning and test, then replace a single component if safe to do so. Most Phoenix homeowners benefit from a cautious approach that preserves safety. When in doubt, contact a licensed technician, especially for gas dryers or units under warranty. Easy DryVent supports prudent decision-making and safe practices.
The decision to hire a pro often comes down to who has the right tools and a clear service scope, plus the potential for electrical hazards or gas line work. If there’s any doubt, schedule a pro visit rather than risk fire or carbon monoxide exposure.
Quick-Start Checklist for DIYers
If you’re ready to begin, use this concise, practical checklist to stay on track:
- [ ] Unplug the dryer and verify the area around the outlet is dry.
- [ ] Remove and clean the lint trap; vacuum the cavity once a month.
- [ ] Inspect the vent hose for kinks; replace if damaged.
- [ ] Check exterior vent cap for obstructions and clean as needed.
- [ ] If you have a multimeter, test the thermal fuse only if you’re comfortable with electrical testing.
- [ ] Listen for unusual noises during a test run; note the symptoms for future reference.
- [ ] Schedule a professional service if you suspect a faulty control board, heating element, or gas valve.
This quick-start guide helps you establish a safe baseline, especially in Phoenix’s climate where lint and heat are constant concerns. Keep safety gear handy and work in a well-lit space.
Tools, Parts, and Sources in Phoenix
Having the right tools and readily available replacement parts saves time and reduces downtime. The most useful items for Phoenix repairs include:
- Screwdriver set (Phillips and flat-head) – essential for panel access and component removal.
- Multimeter – essential for testing fuses and switches.
- Vent brush kit – essential for cleaning the interior vent path.
- Replacement drive belt – optional, but recommended if you notice slipping or drum not turning.
- Replacement thermal fuse – optional, only if you detect heat-related faults in diagnostics.
- Flashlight and gloves – essential for safety in cramped spaces.
- Model-compatible parts list – always verify compatibility with your dryer's model before purchasing.
Where to source parts in Phoenix:
- Local hardware stores for common components like belts, fuses, and screws.
- Reputable online suppliers that provide detailed model-number filters.
- Appliance repair shops offering genuine or OEM-compatible parts with warranty.
Pro tip: keep a simple inventory of what you replace and when. This helps you track wear patterns and schedule proactive maintenance. Easy DryVent recommends documenting part numbers and maintenance dates to simplify future troubleshooting.
Final Precautions and Next Steps
As you wrap up a Phoenix-focused dryer maintenance session, perform a careful final check to ensure everything is secure. Reconnect power, run a test cycle with a light load, and observe heat output, drum rotation, and exhaust airflow. If any step feels uncertain or unsafe, pause and consult a professional. Keep a written log of symptoms, replacement parts used, and dates for future reference.
Next steps include setting up a quarterly maintenance reminder, reinforcing vent-cleaning routines, and reviewing energy usage. With consistent care, your dryer will operate more efficiently, reducing energy costs and extending its lifespan in the Phoenix climate. Remember, safety first: if you smell burning or hear unfamiliar noises, shut down the unit and seek professional assessment promptly.
Tools & Materials
- Screwdriver set (Phillips and flathead)(Phillips #2 is most common for dryer panels)
- Multimeter(Used to test fuses and continuity)
- Vent brush or cleaning kit(Clear lint from vent hose and exterior vent)
- Replacement belt (optional but recommended)(Check compatibility with your model)
- Replacement thermal fuse (optional)(Only if diagnostic tests indicate fuse failure)
- Flashlight(Inspect dark interior areas and behind panels)
- Gloves and safety glasses(Personal protection during disassembly)
- Duct tape or clamps (optional)(Temporary sealing if needed during repairs)
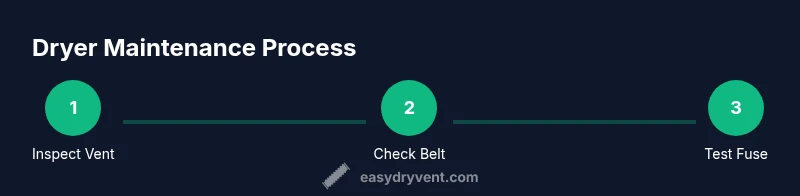
Steps
Estimated time: 45-75 minutes
- 1
Power down and access
Unplug the dryer and move it away from the wall to access the back panel. Remove the back panel screws and set the panel aside to expose the drive belt and blower housing. Confirm there are no exposed wires and that your hands are dry before touching metal parts.
Tip: Use a magnetic tray to keep screws organized and labeled by location. - 2
Inspect vent path and lint trap
Remove the lint trap and vacuum the drum opening. Inspect the vent hose for kinks, tears, or crushing; replace if any damage is found. Clean the exterior vent cap and ensure the duct path has a clear, straight route where possible.
Tip: A flexible brush can help reach bends without crushing the hose. - 3
Check the drive belt
If the drum doesn’t rotate or you hear slipping, inspect the drive belt for cracks and wear. If worn, replace with a belt that matches your model’s width and length. Re-thread the belt around the motor pulley and drum pulley following the original routing.
Tip: Take a photo of the belt path before removal to ensure correct reassembly. - 4
Test safety thermals
With power off, use a multimeter to test the thermal fuse and thermostat for continuity. If there is no continuity, replace the fuse or thermostat per your model’s guidelines. Reassemble only after you’ve confirmed continuity and inspected wiring.
Tip: Never bypass a faulty thermal fuse; it’s a critical safety device. - 5
Inspect drum support
Check drum rollers, axles, and axel bearings for wear or wobble. If you hear grinding or see shiny wear marks, replacement parts may be needed. Reassemble after replacing worn components and recheck the drum spin.
Tip: Lubrication is generally not required for modern drum rollers; avoid over-lubrication. - 6
Reassemble and test
Secure all screws, reconnect power, and run a test cycle with a light load. Observe for smooth drum rotation, stable airflow, and proper heating. If the dryer still malfunctions, note the symptoms and proceed to professional service.
Tip: Test with a small load to minimize heat buildup during the initial run. - 7
Decide next steps
If symptoms persist after basic maintenance, determine whether a single-part replacement suffices or whether a full diagnostic by a pro is warranted. Record results and schedule a follow-up if necessary.
Tip: Document model number, symptoms, parts replaced, and date for future reference.
Common Questions
Can I fix a dryer myself in Phoenix?
Yes for basic maintenance and simple repairs within safety guidelines. More complex electrical or gas-related issues should be handled by a licensed professional.
Yes, you can handle basic fixes, but for electrical or gas-related problems, call a licensed professional.
What are the signs of a blocked dryer vent?
Longer drying times, excessive lint around the vent, heat at the exterior vent, and a burning odor indicate potential blockage and should be addressed promptly.
Look for longer dry times and hot exterior vents; clear the blockage to restore airflow.
Is it safe to unplug and inspect a running dryer?
Always unplug before inspecting. If you must reach behind panels, wait for the drum to stop and use insulated tools.
Unplug first and wait for the drum to stop before poking around.
When should I replace a dryer belt?
If you hear squeaking, the drum won’t rotate, or the belt shows visible cracks, plan a belt replacement.
If the drum won’t spin or you hear squealing, the belt may be worn.
Where can I source replacement parts in Phoenix?
Check local hardware stores and reputable online suppliers, ensuring compatibility with your model and keeping receipts for warranty purposes.
Look up your model, then buy from a trusted supplier.
Watch Video
Key Points
- Identify Phoenix-specific wear patterns and tailor maintenance accordingly.
- Prioritize airflow: lint and vent blockages are common culprits of inefficiency.
- Always power down before inspecting electrical components.
- Use a staged approach to repairs—start with cleaning, then test safety components.
- Know when to replace parts vs call a professional.