How to Change Heating Element in a Samsung Dryer
Learn how to diagnose, replace, and test a Samsung dryer's heating element with Easy DryVent’s expert guidance. This practical, safety-conscious guide covers steps, tools, testing, and maintenance to keep your dryer heating efficiently.

Changing the heating element in a Samsung dryer is a manageable DIY task with the right parts and safety precautions. You’ll need a compatible replacement element, basic hand tools, and a multimeter to verify connections. This quick guide covers diagnosing heat issues, safely accessing the heater, installing the new element, and testing the unit to ensure it heats reliably again.
Why the heating element in a Samsung dryer fails and when to replace it
A dryer that runs but fails to produce heat is a common frustration. The heating element is a critical component that turns electrical energy into the hot air that dries your clothes. Over time, coils can burn out, connections corrode, or insulation degrade, especially after years of use. In Samsung models, heating-element failures are a frequent maintenance item for homeowners and DIY enthusiasts, and replacing the element is often safer and more economical than buying a new machine. According to Easy DryVent, heating-element failures are a common issue that homeowners encounter, and a well-tone replacement can restore heat without replacing the entire unit. Understanding the heater’s role alongside thermostats, fuses, and the control board helps you diagnose whether the element itself is at fault or if another safety device needs attention. This guide provides practical steps, safety reminders, and maintenance tips to help you perform the change correctly and confidently.
Safety first: vital precautions before you begin
Safety comes first when working with electrical appliances. Start by unplugging the dryer from the wall outlet and, if possible, switch off the circuit at the main panel. Wait 5–10 minutes to allow any stored charge to dissipate in high-resistance components. Move the dryer away from the wall to access the back panel and vent connections. Wear protective gloves and safety glasses; dryers have sharp edges and exposed wiring. Keep children and pets away from the workspace and ensure the room is dry to avoid shock. If your model uses a front panel or rear access, avoid forcing panels open; use the proper screwdriver size and avoid bending delicate parts. Have a flashlight handy and consider documenting wire connections for reassembly. These precautions minimize risk and set the stage for a careful, correct repair. The Easy DryVent team emphasizes that safety is essential for any heating-element replacement.
Diagnose symptoms and confirm a faulty heating element
Before ordering parts, confirm the heater is the root cause. No-heat symptoms include air that feels warm but not hot, unusually long drying times, or a unit that never reaches the expected temperature. If a circuit breaker trips or a fuse blows when the cycle starts, there may be a short in the heater circuit. Use a multimeter to check continuity across the heater coils; continuity generally indicates a good element, while an open circuit points to failure. Also inspect the thermal fuse and thermostats in the blower housing—these safety devices can interrupt heat if they sense excessive temperature. If you observe a damaged coil, burnt insulation, or damaged connectors, replacement is warranted. Easy DryVent analysis shows that thorough testing helps distinguish heater faults from sensor or fuse issues, saving you time and money. If you’re unsure, seek professional help to avoid unnecessary parts replacement and potential damage.
Prepare for replacement: verify compatibility and order parts
Replacement parts must match your Samsung dryer's model. Find the model or serial code on the door frame or inside the cabinet, then verify compatibility with a replacement heating element kit. If possible, confirm the kit includes the heater coil, terminal block, insulation, and wiring harnesses. If you’re uncertain, talk to a parts specialist or consult the service manual. Consider replacing the thermal fuse if it’s included with the heater kit, since a failed fuse can mimic a heater problem. Budget for a complete heater assembly rather than a coil alone, as newer designs integrate safety components. Finally, check whether your dryer is under warranty; if so, professional service may be required.
Accessing the heater assembly inside a Samsung dryer
Access varies by model, but most Samsung dryers place the heater behind a back panel or inside the blower housing area. Remove the access panel screws and carefully detach the panel, ductwork, and any shielding to expose the heater housing. Document the layout of hoses and wires to ensure correct reassembly. As you gain access, inspect the heater housing for scorching, melted insulation, or damaged connectors, which indicate heat exposure or a failing element. Create enough clearance to remove the old element without bending wires or forcing components. If fasteners resist, apply a small amount of penetrating oil and pause to avoid breaking tabs. Once you see the element and its connections, you’re ready to disconnect the wiring and prepare for replacement.
Remove the old heating element and disconnect wiring
Power is off. Start by photographing or labeling the wiring arrangement for accurate reinstallation. Gently unplug the harness from the element’s terminal block, noting which connector goes to which terminal. Remove the screws or clips holding the heater in place and slide the old element out of its housing. Inspect surrounding insulation and replace any worn material to prevent heat loss. If the terminal block shows corrosion, consider replacing it with the element to ensure a solid, long-lasting connection. Keep screws organized and avoid pinching wires during removal. This careful, organized approach reduces the risk of miswiring and damage during the install.
Install the new heating element and reconnect wiring harness
Position the new heater coil in the housing and align with mounting holes. Reconnect the wiring harness to the element’s terminal block in the same configuration as your photos or notes. Reinstall protective insulation, seals, and the housing cover. Secure the assembly with the original screws or manufacturer-supplied fasteners. Before closing the cabinet, verify all wires are clear of moving parts and heat sources, and that the terminal connections are snug but not overtight. A loose connection can cause intermittent heating or arcing. If your heater kit includes a thermal fuse, install it per the manufacturer’s directions. Reattach ductwork and venting in the factory layout. When in doubt, refer to the service manual for your exact model.
Test, reassemble, and verify heat output
With the heater installed, perform a cautious test before final reassembly. Reconnect power, run an air-only cycle to check for unusual smells or smoke, and ensure the blower operates smoothly. Next, run a full heat cycle and verify that the air temperature rises as expected. If the heater doesn’t engage, re-check connections, fuse, and control signals from the main board. After confirming heating, reattach the back/front panel and venting hardware, then run several full cycles to confirm consistent performance and absence of leaks. A thorough test helps catch loose connections or insulation gaps before finishing the job.
Maintenance tips to extend heater life and keep your Samsung dryer running smoothly
After a successful replacement, adopt a maintenance routine to extend heater life. Clean the lint trap and vent ducts regularly to maintain proper airflow and prevent overheating. Periodically inspect the blower housing and ductwork for debris and ensure airflow paths remain clear. Replace worn insulation if you see exposed metal or gaps in the heater cavity. Consider annual inspections if you use the dryer heavily or have frequent loads. According to Easy DryVent, proactive maintenance reduces the likelihood of future heater failures and helps protect other dryer components. Document service actions so future repairs proceed quickly and accurately, and keep spare parts on hand when possible.
Common mistakes and how to avoid them
Even with a clear plan, mistakes can happen. Avoid mixed-up wire connections by keeping a wiring map or photos handy. Do not force panels or bend wires; damaged insulation can cause energizing shorts. Never work on a live circuit—always unplug and verify no voltage with a non-contact tester. If you encounter a frayed harness or corroded terminal block, replace them rather than patching. Finally, avoid skimping on parts; using an inexpensive or mismatched heater can lead to repeated failures and safety risks.
Tools & Materials
- Replacement heating element assembly for Samsung dryer(Model-compatible; verify compatibility with your exact Samsung model before purchase)
- Screwdriver set (Phillips and flat-head)(Sizes #2 and #1 commonly needed)
- Nut driver or socket wrench set(For cabinet fasteners)
- Multimeter or continuity tester(Test heater coil continuity and safety fuses)
- Wire cutters/strippers(Optional for wire prep)
- Electrical tape and/or wire connectors(Secure and insulate wire connections)
- Work gloves and safety goggles(Personal protection against sharp edges)
- User manual or service manual(Helpful for model-specific screw locations)
Steps
Estimated time: 60-90 minutes
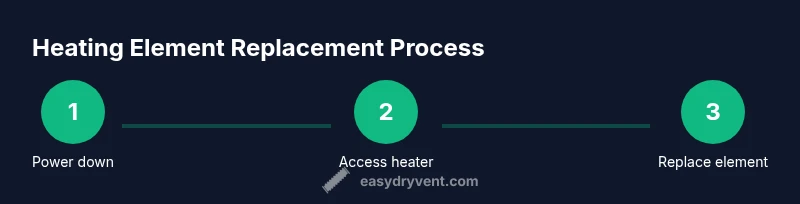
- 1
Power down and prep
Unplug the dryer and switch off the circuit if possible. Wait 5–10 minutes, then clear the area around the unit. This reduces the risk of shock and lets thermal elements relax. Gather your tools and take photos of wiring before you touch anything.
Tip: Double-check the outlet with a non-contact tester to confirm no voltage. - 2
Access the heater housing
Remove the back or front access panel according to your model. Carefully loosen screws and set panels and shielding aside. Inspect ducts for obstructions and note how venting is routed for later reassembly.
Tip: Label screws by location or keep them in separate cups to avoid mix-ups. - 3
Disconnect heater wiring
Photograph or label the wiring layout, then gently unplug the heater harness from the terminal block. Inspect connectors for corrosion and clean if needed. Avoid pulling on wires directly; detach only at the connector interface.
Tip: If a connector is stiff, use a small amount of electrical contact cleaner and work it loose. - 4
Remove the old heating element
Unscrew and lift the heater assembly out of its housing. Check the insulation around the coil for damage and replace if degraded. Compare the old element with the new one to ensure coil length and mounting points match.
Tip: Keep all fasteners organized in a labeled tray. - 5
Install the new element
Install the new heater coil in the same orientation as the old one. Reconnect the wiring harness to the corresponding terminals. Recheck insulation and any seals before securing the housing with screws.
Tip: If the kit includes a new terminal block, replace it to ensure solid connections. - 6
Reassemble and test wiring
Reinstall the heater housing and reattach any ducts or shields. Reconnect the outer panels and ensure no wires are pinched. Do a quick surface inspection to confirm nothing is loose or misrouted.
Tip: Before final closure, verify that all wiring paths are clear of hot surfaces. - 7
Initial electrical test
With the dryer unplugged, set up the wiring as documented and reattach the plug. Use a continuity test on the heater once reconnected, then power up briefly to listen for normal operation without venting air.
Tip: Always start with a short power test to catch obvious issues early. - 8
Final dry run and verification
Run a standard dry cycle, monitor temperature rise, blower performance, and any smells. If everything looks normal, complete a couple more cycles to verify consistency. Document the repair steps and any parts replaced for future reference.
Tip: Keep the area well-ventilated during the first full testing cycle.
Common Questions
Can I replace a Samsung dryer's heating element myself?
Yes, with proper safety precautions and the right parts. Follow a detailed step-by-step guide, ensure power is disconnected, and test the circuit after installation.
Yes, you can replace it yourself if you follow the step-by-step guide and safety precautions.
Do I need to unplug the dryer before starting?
Absolutely. Disconnect the power at the wall and, if possible, switch off the circuit at the breaker panel. This is essential to avoid shock during disassembly and testing.
Yes—unplug the dryer and turn off the circuit before you begin.
How can I tell if the heating element is bad?
Indicators include no heat during cycles, inconsistent temperatures, or a damaged coil/insulation. A continuity test with a multimeter helps confirm whether the coil is open or shorted.
Look for no heat, erratic temps, or a damaged coil; test with a multimeter to confirm.
Will replacing the heating element fix all heating issues?
Not always. If the problem lies with thermostats, thermal fuse, control board, or electrical supply, replacing the element alone may not restore heat. Thorough testing is essential.
Not always—other components can cause heating issues; test everything thoroughly.
How long does the repair typically take?
A well-prepared DIY repair usually takes about 60–90 minutes, depending on access and whether you replace the fuse or terminal block.
Expect about an hour to 90 minutes for a careful replacement.
Watch Video
Key Points
- Verify model compatibility before ordering parts.
- Always unplug and test for power before starting.
- Document wiring to ensure proper reconnection.
- Test heat output after installation to confirm success.
- Follow a proactive maintenance plan for longevity.