Bosch Dryer Repair: A Practical DIY Guide
Learn practical Bosch dryer repair steps, safety guidelines, and maintenance tips from Easy DryVent. A practical DIY guide to diagnose, fix common problems, and decide when to repair or replace.

Planning Bosch dryer repair? This guide helps you safely diagnose and fix common problems, decide when to replace parts, and protect your home from fire risk. You’ll learn a practical DIY workflow, required tools, and a step-by-step approach tailored to Bosch models. If you’re facing bosch dryer repair questions, this article has you covered.
Understanding Bosch Dryer Design and Common Failures
Bosch dryers use a modular design with a drum, belt, blower, heating circuit, and control board. Knowing how these parts interact helps you diagnose problems quickly. Common Bosch dryer repair scenarios include a dryer that doesn’t heat, clothes that aren’t drying, unusual noises, or a drum that won’t rotate. Often the root cause is a worn belt, a blown thermal fuse, a faulty thermostat, or a failed heating element. According to Easy DryVent, starting with a model-specific schematic keeps you safe and focused.
When symptoms arise, match the observation to a subsystem: no heat often points to the heating circuit or fuse; a drum that won’t rotate suggests belt or drum support wear; excessive noise can indicate a failing bearing or idler pulley. Recognizing these patterns lets you plan targeted tests and fixes rather than random part swaps. This approach minimizes downtime and protects other components. Always refer to your model’s service manual for wiring diagrams and part numbers to ensure you order compatible parts.
In short, a methodical, symptom-driven inspection—paired with the right safety precautions—paves the way for effective bosch dryer repair. Easy DryVent’s guidance emphasizes documenting each step and testing components with a meter before replacement, to avoid unnecessary parts swapping.
Safety First: Power Down, Lockout, and Fire Prevention
Safety is the foundation of any dryer repair. Always unplug the unit before beginning work, and, if the dryer is hard-wired or there’s a circuit breaker nearby, switch off the corresponding breaker. For gas models, shut off the gas supply per the manufacturer’s instructions. Wear protective gear such as safety glasses and gloves, and keep water away from electrical components. Do not work on a wet floor or with wet hands. If you’re not sure about the electrical system, consult a licensed technician. Easy DryVent reminds readers that de-energizing the appliance is non-negotiable and that you should test for residual voltage with a non-contact tester before touching any wiring. After disassembly, avoid hot surfaces and reconnect only after a full functional check to prevent arcing or fire hazards.
Additionally, never bypass safety switches or jumpers to force a test. Faulty wiring, damaged insulation, or burnt connectors can pose continued risks even after repairs. Document any unusual smells or scorch marks and replace damaged harnesses or connectors rather than attempting quick fixes. Finally, verify that the venting path is free of blockages, as restricted airflow can create dangerous heat buildup that leads to a fire hazard.
Tools and Materials for Bosch Dryer Repair
Having the right tools saves time and reduces the risk of damage. Essential items include a screwdriver set with both Phillips and flat-head bits, a Torx driver set (commonly T20/T25 for panels on many Bosch models), a nut driver, and an adjustable wrench. A multimeter or continuity tester is crucial for verifying fuses, thermostats, and heating elements. Needle-nose pliers help with disconnecting terminals, while a small pry tool prevents panel damage. A clean work surface, labeled containers for screws, and a model-specific service manual or schematic ensure you replace the correct parts.
For safety and proper function, also gather safety gloves, safety glasses, a flashlight, a vacuum or lint brush for cleaning, and OEM replacement parts as needed (thermal fuse, heating element, belt, or thermostat depending on model). A service manual or Bosch-supported wiring diagram reduces guesswork and helps you confirm part numbers before purchase. As you assemble, keep fasteners in order to reassemble quickly and accurately.
Step-by-Step Diagnose: Identify Root Cause
Diagnosing the root cause requires a structured approach. Start with a visual inspection of the belt, drum, and rollers for wear or broken parts. Next, test electrical components: verify the heating element continuity, inspect the thermostat, and check the thermal fuse for openness. If the dryer runs but produces insufficient heat, focus on the heater circuit, wiring, and airflow path. For noises, inspect the blower wheel and drum support. If the drum won’t turn, confirm belt integrity and motor operation. Reference model-specific schematics to locate the correct test points and connector locations. Record all readings and compare them with the service manual’s expected values. Easy DryVent notes that careful documentation accelerates future repairs and reduces unnecessary part swaps.
After completing tests, categorize findings as: (a) simple parts replacement (likely belt or fuse), (b) intermittent electrical fault (needs wiring or control board check), or (c) airflow issues (lint buildup or vent obstruction). This classification guides the repair strategy and helps you determine whether to continue or seek professional help. Keep in mind safety: never run the dryer with exposed wiring or loose connectors.
Common Fixes You Can Try (Non-Electrical) - Belts, Belts Tension, Drum Glide
Many Bosch dryer failures are caused by mechanical wear rather than electronic faults. A worn or broken drive belt prevents the drum from turning, while worn drum supports or bearings produce slowness, lag, or screeching. If the belt shows signs of cracking or loosening, replacement is usually straightforward with the right belt type and proper tension. Clean lint from the blower housing and vent path; restricted airflow can make the heater overheat and trigger safety shutoffs. When performing a belt or mechanical fix, always refer to the model’s service manual for torque specs and alignment guidelines. If you hear abnormal sounds during rotation after reassembly, stop and recheck belt routing and pulley alignment. This prevents misalignment that could damage the motor or belt.
Lint accumulation is a frequent contributor to performance issues. Clean the lint trap and exhaust hose thoroughly, then test airflow by feeling the exhaust air from the vent. If the exhaust air is weak or there is visible lint near the vent, schedule a vent-cleaning session. Regular maintenance not only improves drying efficiency but also reduces fire risk due to lint buildup. If a belt replacement doesn’t restore operation, you may be looking at a thermostat or sensor problem that requires electrical testing and possible part replacement.
Replacing Critical Components: Thermal Fuse, Heating Element, Thermostats
In Bosch models, the thermal fuse acts as a safety shutoff if the vent path overheats. A blown fuse will lead to no heat or no operation at all. Use the multimeter to check continuity; if there is no continuity, replace the fuse with an OEM part and re-test. The heating element is another common failure point; signs include no heat with a functioning motor. Inspect the coil for breaks and test continuity; replace if out of spec. Thermostats regulate operating temperatures, so a stuck or open thermostat can cause underheating or no heat. Replace only with the same part number to ensure proper operation. When replacing parts, disconnect power, handle components carefully, and reassemble according to the model’s service manual. After replacements, run a dry cycle with a light load to confirm heat output and airflow.
Always verify that the new parts align with your model’s specifications and that all connectors are snug. If you encounter a stubborn fault after replacing a part, recheck the wiring harnesses for damaged insulation or loose pins. Keeping a parts checklist and wiring diagram handy minimizes missteps and ensures your bosch dryer repair job meets safety and performance standards.
When to Call a Pro: Safety, Warranty, and Cost Considerations
Some Bosch dryer repairs are best handled by a professional, especially when the issue involves gas components, high-voltage circuits, or a failed main control board. If you’ve tested the heating element, thermostat, and fuse but heat or rotation remains inconsistent, a pro will have diagnostic tools and the experience to isolate the fault without risking personal safety or warranty coverage. Before calling, gather model number, observed symptoms, and any error codes to help the technician diagnose efficiently. Warranty terms vary, but many manufacturers require service by an authorized technician to maintain coverage when conditions involve safety-critical components. A professional repair may also prove more cost-effective in the long run if the issue recurs or requires specialized parts.
If your unit is under warranty, confirm coverage for labor and parts before scheduling service. For out-of-warranty models, request a written estimate that includes parts and labor, and compare it to the cost of a replacement unit. A pro can help you evaluate the trade-off between repair cost and buying a newer, more energy-efficient model. Easy DryVent suggests prioritizing safety and reliability, especially for electrical or gas appliances, and using OEM parts when possible to protect warranty and performance.
Maintenance Tips to Prevent Future Bosch Dryer Problems
Preventive maintenance reduces the likelihood of unexpected Bosch dryer repairs and extends the life of your machine. Start with a quick monthly lint trap cleaning to minimize airflow restrictions and energy waste. Inspect and clean the vent hose and exterior vent cap to prevent lint buildup and moisture retention. Periodically remove the rear panel (with power off) to dust out the blower housing and inspect for worn components before they fail. Use sensor-based drying cycles when possible, as they help regulate moisture levels and reduce repeated heating cycles that stress components.
As you use your dryer, avoid overloading it, which strains belts and motors and can drive overheating. Check for strange noises or vibrations during operation and address them early to prevent more severe damage. Keep a simple maintenance log noting dates of vent cleanings, belt replacements, and filter changes. Finally, ensure your dryer’s surroundings are well-ventilated and that the area remains dry to reduce corrosion or moisture-related wear. Following these steps contributes to a safer, more efficient appliance with fewer Bosch dryer repair needs.
Authority Sources
To support safe and informed maintenance, consult these authoritative sources for appliance safety and electrical standards:
- https://www.osha.gov
- https://www.nfpa.org
- https://www.consumer.ftc.gov
These sources provide general guidance on electrical safety, fire prevention, and consumer protection for home appliances. Always reference manufacturer manuals and model-specific service guides for your Bosch dryer and follow local electrical codes when performing any repair.
Tools & Materials
- Phillips screwdriver set(Flat and Phillips tips; include precision bits for small screws)
- Torx screwdriver set(Include T20 and T25 bits for panels on many Bosch models)
- Nut driver set(For securing nuts in frame and panel assemblies)
- Flathead screwdriver(Prying without marring plastic parts)
- Multimeter or continuity tester(Test fuses, thermostats, and heating elements)
- Needle-nose pliers(Helpful for disconnecting connectors)
- Service manual or model-specific schematic(Identify test points and part numbers)
- Safety gear (gloves, glasses)(Personal protective equipment)
- Replacement parts (OEM preferred)(Thermal fuse, belt, thermostat, or heating element as needed)
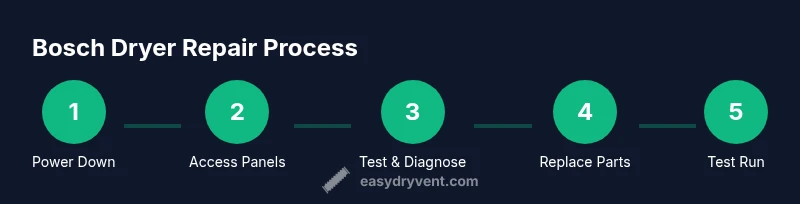
Steps
Estimated time: 60-120 minutes
- 1
Power down and unplug
Unplug the dryer and, if possible, switch off the dedicated circuit breaker. This eliminates the risk of shock while you inspect internal components. If the unit is hard-wired, follow the manufacturer’s lockout/tagout procedure.
Tip: Use a non-contact tester to confirm no voltage at the terminal strip. - 2
Remove access panels
Use the appropriate bits to remove the rear and/or dryer door panels to expose the drum, belt, and blower housing. Keep screws organized in labeled containers to simplify reassembly.
Tip: Take pictures during disassembly to guide reassembly. - 3
Inspect belt and drum components
Look for a cracked or stretched belt, frayed edges, or damaged drum rollers. Manually rotate the drum with the belt removed to check for rough spots or binding.
Tip: Rotate the drum slowly and listen for unusual squeaks. - 4
Test heating and safety parts
With power off, test the thermal fuse and thermostat for continuity using your multimeter. If either part is open circuit, replace it. Inspect the heating element for visible breaks or scorching.
Tip: Replace only with OEM or model-specific equivalents. - 5
Check airflow path
Inspect the blower wheel, lint screen housing, and vent hose for blockages. Remove built-up lint and ensure the vent path is clear to restore proper dry times and prevent overheating.
Tip: Vacuum the blower housing and wipe down the vent path. - 6
Evaluate control wiring
Inspect wiring harnesses and connectors for loose pins or signs of heat damage. Re-seat plugs and secure harnesses away from moving parts to prevent future faults.
Tip: Avoid forcing plugs; ensure latching tabs click securely. - 7
Replace faulty parts as needed
Install the new belt, fuse, thermostat, or heating element per the service manual. Double-check that all parts align correctly with their mounts and that connectors are fully seated.
Tip: Use torque specs from the manual to avoid over-tightening. - 8
Reassemble and test
Reattach panels, plug in the unit, and run a test cycle with a light load to verify heat, airflow, and drum rotation. Monitor for abnormal smells, heat, or vibration.
Tip: Run at least one timed cycle to confirm consistency. - 9
Finalize and clean up
Clean up tools, wipe down surfaces, and store spare parts. Note any observations for future maintenance and keep a repair log for warranty or service history.
Tip: Take photos of final assembly for future reference.
Common Questions
What is the most common Bosch dryer repair issue?
Not heating is one of the most common problems and is often caused by a blown thermal fuse or faulty heating element. Start by testing these components and confirming power to the unit.
Not heating is common and can often be fixed by checking the fuse or heating element.
Can I repair a Bosch dryer safely by myself?
DIY repair is possible if you follow safety guidelines, unplug the unit, and avoid high-voltage components. For gas models or complex electronics, consider a professional.
DIY repair is possible if you follow safety guidelines and unplug the unit.
How long does Bosch dryer repair typically take?
Simple fixes like belt or fuse replacement often take 60–120 minutes. More involved repairs can take longer depending on access to parts and model configuration.
Most repairs take about an hour or two, depending on the part and model.
Will repairing my Bosch dryer void its warranty?
Repair work may affect warranties if non-OEM parts are used or if an authorized technician is required. Always check your warranty terms and use OEM parts when possible.
Warranties vary; using OEM parts and following the manual helps protect coverage.
Do I need OEM parts for Bosch dryer repair?
Using OEM parts improves reliability and fit. Check your model number and cross-reference part numbers in the manual or Bosch service guides.
OEM parts are recommended for best compatibility.
Should I repair or replace a Bosch dryer?
If repairs exceed a significant fraction of a new unit’s cost or the dryer shows repeated failures, replacement may be more cost-effective in the long run.
If frequent failures keep recurring, consider replacement.
Watch Video
Key Points
- Diagnose before replacing parts
- Always de-energize and verify safety
- Use OEM parts for reliability
- Clean vents to maintain airflow
- Know when to seek professional help