Where to Install Dryer Vent: A Homeowner's Guide
Learn safe, code-compliant dryer vent installation locations and routing. This step-by-step guide covers exterior placement, materials, and practical steps to avoid lint buildup and fire risk.

You should install the dryer vent to exhaust outdoors, preferably through an exterior wall or roof, with a short, straight run using smooth metal duct and a proper vent cap. Choose a backdraft damper and clamp securely. Verify local code requirements, your dryer's manual, and adequate clearance from combustibles before starting. This guide walks you through the process.
Positioning the vent for safety and efficiency
The location you choose for your dryer vent matters for safety, efficiency, and long-term durability. Start with the principle that exhaust should leave the home, not be recirculated inside living spaces. A straight, short run with minimal bends reduces lint buildup and airflow resistance, which translates to faster drying and lower energy use. When planning, sketch the route from the dryer's rear to the exterior opening and consider obstacles such as electrical lines, plumbing, or structural members. Favor exterior walls that offer direct access to the outdoors and a clear path for the vent to terminate without obstruction. Keep in mind that heat and humidity can travel back through perforations, so avoid routes that pass through bedrooms, crawlspaces, or unfinished spaces that may trap moisture. Finally, choose materials with a smooth interior to minimize lint retention and make future cleaning easier.
Exterior routing: choosing walls and clearances
Exterior routing requires balancing the shortest path with practical constraints. A vent that exits through an exterior wall should avoid windows, doors, or intake vents that could pull exhaust back indoors. Choose a wall that provides direct access to the outdoors and minimizes the need for long runs around corners. Consider wind exposure and the risk of snow buildup near the termination, as these factors can impede airflow. Use a sturdy, weatherproof vent hood and ensure the exterior opening is capped with a damper that closes when the dryer is not in use. When possible, route along the stud line to keep the path rigid and easier to seal. Remember: every extra bend adds resistance and lint retention potential.
Interior routing considerations and avoiding attic or crawlspaces
Do not route dryer vent ducts through living space ceilings, attics, or crawlspaces. Moisture and lint in these spaces can cause mold and fire hazards, and many codes prohibit this practice. If an interior pass-through is unavoidable, use rigid metal duct and secure an airtight wall sleeve or firestop. Maintain a clean, straight interior run as much as possible, minimizing turns and keeping diameter consistent. Ensure there is no obstruction near the dryer's outlet and that the path does not intersect with electrical, plumbing, or gas lines. Regularly inspect for moisture buildup or signs of leakage around penetrations.
Codes, permits, and safety basics
Local codes typically govern dryer vent installations, including the allowed materials, diameter, and exterior termination. Most jurisdictions require rigid or semi-rigid metal duct (not foil), a properly rated exterior vent hood, and a backdraft damper. Check whether permits are needed before cutting walls or ceilings. Always verify that the installation aligns with the dryer's manual guidance and the National Fire Protection Association guidelines for lint control and venting. Safety basics include keeping exits clear, using noncombustible materials, and avoiding obstructed outdoor outlets that could trap moisture.
Materials that stand up to heat and moisture
Choose ducting with a smooth interior surface to minimize lint accumulation and airflow resistance. The standard size for most residential dryers is a 4-inch duct, but always confirm your appliance's specification. Use galvanized steel or aluminum ducting rather than flexible foil, which traps lint. Secure joints with metal clamps and seal with foil tape or high-temperature sealant to prevent air leaks. The exterior vent hood should have a lint trap or damper and be rated for outdoor use. Durable fasteners and corrosion-resistant hardware will extend the life of the system.
Vent hood, backdraft damper, and exterior termination
Select a vent hood that includes a backdraft damper to prevent wind-driven backflow. The exterior termination should be weatherproof, with a sealed flashing if installed on a wall or roof. Position the hood to avoid snow accumulation and ensure the damper can move freely. Seal around the exterior opening to prevent drafts and pests. After installation, test the system by running the dryer and checking for steady airflow and no leaks at every joint.
Common mistakes and how to fix them
Common errors include using foil or flexible ducts, making excessive bends, or not sealing exterior penetrations. Another frequent issue is terminating the vent in a location with obstructions or inadequate clearance. To fix these issues, replace foil or foil-backed ducts with metal ducting, reduce bends to the minimum, and apply high-quality exterior sealant around the opening. Finally, recheck airflow at the exterior vent after any adjustments and clean any lint buildup promptly to maintain safety and efficiency.
Authoritative sources
For deeper guidance, consult authoritative sources such as NFPA (nfpa.org) for lint-related fire safety, the U.S. Fire Administration (usfa.fema.gov) for maintenance and safety tips, and energy and safety guidelines from the Department of Energy (energy.gov). These sources provide foundational information on safe vent design, materials, and maintenance.
Tools & Materials
- Measuring tape(to map route & vent location)
- Pencil and level(mark straight lines and ensure level)
- 4-inch smooth metal dryer vent duct(galvanized steel or aluminum; smooth interior)
- Duct clamps and foil tape(secure all joints; prevent leaks)
- Exterior vent hood with backdraft damper(weatherproof and rated for outdoor use)
- Hammer drill with masonry bit(for wall penetration)
- Tin snips or aviation snips(cut duct to length)
- Safety gear: gloves and safety glasses(protect during cutting and drilling)
- Caulk or weatherproof sealant(seal exterior penetration)
- Caulk gun(apply sealant smoothly)
- Flashlight or headlamp(improves visibility in tight spaces)
Steps
Estimated time: 60-90 minutes
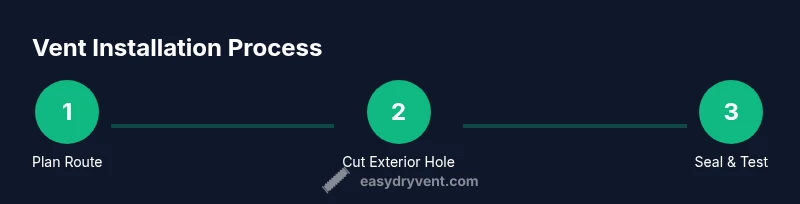
- 1
Plan the route
Map the shortest, straightest path from the dryer to the exterior. Check for obstructions like wiring, pipes, and joists. Mark entries with a level line to ensure clean cuts.
Tip: Double-check clearances before drilling; a small misalignment can require retakes. - 2
Mark the exterior exit
Choose an exterior wall or roof point near the dryer with direct outdoor access. Mark the hole location and ensure there is no blockage behind the exterior surface.
Tip: Use a stud finder to avoid hitting studs or pipes behind the wall. - 3
Cut the exterior opening
Drill a pilot hole, then use a suitable tool to create the exterior opening. Deburr edges to prevent duct damage and ensure a snug fit for the vent hood.
Tip: Keep the opening slightly undersized and file to final size for a clean fit. - 4
Mount interior wall penetration
Create a neat interior hole aligned with the exterior exit. Protect wood framing and install a firestop if required by local code.
Tip: Seal firestop gaps to prevent heat transfer and pests. - 5
Install duct segments and joints
Assemble duct sections with smooth interior finish. Use foil tape over every joint and fasten securely with clamps to prevent leaks.
Tip: Avoid excessive flex connectors; keep bends to a minimum. - 6
Attach exterior vent hood and seal
Install the vent hood on the exterior, ensuring the damper works freely. Seal around the hood with weatherproof sealant to prevent leaks.
Tip: Test closure by blowing air from inside the dryer path. - 7
Test airflow and finalize
Run the dryer on a low heat cycle and feel for steady airflow at the exterior vent. Look for lint at joints and verify no leaks at any joint.
Tip: Address any airflow reductions before finalizing.
Common Questions
Where is the best place to install a dryer vent?
The vent should exhaust outdoors, ideally through an exterior wall or roof with a short, straight run using metal duct. Avoid enclosed spaces and long bends.
Vent outdoors through an exterior wall or roof with a straight metal duct; avoid enclosed spaces and excessive bends.
Can I vent through a window?
Venting through a window is not recommended because it can leak moisture, lint, and exhaust into living spaces. If unavoidable, use proper temporary seal and a purpose-built vent kit.
Window venting is not ideal due to moisture and lint issues.
Is a flexible foil duct acceptable?
Flexible foil ducts are discouraged; they trap lint and collect moisture. Use rigid or semi-rigid metal duct for safer, more efficient operation.
Avoid flexible foil ducts; use rigid metal for safety and airflow.
Do I need a permit?
Local codes may require a permit for vent installations and exterior penetrations. Check with your city or building department before cutting into walls or ceilings.
Check local codes; permits may be required for exterior vent work.
How often should I clean the vent?
Inspect the vent path and lint trap regularly and clean as needed. A clean path reduces drying time and minimizes fire risk.
Regularly inspect and clean the vent path to reduce fire risk.
What materials are best for long-term durability?
Use 100% metal duct with a smooth interior and a code-approved exterior vent hood; avoid plastic or foil where possible.
Choose metal duct with a smooth interior for durability and safety.
Watch Video
Key Points
- Plan a straight path to minimize bends.
- Use metal duct and proper vent hood with damper.
- Seal exterior penetrations well to prevent leaks and pests.
- Test airflow after installation and address gaps.