Venting an Electric Dryer: A Practical Guide
Learn how to vent an electric dryer safely and efficiently with practical steps, safety checks, and maintenance guidance from Easy DryVent.

Venting an electric dryer is essential for safety and efficiency. This guide shows you how to plan a compliant vent path, install rigid metal ducting, and test airflow to minimize lint buildup and moisture. You’ll learn code basics, avoid common mistakes, and know when to call a pro. Prepare by gathering the right tools and following local venting codes.
Why proper venting matters
Venting an electric dryer isn’t just about getting clothes dry; it’s a core safety and efficiency habit for any home. Poor venting allows heat, moisture, and lint to accumulate in walls, attics, or crawl spaces, creating fire risks and promoting mold growth. A well-designed vent path reduces drying time, lowers energy consumption, and protects indoor air quality. According to Easy DryVent, proper venting is a foundational part of responsible home maintenance, not optional fringe work. In this section we explore how venting affects fire safety, moisture control, and energy efficiency, plus the role of local codes and best practices in guiding your project.
Key concepts to keep in mind include keeping the run as straight and short as possible, using metal duct materials, and avoiding indoor air recirculation. You’ll also learn how a properly vented system helps prevent backdrafts and lint accumulation, which are common culprits in dryer performance problems.
Assessing your current venting setup
Before changing anything, assess what you have. Start by inspecting the exterior vent cover—make sure the damper opens freely when the dryer runs and that there are no obstructions like nests or debris. Trace the duct path from the dryer to the exterior, noting the number of joints, the length of the run, and the number of bends. Look for material type: rigid metal ducts perform best; flexible plastic or foil ducts are more prone to lint buildup and fire hazards. Check for signs of damage such as crushing, kinks, or loose connections. If you find such issues, plan to replace with rigid metal ducting and secure connections with proper clamps and foil tape.
Document the route and take photos if possible. This helps you plan the new layout and communicate with any professionals if you decide to hire one. As you evaluate, remember that every bend and joint can add resistance to airflow, so the goal is to minimize length and maximize smooth, straight runs where feasible. Easy DryVent’s recommended approach emphasizes keeping exterior routing simple to reduce maintenance needs and improve dryer performance.
Safety prerequisites and local code considerations
Safety first: always unplug the dryer and shut off the circuit breaker before handling any venting components. Wear gloves and eye protection to guard against sharp metal edges. Many communities require metal ductwork, a vent hood with a damper, and specific clearances around the exterior wall. Check your local building codes and energy standards before starting; some jurisdictions prohibit certain duct materials or longer runs without professional oversight. If you live in a multi-story home or haven’t vented a dryer before, consider consulting a professional or your local building permit office to confirm compliance. Following code helps ensure you’re protected from fire risks and insurance complications.
A clean, code-compliant install also reduces repeated inspections or fixes later. If you’re unsure about a specific code, reference your jurisdiction’s official building codes or a trusted technical resource. Easy DryVent notes that aligning with code not only keeps you safe but also supports better appliance performance.
Choosing vent path and materials
The standard for most clothes dryers is a 4-inch diameter metal duct with minimal bends. Rigid metal ducts (galvanized steel or aluminum, depending on local code) offer the best airflow and are easier to seal. Avoid plastic or flexible foil ducts; they sag, trap lint, and are more susceptible to crushing and fire risks. Plan a short, straight run when possible, with gentle elbows instead of sharp turns. Install an exterior vent hood with a back-draft damper to prevent wind-driven rain and pests from entering.
When routing, aim for a single pass from the dryer to the outside, with the fewest joints. Use UL-listed foil tape to seal every seam and secure connections with metal clamps. Support ducts with hangers or straps to prevent sagging, and ensure there’s a slight downward slope toward the exterior to promote drainage of any condensation. If you need to pass through an attic or crawl space, add protection from temperature extremes and moisture, and seal penetrations around the duct with appropriate caulk or foam.
As you design your layout, keep in mind that longer runs with multiple bends reduce efficiency and increase lint buildup. The goal is a clean, smooth path that preserves airflow while meeting local code requirements.
Planning your installation: layout, permits, and prep
With a route in mind, create a detailed plan that includes the type of duct, length estimates, required fittings, and mounting hardware. If permits are required in your area, apply for them before purchasing materials. Prepare the work area by laying out tools, laying out the duct pieces, and protecting flooring and nearby cabinetry from dust and debris. If you’re replacing an existing duct, remove and discard the old components carefully, especially if the old duct is plastic or foil.
Now’s the time to verify the exterior path. Ensure the vent hood sits flush against the outside wall with minimal gaps and that the exterior opening is clear of leaves, snow, or other obstructions. A properly sealed exterior vent prevents backdrafts and reduces the chance of pests entering your home. Finally, verify electrical safety: the dryer plug and outlet should be intact, and the dryer should be unplugged during any vent work.
This phase is about solidifying a safe, code-compliant plan that minimizes risk and maximizes airflow. Easy DryVent emphasizes careful planning as the most reliable predictor of a successful venting project.
Common mistakes and troubleshooting
Common mistakes include using non-metallic or foil ducting, creating long, windy paths with many elbows, and failing to seal joints properly. Each mistake reduces airflow, increases lint buildup, and can create a fire hazard. If you notice excessive lint around the dryer, slower drying times, or a musty odor, inspect the vent path for leaks and blockages. Another frequent error is not maintaining exterior vent clearance; ensure the vent hood is clean and that the damper moves freely.
Troubleshooting starts with a visual inspection: look for crushed sections, loose connections, and gaps between duct sections. Then test airflow by running the dryer with a piece of tissue or a small piece of paper near the exterior vent; it should be drawn outward with a noticeable breeze. If not, re-check joints, elbows, and hood alignment. If the system still seems inefficient after adjustments, consult a professional to evaluate for hidden leaks, improper routing, or code-related issues.
Taking a methodical approach to troubleshooting saves time and reduces the risk of missed issues that could compromise safety or performance.
Maintenance and long-term care
Maintenance isn’t a one-time event. Periodic cleaning of the lint trap is essential, but lint can also accumulate inside ductwork over time. Plan for a professional or thorough DIY cleaning every year or two, depending on dryer usage and the length of your vent run. Regularly inspect exterior vent covers for obstructions, signs of rust, or damage to the damper. If you notice reduced airflow or a burning smell, shut down the dryer and inspect immediately.
Simple steps keep airflow at peak performance: brush or vacuum accessible duct sections during cleanings, replace worn gaskets on the exterior hood, and ensure all joints remain sealed with foil tape. Also, re-check the route if you remodel or add new insulation or HVAC components nearby; vibrations during renovations can loosen connections.
By keeping up with maintenance, you reduce the likelihood of unexpected outages and extend the life of your dryer and vent system. Easy DryVent recommends a proactive mindset so you can enjoy safer, more efficient drying for years to come.
When to call a pro and what to expect
If you’re uncertain about routing through walls or an attic, or you encounter code requirements that differ from your plan, it’s wise to call a licensed professional. A pro can assess structural obstacles, ensure proper clearance, and confirm compatibility with local codes. Expect a professional to discuss vent path length, required materials, permissible bends, and the exterior termination options, including hood style and damper type. They’ll also inspect for any existing moisture or mold issues related to poor venting and address them.
Hiring a pro can vary in scope and cost depending on your home layout and permit requirements. If you choose to DIY, be prepared to invest time in planning, safety checks, and meticulous sealing. Regardless of the route, you’ll want documentation of compliance and a tested airflow result to validate that the system is performing correctly. The Easy DryVent team recommends ensuring any installation meets local codes and air-quality guidelines for your area.
Quick-start checklist you can use today
- Plan a straight, short route with a 4-inch metal duct
- Verify a functioning exterior vent hood with damper
- Unplug dryer and wear safety gear during work
- Seal all joints with UL-listed foil tape
- Test airflow from inside to outside after completion
- Schedule periodic lint path cleanings and inspections
- Keep the vent path clear of obstructions and moisture
Additional resources and next steps
Beyond the basics covered here, consider reviewing local building codes and manufacturer guidelines for your dryer model. Use reputable sources for ventilation standards and maintain your system with regular inspections. If you’re unsure about any step, primary resources from local building authorities and appliance manufacturers can provide model-specific guidance. As you move forward, create a maintenance calendar and document your vent routing for future renovations or insurance needs. Easy DryVent offers further practical tips and checklists to help homeowners stay on track.
Tools & Materials
- Measuring tape(Minimum 25 ft; plan shortest safe path)
- Safety goggles(Protect eyes from debris and sharp edges)
- Gloves(Cut-resistant recommended)
- Rigid metal 4-inch vent duct(Galvanized steel or aluminum per code)
- 4-inch elbows and straight ducts(Use minimal bends)
- Exterior vent hood with damper(Back-damper preferred; ensure weather seal)
- UL-listed foil tape(Seal all joints; avoid duct tape)
- Duct clamps or screws(Secure joints tightly)
- Hammer drill or metal snips(Only if cutting through walls/metal)
- Screwdriver set(For securing clamps and panels)
- Vacuum or lint brush(Clean lint path during install)
Steps
Estimated time: 2-6 hours
- 1
Plan route and measure path
Map the shortest, straightest path from the dryer to the exterior. Identify any obstacles, and choose rigid metal ducting with minimal bends. Verify the exterior vent location and clearance before purchasing materials.
Tip: Sketch the route on paper to prevent backtracking. - 2
Shut off power and prep area
Unplug the dryer from the wall outlet and switch off the circuit breaker. Remove any existing vent cover and clear the work area of dust and lint.
Tip: Keep the area well-lit and use a drop cloth to catch dust. - 3
Remove old duct and prepare connections
Detach the old vent pieces, inspect for damage, and discard unsafe ducts. Clean the opening and ensure a clean, dry surface for new duct connections.
Tip: Take photos of existing connections for reference. - 4
Install rigid metal duct with minimal bends
Assemble 4-inch rigid metal duct sections with elbows as needed. Fit ducts securely and align joints to minimize air resistance. Use clamps to secure each joint.
Tip: Avoid fabricating sharp turns; maintain gradual directional changes. - 5
Seal joints and fit the exterior hood
Apply UL-listed foil tape to all seams inside and outside. Install the exterior vent hood with damper, ensuring a snug fit against the exterior wall.
Tip: Do not rely on duct tape alone for long-term sealing. - 6
Test airflow and verify operation
With the dryer unplugged, re-connect and power up. Check that air flows freely to the exterior hood and that the damper works smoothly. Reinstall any panels.
Tip: Place a tissue at the exterior vent to visually confirm airflow. - 7
Final inspection and cleanup
Tidy up the work area, remove debris, and vacuum dust from lint-prone spots. Re-check all connections after a few uses and schedule routine maintenance.
Tip: Document the route and keep a copy of the vent plan for future upkeep.
Common Questions
Do I need to vent an electric dryer?
Yes. Proper venting removes heat and moisture, reduces lint buildup, and lowers fire risk. Most codes require venting to outdoors for electric dryers.
Yes, you should vent an electric dryer to outdoor air to remove heat and moisture and reduce fire risk.
Can I vent through a window?
Venting through a window is possible in some situations, but it must be properly screened and sealed to prevent backdrafts and moisture intrusion. Permanent exterior venting is preferred.
Venting through a window can work temporarily, but a proper exterior vent is usually better in the long run.
What material is best for a dryer vent?
Rigid metal ducts are best for performance and safety. They resist crushing and lint buildup better than flexible ducts.
Rigid metal ducts are the recommended material for dryer vents.
How long can a dryer vent run be?
Length depends on layout and code. Keep runs as short as possible, with gradual bends and proper support. Longer runs require careful planning and adequate duct sizing.
There isn’t a one-size-fits-all length; keep it as short as possible and plan for bends.
Is it safe to use a flexible foil duct?
No. Flexible foil or plastic ducts trap lint, sag, and pose higher fire risk. Codes generally require rigid metal ducts.
Flexible duct is not recommended; use rigid metal instead.
How often should I clean the vent?
Clean the exterior vent and accessible duct sections at least once or twice a year, or more often if you run the dryer daily.
Clean the vent at least once or twice a year, or more often if you use the dryer a lot.
Watch Video
Key Points
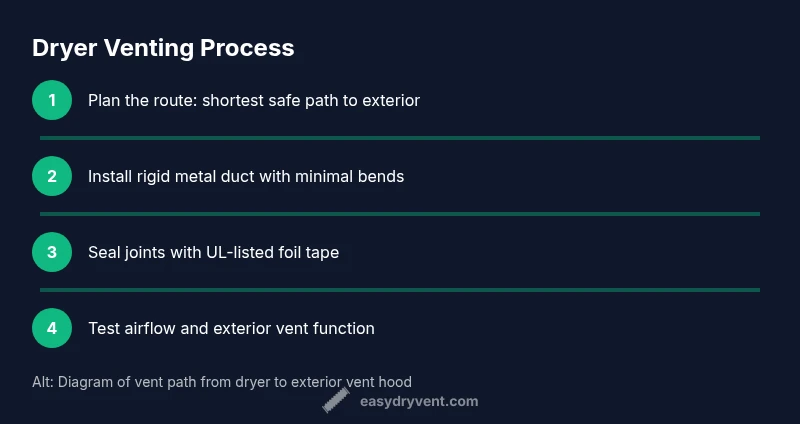
- Plan a straight vent path to exterior.
- Use rigid 4-inch metal ducting only.
- Seal joints securely with foil tape.
- Test airflow after installation.
- Schedule regular vent maintenance.