How to Put Dryer Vent in Wall: A DIY Guide
Step-by-step instructions to safely route a dryer vent through an exterior wall with a wall sleeve, durable duct, proper sealing, and exhaust testing. Learn planning, materials, safety, and maintenance to reduce fire risk and improve dryer efficiency.

Learn how to put dryer vent in wall safely and code-compliant. This quick guide covers planning, required tools, wall sleeve selection, duct sizing, and exterior vent location. We’ll outline clear safety considerations, lint prevention, and how to test airflow to avoid leaks. Follow these steps to ensure durable performance and safer, efficient drying.
Plan Your Dryer Vent Wall Route
Before cutting any holes, map a route that minimizes turns, keeps the vent away from combustibles, and maintains required clearances. Check local codes for exterior vent placement, and plan for a dedicated outside vent hood with a backdraft damper. A through-wall installation should use a rigid or semi-rigid metal duct, not flexible foil, to minimize lint buildup and airflow restrictions. Consider the dryer’s distance to the vent and the number of bends; each bend adds resistance and can trap lint. This planning phase also includes choosing a suitable interior wall sleeve and assessing attic or crawlspace access if needed. The goal is a smooth run with minimal resistance while staying compliant with code and safety standards. When in doubt, consult a pro or your local building department. The phrase how to put dryer vent in wall appears here to reinforce the search intent and ensure alignment with the keyword strategy.
Safety and Code Considerations
Understanding safety and code requirements is essential before any installation. Fire codes emphasize avoiding plastic vent materials and keeping the vent path clear of combustibles. Many jurisdictions require a rigid metal duct, a properly rated wall sleeve, and an exterior vent with a damper to minimize backdrafts. This section highlights the importance of clearances from windows, doors, and attic soffits, as well as the role of lint control in preventing fires. Easy DryVent recommends reviewing local building codes and, if necessary, obtaining a permit for major vent modifications. This not only improves safety but also protects your home's resale value and insurance coverage. The keyword how to put dryer vent in wall is referenced to confirm intent and guide the reader toward compliant practice.
Tools and Materials You’ll Need
A successful installation relies on the right tools and materials. Gather a rigid metal wall sleeve, 4-inch round duct, exterior vent cap with damper, 90-degree elbows as needed, metal foil tape or mastic, ribbed or smooth interior duct sections, a drywall saw or hole saw, a tape measure, a pencil, a level, caulk or exterior sealant, safety gear (gloves, eye protection), and a drill. Avoid flexible foil ducts for the interior portions as they tend to trap lint and restrict airflow. By preparing these items in advance you can complete the project with fewer interruptions and reduced risk of rework. The phrase how to put dryer vent in wall is used here to maintain focus on the core task.
Preparing the Interior Wall Opening
Accurately marking the exterior vent location is crucial. Use a stud finder to avoid wiring and pipes, then cut a clean, sized opening for the wall sleeve. A correctly sized opening ensures a snug sleeve fit and minimizes air leaks. Deburr edges and remove dust to improve sealant adhesion. If you encounter insulation or wiring behind the wall, pause and re-evaluate the route. A precise opening reduces the chance of damage to the wall or the vent system and makes later steps easier. The block emphasizes the need to plan and verify before cutting.
Installing the Wall Sleeve and Routing Duct
Slide the wall sleeve into the interior opening and secure it, ensuring it sits flush with the wall surface. Attach rigid duct sections through the sleeve, maintaining a straight, short path with minimal elbows. Each bend adds resistance, so minimize turns where possible and use radiused elbows if available. Seal joints with approved tape or mastic on both interior and exterior sides to prevent air leaks and lint migration. The text reiterates the practical approach to routing and emphasizes keeping the route as direct as possible, which is central to an effective how-to put dryer vent in wall workflow.
Exterior Venting and Backdraft Damper
Install the exterior vent cap with a backdraft damper to prevent pests and cold air from entering your home when the dryer is off. Ensure the vent opening is clear of obstacles and meets exterior clearance requirements (distance from windows and doors, etc.). Seal the exterior wall around the vent hood with a weather-resistant sealant to prevent water intrusion. A proper exterior termination is critical for preventing leaks, moisture buildup, and energy loss. The section connects the exterior considerations back to the core objective of safely venting through a wall.
Connecting and Sealing Duct Joints
Connect all duct joints with metal tape designed for ductwork or with mastic sealant designed for high-temperature airflow. Avoid duct tape meant for household tasks, as it degrades under heat and lint exposure. After assembling, gently wiggle joints to ensure a tight fit and confirm there are no gaps. Proper sealing improves efficiency, reduces lint accumulation, and lowers fire risk — key aspects of a successful how to put dryer vent in wall project. The density of information here supports readers who want to do it right the first time.
Testing Airflow and Safety Checks
With the vent system connected, test the airflow by running the dryer on a normal cycle and feeling for strong, consistent airflow at the exterior vent. Listen for any whistling sounds that indicate leaks, felt around the exterior cap for air leaks, and check for condensation inside the wall cavity. If airflow is weak, re-check joints and elbows for proper sealant, and ensure the path remains as straight as possible. Document any adjustments for future maintenance and safety.
Maintenance and Long-Term Care
Regular maintenance helps keep the vent efficient and safe. Inspect the exterior vent cap and damper for debris, verify that the interior duct remains free of kinks, and clean the lint screen and the accessible duct path periodically. Schedule annual checks or after heavy use to ensure there are no blockages. A proactive maintenance mindset aligns with best practices for how to put dryer vent in wall and keeps your system performing optimally.
Authority sources
To reinforce best practices and safety considerations, refer to authoritative safety guidelines and building codes. The following sources provide general safety context and code guidance relevant to vent installations:
- https://www.cpsc.gov
- https://www.osha.gov
- https://www.nfpa.org
Tools & Materials
- Rigid metal wall sleeve(Choose interior and exterior dimensions to fit 4-inch duct; ensure exterior hood has damper.)
- 4-inch rigid metal duct(Prefer straight runs with minimal elbows.)
- Exterior vent cap with damper(Ensure functionality and pest protection.)
- 90-degree elbows (metal)(Use as needed to route path with minimal turns.)
- Metal foil tape or duct mastic(Seal all joints to prevent leaks.)
- Hole saw or drywall saw(For clean wall opening matched to sleeve size.)
- Measuring tape, pencil, level(Accurate placement and alignment.)
- Caulk or exterior sealant rated for outdoors(Seal around wall sleeve and vent hood.)
- Safety gear (gloves, safety glasses)(Protect during cutting and drilling.)
- Drill with appropriate bits(For pilot holes and sleeve installation.)
- Stud finder(Helpful to avoid wiring or pipes behind wall.)
- Trash bag or drop cloth(Contain dust and debris.)
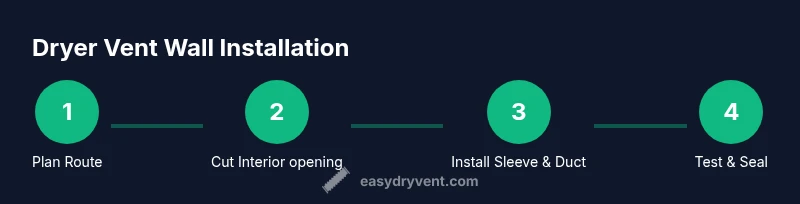
Steps
Estimated time: 2-4 hours
- 1
Plan and assess safety
Define the route, check clearances, and confirm local code requirements. Create a rough diagram showing interior path and exterior termination. Record measurements and identify potential obstacles like wiring or plumbing.
Tip: Double-check that the planned exterior vent location complies with local codes and is reachable for maintenance. - 2
Gather and verify materials
Lay out wall sleeve, duct, vent cap, and sealant before starting. Confirm the duct size matches the wall sleeve and exterior vent. Inspect parts for any damage.
Tip: Keep all components dry and dry-fit before final assembly to avoid rework. - 3
Mark and cut interior opening
Use a stud finder to avoid hidden elements, then mark the hole size for the wall sleeve. Cut cleanly to fit the sleeve snugly.
Tip: Deburr the edges to prevent tearing the sleeve during installation. - 4
Install wall sleeve
Insert the sleeve through the interior wall, align flush with the finished surface, and secure it per manufacturer guidance. Seal around the sleeve interior edge.
Tip: Use a level to ensure the sleeve is perfectly vertical to avoid kinks in ducting. - 5
Route duct through interior wall
Slide duct through the sleeve, keeping runs straight and minimizing elbows. Use elbows sparingly and ensure joints are fully seated.
Tip: Avoid compressing duct material; it should retain its round shape for optimal airflow. - 6
Seal interior joints
Apply duct sealant or metal tape to all interior joints. Wipe away excess sealant and ensure a continuous seal path.
Tip: Seal from inside to outside to prevent lint migration across the wall. - 7
Install exterior vent and seal
Secure the exterior vent cap over the vent opening. Seal around the exterior edge to prevent water intrusion and pests.
Tip: Install with damper closed when not in use to prevent drafts. - 8
Test airflow and leaks
Run the dryer and verify strong airflow at the exterior vent. Check for air leaks around joints and around the sleeve with a smoke test or light dusting.
Tip: If you hear whistling, re-check the joints and reseal as needed. - 9
Finish and maintain
Reinstall any trimmed interior surfaces, clean up debris, and schedule routine inspections for lint buildup and vent integrity.
Tip: Set a maintenance reminder to inspect the vent every 6-12 months.
Common Questions
What is the best vent material for a wall installation?
Use rigid or semi-rigid metal ducting rather than flexible foil. Metal ducts resist lint buildup and maintain airflow, reducing fire risk. Always connect with approved fittings and sealants.
Use rigid metal ducting for your wall vent to reduce lint buildup and fire risk. Seal all joints for a safe, efficient path.
Do I need a professional to install a wall vent?
A through-wall vent installation can be done by a competent DIYer with basic carpentry and ducting skills, but local codes may require a permit or professional inspection. If you’re unsure about electrical or structural aspects, hire a pro.
You can do it yourself if you’re comfortable with carpentry and basic ducting, but check local codes and permits; hire a pro if unsure.
What clearance is required around the exterior vent?
Maintain adequate clearance from windows, doors, soffits, and other openings to prevent backdrafts and moisture intrusion. Check local code guidelines for exact distances.
Keep the exterior vent away from windows and doors to prevent drafts and moisture issues.
Can I vent through an interior wall to the attic or crawl space?
Vent through an exterior wall rather than interior spaces like the attic, which can cause condensation and mold. Exterior venting is the safer, code-compliant approach.
Vent through an exterior wall; interior venting can cause moisture and mold problems.
How do I test for leaks after installation?
Run the dryer and look for air leaks around joints with soapy water or perform a simple airflow check at the exterior vent. Re-seal any observed gaps.
Run the dryer and check the joints at both ends for leaks; reseal as needed.
Is foil or flexible duct acceptable for a wall vent?
Foil ducts are generally not recommended for wall vents due to lint buildup and higher fire risk. Use rigid or semi-rigid metal ducting with tight joints.
Avoid foil ducts; prefer rigid or semi-rigid metal ducting for safety and efficiency.
How often should I inspect the vent system?
Inspect the vent system at least once a year for lint buildup, dampness, and hardware integrity. Clean and reseal if needed.
Inspect annually and clean any lint buildup to keep it safe and efficient.
What maintenance is recommended for efficiency?
Regularly clean the lint screen and inspect the duct path for kinks or blockages. Replace any damaged components promptly to maintain airflow.
Keep the lint screen clean and check for blockages to maintain efficiency.
Watch Video
Key Points
- Plan the route carefully to minimize bends and ensure proper clearances.
- Use rigid metal components and seal all joints to prevent leaks and lint buildup.
- Test airflow after installation and seal any gaps promptly.
- Follow local codes and safety guidelines for a durable, safe vent.
- Schedule regular maintenance to sustain performance.