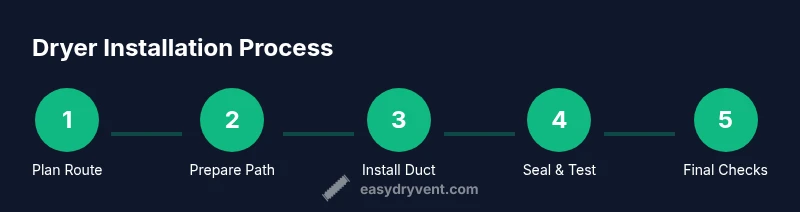
How to Install a Dryer: Step-by-Step Guide
Learn how to install a clothes dryer safely and efficiently with this step-by-step guide covering venting, electrical, and gas considerations. Includes planning, ducting choices, code compliance, and safety tips from Easy DryVent.

By following this step-by-step guide, you’ll install a dryer safely and efficiently, including venting, electrical, and gas considerations. You’ll learn how to plan the run, select compliant ducting, and complete a code-friendly hookup for electric and gas dryers. Expect clear, safety-first instructions, with pro tips to minimize lint buildup and fire risk.
Why Proper Dryer Installation Matters
Installing a dryer correctly isn’t just about getting laundry dry; it’s about safety, efficiency, and long-term performance. A poorly planned vent path, damaged ducts, or improper electrical or gas connections can lead to lint buildup, moisture intrusion, mold growth, and in worst cases, house fires or gas leaks. According to Easy DryVent, the safest and most efficient dryer setups are code-compliant, use appropriate 4-inch ducting, and keep vent runs as short and straight as possible. This section will help you audit your current setup, identify weak points, and lay a strong foundation for a successful installation. You’ll gain a mental map of the system: where the dryer sits, how the exhaust will travel, and what safety checks to perform before flipping the switch.
Planning Your Installation: Venting, Gas, and Electrical Considerations
A successful install begins with planning. Start by confirming the dryer type (electric or gas) and the building codes for venting in your area. Decide on a vent route that minimizes bends and avoids shared spaces or cluttered crawl spaces. Ensure you have a dedicated electrical circuit if you’re installing an electric dryer, and verify gas line accessibility and shut-off provisions for a gas dryer. The planning stage should also account for exterior vent location and weatherproofing to prevent backdrafts and moisture intrusion. Based on Easy DryVent analysis, following code guidelines and using the right ducting yields safer operation and better airflow, which translates to faster drying and less energy waste. This block helps you map a clean path before you touch a tool.
Choosing The Right Vent Kit and Ducting
Vent kit selection is the backbone of a safe install. Use rigid metal or semi-rigid metal ducting with a 4-inch diameter, avoiding plastic or foil alternatives that can sag and trap lint. Match the ducting to your exterior vent and ensure all seams are sealed with UL-listed foil tape rather than generic duct tape. Keep duct runs as straight as possible and limit elbows to reduce airflow resistance. If you’re replacing an old system, inspect the entire length for kinks, crush damage, and loose joints. A compliant kit includes a backdraft damper and a vent hood suitable for the exterior climate. This choice directly affects efficiency, lint accumulation, and the risk of pests entering the home.
Exterior Venting: Location, Backdraft Dampers, and Clearance
Exterior vent location matters just as much as duct material. Place the vent to minimize exposure to rain and snow, keep it away from windows and soffits, and ensure there’s enough clearance from combustibles. A properly installed damper prevents backdraft air from entering your home, protecting you from humidity and cold drafts. Seal all penetrations around the vent with high-quality sealant that remains flexible in temperature changes. If you live in an area with heavy snowfall or wind, consider a weatherproof vent cap and a short, straight run from the dryer to the exterior wall to maintain good airflow and reduce lint buildup.
Electrical Requirements for Electric Dryers
Electric dryers rely on a dedicated, appropriately rated circuit and outlet. Confirm the dryer’s electrical requirements in the manual, and install a grounded outlet or a hard-wired connection as required by local code. Use a properly rated power cord if the unit doesn’t come with one and avoid using extension cords. Ensure the outlet is easily accessible and not obstructed by the vent path. Before plugging in, test the outlet with a voltage tester to verify safety. Following these electrical precautions is essential for preventing shock hazards and circuit overloads.
Gas Dryers: Safety and Connection Guidelines
Gas dryers require careful handling of fuel lines and venting. Turn off the gas supply before any disassembly or vent work, and ensure there are no leaks with a gas-sniffing detector or soapy water test around joints (if allowed by local code). Attach the vent kit in the same way as an electric dryer, but also verify the gas shut-off valve is fully open after the installation. Gas dryers must be properly vented to the outdoors to prevent carbon monoxide buildup; never vent into an attic, crawl space, or other enclosed areas. If you’re uncertain about gas work, contact a licensed professional.
Vent Path Best Practices: Bends, Joints, and Support
Create a vent path with the fewest bends possible to maximize airflow and reduce lint accumulation. Support ducts every few feet to prevent sagging, and ensure joints are fully sealed with foil tape, not duct tape that can degrade over time. Avoid crushing or bending the duct at the dryer outlet, and keep the run above floor level where feasible to reduce lint collection in hidden corners. A well-supported, straight path not only dries clothes faster but also reduces the risk of fire and mold.
Sealing, Testing, and Troubleshooting
After installation, test the system for airflow and leaks. Check the exterior vent for unobstructed airflow, and feel the ductwork to confirm there are no leaks at joints. Run a short dryer cycle with a lint screen removed to observe the airflow and listen for unusual noises that might indicate loose connections or misaligned ducts. If airflow is weak, inspect for kinks or crushed sections and re-seal with foil tape. Maintain a routine of periodic lint trapping checks and vent cleaning to preserve safety and efficiency.
Safety, Codes, and Permits
Local codes and national safety standards govern dryer installation. Always consult the instructions included with your appliance and check local building codes for vent length limits, duct material requirements, and gas line standards. When in doubt, obtain the necessary permits or hire a licensed professional for the portion of the work that involves electrical or gas connections. Safety first ensures a reliable, long-lasting setup that protects your home and family.
Maintenance Tips for Longevity and Safety
Regular maintenance reduces fire risk and improves drying performance. Clean the lint trap after every load, and periodically inspect the vent and duct for lint buildup, holes, or sagging. Schedule a professional vent cleaning every 1–3 years depending on usage and household conditions. Keep the area around the dryer free of flammable materials and ensure the exhaust path remains clear of obstructions, pets, and laundry obstacles. Simple maintenance is the best investment in efficiency and safety.
Authority Sources and References
For additional guidance, consult authoritative sources such as NFPA and government safety resources. These references provide foundational information on fire safety, ventilation, and appliance installation best practices:
- https://www.nfpa.org
- https://www.cpsc.gov
- https://www.osha.gov
Additional Resources for DIY Installers
If you’re pursuing a DIY installation, use this repository of tips and checklists to stay organized and safe. Create a project plan, gather the right tools, and pace yourself to avoid rushed mistakes. This section links to practical checklists, measurement templates, and maintenance schedules designed for homeowners and DIY enthusiasts.
Tools & Materials
- Dryer vent kit (4-inch duct, metal)(Rigid or semi-rigid metal ducting; avoid plastic or foil ducts)
- Exterior vent hood with backdraft damper(Weatherproof when installed; ensure damper seals properly)
- UL-listed foil tape(Use for all duct seams; avoid duct tape)
- Sheet metal screws or duct clamps(Secure all duct joints without sagging)
- Measuring tape(Measure duct path length and clearance)
- Voltage tester / multimeter(Test outlets and wiring before connecting electric dryer)
- Circuit tester or clamp meter(Helpful for verifying dedicated circuit on electric dryer installs)
- Safety gloves and glasses(Personal protection during cut and install tasks)
- Gas shut-off wrench (if installing gas dryer)(Keep handy; use only if you’re servicing gas lines)
- Power cord (4-prong) or hard-wire kit(As required by dryer model and local codes)
Steps
Estimated time: 1-2 hours
- 1
Turn off power and gas supplies
If electric, unplug the dryer at the wall outlet or switch off the circuit breaker. If gas, shut off the gas supply at the appliance valve and ventilate the area. Confirm power is off with a voltage tester before touching wiring.
Tip: Always verify power is off before handling electrical connections to prevent shock. - 2
Remove old vent and clear the path
Disconnect the existing vent from the dryer and exterior vent. Remove lint buildup and check for crushed or damaged duct segments. Clean the area around the installation site to prevent debris from entering the system.
Tip: Keep a small bag handy to collect loose lint during removal. - 3
Measure the vent run and plan the route
Measure the total length from dryer outlet to exterior vent and identify any bends. Choose metal ducting with minimal elbows and plan a straight path where possible to maximize airflow and minimize lint traps.
Tip: Avoid long, windy runs; plan for easy future cleaning as part of your layout. - 4
Install exterior vent hood on the wall
Mark the exterior wall and cut a clean opening for the vent hood. Install the hood with screws and ensure the backdraft damper moves freely. Seal the exterior around the opening to prevent leaks.
Tip: Check for obstructions like insect screens inside the wall cavity before final mounting. - 5
Attach the duct to the dryer's exhaust
Connect the 4-inch metal duct to the dryer's exhaust outlet. Secure with foil tape and, if needed, clamps. Avoid compressing the duct or creating sharp kinks that reduce airflow.
Tip: Use a straight, short connector directly at the dryer outlet for best performance. - 6
Seal joints and route the duct path
Seal all joints between duct sections with UL-listed foil tape. Route the duct path to the exterior vent, securing every few feet with appropriate supports. Keep the route free from sharp edges and avoid placing duct tape on duct corners.
Tip: Inspect after each bend to detect any sagging or loose fittings early. - 7
Connect electrical supply (electric only)
Install the dryer power cord if required by the model and connect to a dedicated outlet of the correct rating. If wiring directly to the dryer, follow the manufacturer’s disconnect procedures and local codes.
Tip: Never use an extension cord for a dryer; it can overheat and cause a fire. - 8
Connect gas line (gas dryers only)
Attach the gas connector to the appliance inlet and verify the shut-off valve is accessible. Use a gas-rated sealant or thread tape as required, and test for leaks with a safe method per local code.
Tip: If you smell gas at any point, shut off the supply and evacuate the area immediately. - 9
Level and position the dryer
Slide the dryer into place and adjust feet to level from side to side and front to back. A level appliance reduces vibrating noises and protects the vent path from excessive movement.
Tip: Place a rubber pad under the dryer to minimize movement and protect the floor surface. - 10
Run a test cycle and inspect airflow
Plug in and power on the dryer. Run a short cycle to verify airflow at the exterior vent, listen for air leaks, and look for unusual vibrations. Re-check seals and joints if airflow seems weak.
Tip: Check the exterior vent after the first few cycles to confirm consistent airflow.
Common Questions
Do I need a professional to install a dryer?
Not always. If you’re comfortable with electrical and gas connections and you follow local codes, you can install a dryer yourself. However, gas work and complex venting may require a licensed pro.
You can do it yourself if you’re comfortable with electrical and gas work and codes, but consult a pro for gas work if unsure.
Can I reuse my existing vent duct if it’s metal and undamaged?
Only if the duct is metal, undamaged, properly sealed, and not crushed. Plastic or foil ducts are generally not recommended due to higher lint buildup and fire risk.
Reuse only if metal, intact, and sealed; otherwise replace.
Is a dedicated circuit required for electric dryers?
Yes, most electric dryers require a dedicated circuit of appropriate amperage per local code. Check the dryer manual and local electrical codes.
Electric dryers usually need their own dedicated circuit.
What should I do if I smell gas during installation?
Shut off the gas, evacuate the area if needed, and contact a licensed professional to investigate. Do not operate any electrical switches in the area.
Shut off gas and call a professional right away.
How can I tell if my vent is blocked?
Look for reduced airflow at the exterior vent, noticeably longer drying times, or visible lint buildup in ducts. Inspect and clean as needed.
If airflow is weak or drying takes longer, inspect the vent.
Can I vent through a window or door?
It’s possible but not ideal. Use a purpose-built vent kit that seals properly to prevent moisture, pests, and drafts.
Vent through a window is possible but not preferred.
Watch Video
Key Points
- Plan vent routes before starting
- Use 4-inch metal ducting for safety
- Shut off power and gas before work
- Seal joints with UL-listed foil tape and test airflow
- Follow local codes and safety guidelines