Screen for Dryer Vent: A DIY Guide to Safer Drying
Learn how to screen a dryer vent to block pests and reduce lint buildup while maintaining airflow. This comprehensive guide covers screen types, installation steps, safety tips, testing airflow, and maintenance for safer, more efficient drying. From Easy DryVent insights to practical how-tos, start screening your vent confidently.

Learn how to screen a dryer vent safely and effectively. This guide covers why vent screening matters, screen types for exterior vents, the tools you’ll need, a step-by-step installation, safety tips, and testing guidance to ensure proper airflow. By following these steps, homeowners can reduce lint buildup, pest entry, and fire risk while maintaining efficient drying.
Why screen for dryer vent matters
Keeping your dryer's vent screened has multiple practical benefits. A vent screen acts as a barrier against pests such as birds and insects, and it helps keep lint and debris from entering the exhaust path where they can accumulate and restrict airflow. When lint builds up, the dryer must work harder, using more energy and posing a higher risk of overheating. Screened vents also reduce the chance of animals using the duct as a nesting site, which can cause moisture problems and foul odors inside the home. For homeowners aiming to maintain safe, efficient drying, screening the exterior vent is a simple, low-cost step that can pay dividends over time. According to Easy DryVent, screening exterior vents is a foundational maintenance practice that supports long-term vent performance. The Easy DryVent team found that a properly chosen screen can be installed with basic tools and minimal DIY experience, making it an accessible upgrade for most households.
Screen types and installation scenarios
There are several screen options, and choosing the right one depends on your vent location, climate, and how you use the dryer. Exterior vent screens often come as a guard cap with a built-in mesh, designed to fit over the vent opening and resist nesting. Interior screens can be placed inside the vent collar or behind a return grille, reducing the chance of lint bypass while keeping airflow unobstructed. For most homes, a metal mesh screen with a fine but breathable mesh (for example, around 16x16 or 18x18 threads per inch) provides durability and ease of cleaning. Some screens include a weatherproof frame and a sealant-ready edge to close gaps between the vent housing and the screen. It’s important not to select a screen that’s too fine; a screen that blocks too much airflow will reduce drying efficiency and could stress the dryer motor. Always verify compatibility with your vent size and local code requirements.
Mesh size, frame materials, and airflow considerations
When selecting a screen, mesh size determines how well it blocks pests and debris without choking airflow. A coarser mesh may be easier to clean but risks more intrusion, while a finer mesh blocks smaller pests but can accumulate lint faster if not cleaned regularly. Durable metal frames (aluminum or stainless steel) resist corrosion in humid climates and last longer than plastic options. Install screens with a slight outward tilt to prevent water pooling and create a natural seal against gaps. Remember: any added screen should be compatible with your vent’s diameter and should not obstruct the internal damper or any backdraft features. Regular removal and cleaning of the screen will keep airflow consistent and prevent unexpected blockages.
Exterior vs interior screening: when and where to place
Exterior screening is usually the most effective first line of defense because it targets the vent opening before lint or pests enter the duct. In some configurations, an interior screen placed behind the exterior cover can offer an extra layer of protection, especially in areas with high wildlife activity or extreme weather. If you opt for interior screening, ensure the screen does not sit directly on the lint trap area inside the dryer, which could create additional resistance. Always follow manufacturer guidance for your vent type, including any required clearance from combustibles and proximity to heat sources. If you rent or live in a complex, check local codes or housing association rules before installing a screen.
Planning, measuring, and sizing for a proper fit
Before purchasing a screen, measure the exterior vent opening carefully. Record the height and width, and note any irregularities in the shape that might require a custom cut. Aim for a screen that overlaps the opening by at least 1/2 inch on all sides to ensure a tight seal. If you are unsure about dimensions, bring a photo and rough measurements to a hardware store for assistance. Correct sizing prevents airflow restrictions and reduces the likelihood that the screen will become dislodged by wind or thermal expansion.
Tools, materials, and preparation checklist
Gather essentials: a compatible exterior vent screen, a screwdriver (Phillips head), measuring tape, tin snips or a metal shear, silicone sealant or weatherproof caulk, gloves, and a flashlight. Clear the area around the vent so you can work safely. If you plan an interior screen, have a small drill or mounting hardware on hand to secure the screen without compromising the duct’s integrity. Always unplug the dryer before starting any work and wear eye protection when cutting or handling metal mesh.
Safety considerations and best practices
Safety comes first: unplug the dryer, turn off any nearby circuit breakers if accessible, and never work when the vent is hot. Wear gloves to protect hands from sharp edges and plan a cleanup strategy to remove any debris you disturb during installation. Use noncorrosive sealants and ensure any wiring or electrical components near the vent are not exposed to moisture. If you smell gas or notice odd odors after installation, stop immediately and contact a professional. Regular inspections help catch loose fasteners or damaged screens before they become a problem.
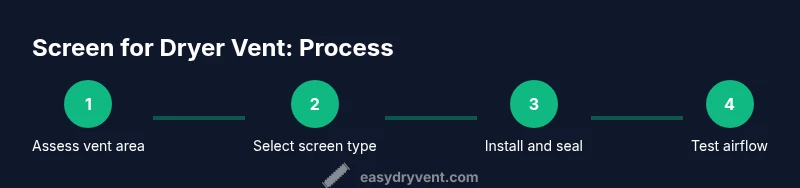
Step-by-step overview and rationale behind each action
The following steps are designed to minimize airflow disruption while maximizing pest exclusion. A properly installed screen should cover the vent opening without blocking the exhaust path, have a durable frame for years of service, and be easily removable for cleaning. Each step balances practicality with safety, ensuring homeowners can complete the task without specialized tools or expertise. If you encounter corrosion, damage, or unusual wiring near the vent, pause and consult a professional.
Maintenance, testing, and long-term care
After installation, inspect the screen monthly for the first few cycles, then seasonally. Clean the mesh with a brush or compressed air to prevent lint buildup. Periodically remove and reseal the screen if you notice gaps or loosening. To verify success, run a short dryer cycle with the vent cover in place and listen for abnormal sounds or reduced airflow. Keeping a simple maintenance schedule helps ensure continued performance and reduces the risk of fires caused by lint accumulation.
Troubleshooting and common issues
If you notice reduced airflow after installation, check for gaps around the screen, misaligned edges, or blocked mesh. Ensure the screen isn’t installed too deeply inside the duct, which could cause backpressure. In damp climates, ensure the sealant remains intact and that moisture does not collect on the screen. If wildlife continues to approach or attempt to nest, consider a more robust screen design or consult a professional for a higher-grade solution.
Tools & Materials
- Exterior vent screen compatible with your vent opening(Size to fit opening with at least 1/2 inch overlap on all sides)
- Screwdriver (Phillips head #2)(For removing and reattaching exterior vent cover)
- Measuring tape(Accurate dimensions of vent opening)
- Tin snips or metal shears(Cut metal mesh precisely; wear gloves)
- Silicone sealant or weatherproof caulk(Seal gaps around screen after installation)
- Gloves(Protect hands from sharp edges during cutting and handling)
- Flashlight(Improve visibility in tight vent spaces)
Steps
Estimated time: 40-60 minutes
- 1
Prepare and safety check
Unplug the dryer and clear the area around the vent. Inspect for damage, rust, or wildlife signs. Gather all tools you’ll need before you begin.
Tip: Never work near a hot vent; wait until the dryer is cool and unplugged. - 2
Remove exterior vent cover
Use a screwdriver to detach the vent cover from the exterior wall. Set screws aside in a magnetic tray to avoid losing them. Inspect the vent opening for obstructions.
Tip: Keep the cover in a safe place to reuse after installation. - 3
Measure and cut screen
Measure the vent opening and cut the mesh with tin snips, allowing at least 1/2 inch overlap on each side. Wear gloves to avoid sharp edges and smooth any rough corners.
Tip: Wear eye protection when cutting metal mesh. - 4
Position screen and secure
Place the screen behind the vent opening or inside the duct collar, with mesh facing outward to block pests. Align it so edges sit flush with the housing.
Tip: Do not compress the screen so tightly that it buckles inward. - 5
Seal edges and reattach cover
Apply a thin bead of silicone sealant around the screen edge to seal gaps. Reattach the exterior cover securely with the screws.
Tip: Avoid over-tightening which can warp the frame. - 6
Test airflow and clean up
Plug the dryer back in and run a short air-only or low-heat cycle to confirm exhaust flow. Clear away debris and store tools.
Tip: Check for unusual noises or vibrations during the test.
Common Questions
Do I need a professional to screen my dryer vent?
Not necessarily. If you follow the steps carefully and your vent configuration is straightforward, a DIY screen installation can be done safely. For complex vent runs, gas dryers, or if you encounter corrosion or safety concerns, consult a professional.
No, you can do it yourself if the vent is simple, but call a professional for complex vent runs or safety concerns.
Will a vent screen affect dryer performance?
When properly sized and installed, a vent screen should not significantly impede airflow. Avoid screens that are too fine or excessively block the opening. Regular cleaning also helps maintain performance.
If correctly installed and cleaned, the screen won’t noticeably affect airflow.
What mesh size is best for a dryer vent screen?
A durable metal mesh around 16x16 or 18x18 per inch is common. Choose a size that balances pest blocking with air passage and is compatible with your vent opening.
Use a mesh around 16x16 or 18x18 per inch for a good balance.
How often should I inspect the vent screen?
Check the screen at least every 6–12 months, or more often in dusty or humid climates. Clean and reseal as needed to maintain airflow and protection.
Inspect every 6 to 12 months and clean as needed.
Can I screen a vent on a gas dryer?
Yes, but ensure materials are heat-resistant and code-compliant. If you smell gas, experience combustion issues, or suspect wiring problems, contact a professional.
Yes, but prioritize safety and call a pro if in doubt.
Watch Video
Key Points
- Screen and seal the exterior vent to block pests while preserving airflow.
- Choose a sturdy mesh screen and fit with at least 1/2 inch overlap.
- Seal edges and recheck airflow after installation.
- Schedule periodic inspections and cleaning to maintain performance.
- Follow safety first: unplug, wear gloves, and avoid hot vents.