How to Check Dryer Vent: A Practical DIY Guide
Learn how to check your dryer's vent for blockages, lint buildup, and poor airflow. This step-by-step guide covers exterior and interior inspection, safe cleaning methods, airflow testing, and maintenance to improve safety and efficiency.

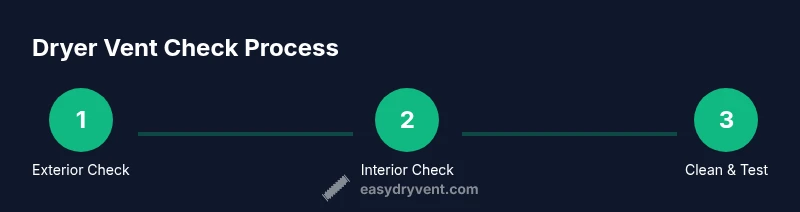
This guide shows how to check a dryer vent for blockages and lint buildup, ensuring safe, efficient drying. You will inspect the vent exit, interior duct, and lint trap, then clean with a brush, vacuum, and compressed air if available. Gather a flashlight, a vacuum with attachments, a vent brush, and protective gloves.
Safety First: Prepare and Power Down
Before you begin any inspection of the dryer vent, safety should guide every move. Unplug the dryer from the wall outlet and slide it a few inches away from the wall to access the vent without tugging on the cord. If you have a gas-powered dryer, follow additional safety steps for ventilation and operation, including ensuring the area is well ventilated and the gas shutoff is accounted for if you’re working near the exhaust. Wear a dust mask and protective gloves to shield yourself from lint, dust, and debris that may tumble loose from the vent. Keep children and pets away from the workspace and have a flashlight handy for dim cabinet corners. This preparation minimizes the risk of accidental contact with hot surfaces and helps you identify obvious blockages in the vent path. According to Easy DryVent, starting with a clean, well-ventilated space improves airflow and reduces debris that could re-enter living areas.
Exterior Vent: Locate, Inspect, and Clear
Begin at the exterior wall where the vent exits your home. Look for a vent hood that opens freely when puffs of air are emitted by the dryer. Ensure the flapper moves with airflow and isn’t stuck closed or jammed by debris. Clear any visible lint near the opening and check for damage to the vent cover or duct near the exterior. If you notice nesting materials, pests, or heavy debris, remove it carefully with gloves or a small brush. Inspect the area for obstructions like nearby landscaping, grass, or leaves that could block airflow. Confirm the run exits away from windows, doors, or soffits to prevent backdrafts. This exterior check provides a quick read on gross blockages and whether interior inspection should continue.
Interior Duct and Lint Trap: Access and Assess
With the dryer unplugged, access the interior duct through the cabinet or wall panel. Use a flashlight to look for obvious lint buildup, kinks, crushed sections, or disconnections. Pay attention to corners and 90-degree bends where lint tends to accumulate. If you can reach, gently insert a vent brush and rotate it to loosen debris while guiding it toward the lint trap or access point. Vacuum the loosened lint as you go to minimize resettling dust. Do not force brushes through tight bends or pinwheel joints; if you meet resistance, stop and reassess. Document any damaged joints or excessive buildup with photos for future reference. After you finish, re-secure the access panel and restore power.
Safe Cleaning: Remove Lint Without Damaging Ducts
Use a stiff vent brush or a flexible attachment designed for dryer vents to dislodge lint from the duct walls. Work slowly and use short, controlled strokes to minimize sagging or bending of the duct. Alternate brushing with gentle vacuuming to capture loosened lint. Avoid water or liquid cleaners inside the duct, as moisture can promote mold growth and compromise duct integrity. If you encounter stubborn lint that won’t budge, stop cleaning and plan a more thorough cleaning with professional equipment. Always keep the area well-ventilated and wear a mask to avoid inhaling dust. After cleaning, wipe down accessible surfaces and check for any loose screws or gaps that could leak lint into living spaces.
Airflow Test: Check Performance After Cleaning
Reassemble any panels, restore power, and run a short test cycle with clothes or a small load. Feel the airflow at the exterior vent and listen for changes in motor load or noise. A strong, steady airflow should be present; weak airflow indicates remaining lint or a more complex duct issue. If you still notice reduced airflow, repeat the interior inspection focusing on turns and joints, or consider calling a professional for a more thorough inspection. This step confirms the effectiveness of your cleaning and helps prevent future blockages.
Maintenance and Common Issues: When to Call a Pro
Common issues include persistent low airflow, visible lint around the vent or cabinet, or unusual heat or burning smells. If the exterior vent is blocked by debris or the interior duct is severely crushed, a professional should handle the job. For long duct runs, multiple turns, or ducts routed through walls and ceilings, routine professional maintenance is often more cost-effective than repeated DIY attempts. Use a preventive approach: establish a simple maintenance schedule, document findings, and replace worn components as needed. Regular checks can prevent dryer fires and improve drying efficiency.
Long-Term Plan: Schedule and Documentation
Create a simple monthly routine: inspect and clean the lint trap after every load, perform a quick exterior vent check quarterly, and arrange an annual professional inspection if your home’s dryer vent routing is complex. Keep notes or photos from each inspection so you can track changes over time. A small investment in routine maintenance pays off with safer operation, faster drying times, and lower energy use. According to Easy DryVent, consistent maintenance reduces the likelihood of emergencies and helps you spot problems early.
Tools & Materials
- Flashlight or headlamp(Bright, hands-free preferred)
- Vacuum with hose attachment(HEPA if possible; helps capture fine lint)
- Stiff dryer vent brush / vent brush kit(Long, flexible bristles to reach duct sections)
- Screwdrivers (Phillips and flathead)(For removing access panels)
- Gloves and safety goggles(Protect hands and eyes from debris)
- Duct tape or foil tape(Seal minor joints after inspection if needed)
- Step stool or ladder(Access exterior vent or high cabinets)
- Dust mask or respirator(Helps with dusty conditions)
Steps
Estimated time: 45-60 minutes
- 1
Power Down and Prep
Unplug the dryer and move it slightly away from the wall to access the vent. If you’re comfortable, turn off the gas supply for gas models and ensure proper ventilation. Set up a clear workspace, turn on the flashlight, and lay out your tools. This minimizes the risk of accidents and helps you work methodically.
Tip: Double-check that the outlet is not hot to the touch before handling cords. - 2
Inspect Exterior Vent
Go to the outside vent and check the hood for smooth operation. Remove visible lint near the opening and ensure the flapper moves freely. Look for damage or signs of nesting, and clear any obvious obstructions with gloves or a brush. A clean exterior vent is the first line of defense against airflow restriction.
Tip: Use a camera to document any exterior damage for future reference. - 3
Access Interior Duct and Lint Trap
Remove the cabinet panel or lint trap housing to gain access to the interior duct. Shine the light down the run and look for lint buildup, kinks, or loose connections. If reachable, rotate the brush and gently pull lint toward the lint trap while vacuuming. Stop if you encounter a stubborn buildup or a potential joint failure.
Tip: Do not yank on ducts; you can damage joints and worsen airflow. - 4
Clean Duct and Lint Trap
Use the vent brush to dislodge lint along the duct walls, then vacuum the debris as you go. Work in short strokes and pull debris toward the exit or access point. Clean the lint trap housing thoroughly and inspect for wear. Reinsert the lint screen and verify it sits flush.
Tip: Avoid pushing lint deeper into tight bends; work from accessible sections outward. - 5
Reassemble and Test Airflow
Secure all panels, plug the unit back in, and run a test cycle. Check the exterior vent for a strong airflow and listen for unusual noises. If airflow is weak, repeat interior inspection focusing on bends and joints. A successful test confirms improved vent performance.
Tip: Record the test results so you can track future changes. - 6
Final Safety Check
Inspect all connections for tightness and signs of wear. Ensure no screws are loose in the cabinet and that the vent path remains clear. If you notice damage that you cannot fix safely, contact a professional. End with a quick safety reminder and a plan for ongoing maintenance.
Tip: Never run the dryer with a compromised or open access panel.
Common Questions
Why is my clothes taking longer to dry after a vent check?
If drying takes longer after inspection, there may still be a blockage or insufficient airflow in the duct. Re-check exterior and interior sections and consider a more thorough cleaning or professional service if the run is long or has many turns.
Long dry times usually mean airflow is restricted; recheck the vent path and clean thoroughly before calling a pro.
How often should I check my dryer vent?
It's wise to inspect the vent at least every few months if you use the dryer frequently. High-use households or homes with dogs and lots of lint may benefit from monthly checks. Regular checks help prevent buildup that can reduce performance and create fire risk.
Check the vent every few months, more often if you notice longer drying times or more lint.
Can I clean the vent myself or should I hire a pro?
Many minor blockages can be resolved with a DIY inspection and cleaning using the right tools. Complex runs, significant crushes, or vents that run through walls and ceilings may require professional equipment and expertise to ensure safety and compliance with local codes.
DIY cleaning works for simple cases, but call a pro for long, complex, or damaged vents.
What tools do I need to clean a dryer vent?
Essential tools include a flashlight, a vacuum with a hose attachment, a stiff vent brush, screwdrivers for access panels, and gloves. A step ladder can help reach exterior vents, and duct tape is handy for resealing joints if needed.
Use a flashlight, vacuum, vent brush, and screwdrivers for a safe DIY clean.
Is it safe to use a leaf blower to clean the vent?
Leaf blowers are typically not recommended for dryer vents; they can create excessive force and may damage joints or blow lint deeper into the system. Stick to purpose-built vent brushes and a vacuum for controlled cleaning.
No, avoid leaf blowers. Use vent brushes and a vacuum instead.
What signs indicate a blocked vent?
Signs include clothes that take longer to dry, a hot dryer with a the exterior vent not expelling air, excess lint around the vent area, or a burning smell. If you notice any of these, perform a thorough check or call a professional.
Look for longer dry times, hot venting, and lint around the vent.
Key Points
- Unplug and prepare the workspace before inspecting.
- Inspect both exterior vent and interior duct for blockages.
- Use the right tools and avoid aggressive cleaning methods.
- Test airflow after cleaning to confirm improvement.
- Establish a regular maintenance routine to prevent hazards.