Fixing a Dryer Vent: A Practical DIY Guide
Learn how to safely fix and maintain a dryer vent with step-by-step instructions, safety tips, and when to call a pro. Easy DryVent shares practical guidance to improve airflow, reduce drying times, and prevent fire hazards.

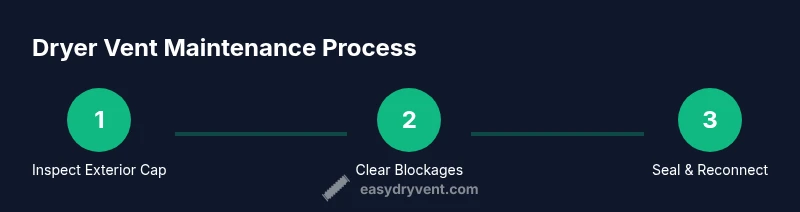
According to Easy DryVent, fixing a dryer vent safely starts with inspecting the exterior vent cap, clearing blockages, cleaning lint, and resealing joints. Gather a flashlight, vacuum with brush attachment, a vent brush, screwdrivers, work gloves, and safety goggles. Power off the dryer, test airflow, and stop if you encounter damaged ducts or fire hazards. If you encounter extensive damage, call a pro.
What fixing a dryer vent achieves
Powerful reasons to fix a dryer vent: safety, efficiency, and reliability. A vent that is blocked or leaky can trap hot air and lint, creating a fire hazard and slowing your dryer’s performance. By fixing the vent, you help your dryer operate more efficiently, reduce energy waste, and minimize the risk of house fires. Easy DryVent’s approach emphasizes simple, repeatable steps that homeowners can undertake safely. Regularly inspecting the exterior vent cap, clearing lint, and ensuring a clean interior path are the core tasks. The long-term payoff is faster drying times on every load and lower energy bills. In addition, a well-maintained vent reduces wear on the dryer's drum and heating element, extending the appliance’s life and preserving home safety.
This work matters not just for efficiency but for home safety. A properly functioning vent minimizes moisture buildup in walls, reduces the likelihood of mold in damp spaces, and improves dryer performance, especially on those peak-load days. Easy DryVent’s guidance focuses on practical checks you can perform without specialized tools, while noting boundaries where professional service is the safer option.
Safety prerequisites before you begin
Safety first. Before touching any part of the dryer vent, unplug the dryer or switch off the circuit breaker to avoid accidental starts. If you have a gas dryer, shut off the gas supply per the manufacturer’s instructions. Keep children and pets away from the work area and ensure the space is well-ventilated. Wear protective gloves and safety glasses, and use a flashlight to illuminate dark ducts. If you smell gas or suspect a gas leak, evacuate the area and contact your utility provider immediately. Clear the work area of clutter to reduce tripping hazards when moving the appliance. Finally, test the area for electrical or gas shutoffs and confirm there is no power reaching the dryer before you begin.
Common causes of blocked or damaged vents
Most dryer vents fail for three main reasons: lint buildup, damaged or crushed ducts, and improper vent routing. Lint accumulates first in the trap and then travels into the duct, where it compacts and restricts airflow. Damaged ducts—such as crushed sections or holes—allow warm air to escape into walls rather than travel outdoors. Improper vent routing, including overly long runs or frequent bends, creates pressure that pushes lint back toward the dryer. Exterior factors, like bird nests, leaves, or snow, can block the vent cap. By understanding these causes, you can tailor your cleaning and inspection routine to prevent problems before they escalate.
Cleaning vs repair: knowing when to DIY
Basic cleaning and resealing joints are well within a confident DIY skill set for most homeowners. If you notice persistent reduced airflow after cleaning, or if you see crushed or detached ducts, discolored insulation, or signs of moisture inside walls, these are signals that professional service is warranted. Do not attempt full duct replacement or interior work behind walls unless you have training or supervision. The goal is to remove blockage and restore a smooth, continuous path from the dryer to the outdoors, not to perform structural repairs.
Stepwise vent cleaning: exterior first
Begin outside by inspecting the vent hood and flap. Remove the exterior grille or cap and inspect for obstructions. Clear leaves, bird nests, and dirt with gloved hands or a long brush. Reinstall the cap securely, ensuring the flap moves freely. Then, move to the interior side, starting at the point where the dryer connects to the vent. Use a vent brush to loosen lint and vacuum it out with a hose attachment. Work in sections, taking care not to push lint further into the system.
Inspect connections and duct integrity
Next, check all connections near the dryer and along accessible portions of the duct. Tighten clamps and reseal joints with UL-listed foil tape. Avoid duct tape for long-term sealing, as it degrades with heat. If you encounter crushed segments or obvious leaks, determine whether you can straighten and reattach the duct or if replacement is needed. A well-sealed system should feel rigid and smooth when you run a light hand along its length.
Maintenance plan to prevent future problems
Create a simple schedule: clean the lint trap before every load, inspect the vent cap quarterly, and perform a deeper interior cleaning twice a year. Keep a small vacuum and vent brush on hand for quick maintenance. Consider upgrading to a rigid metal duct if your home uses long runs or many bends. Finally, document your maintenance with dates so you can track patterns over time and know when you should call a professional.
Tools & Materials
- Flashlight(Bright, hands-free preferred; use LED for visibility)
- Vacuum with hose/brush attachments(HEPA-rated if possible; vacuum around lint)
- Vent brush kit(Special brush designed for dryer ducts)
- Screwdrivers (Phillips and flat-head)(For removing caps or covers)
- Metal foil duct tape (UL 181)(For joints and seals)
- Duct clamps (metal)(Secure duct connections)
- Replacement exterior vent cap (if damaged)(Optional if cap is cracked)
- Gloves and safety glasses(Protect hands and eyes)
- Pliers or additional tools(For stubborn clamps)
- Unplugged/dryered power source(Ensure no power during work)
Steps
Estimated time: 60-90 minutes
- 1
Power down and prep
Unplug the dryer and move it slightly away from the wall to access the vent area. Gather tools and clear the workspace to reduce tripping hazards. This step sets a safe foundation for all subsequent actions.
Tip: Keep a clear path and have a helper ready if the dryer needs to be moved. - 2
Inspect exterior vent cap
Open the exterior vent cap and check for nests, leaves, or snow blocking airflow. If the cap or flap is damaged, note it for replacement before continuing. A blocked exterior is the most visible sign of trouble.
Tip: Wear gloves to avoid sharp edges; ensure the flap moves freely after inspection. - 3
Clear exterior blockage
Remove visible debris from the cap and the surrounding vent opening. Use a long brush or gloved hand to knock loose stubborn lint. Reinstall the cap securely so the flap can operate normally.
Tip: Do not force stuck parts; replace damaged components if needed. - 4
Detach the dryer from the vent
Loosen the duct clamp at the dryer outlet and slide the duct away from the dryer. Inspect for crushed or kinked sections and set them aside for repair or replacement. Move slowly to avoid damaging the connections.
Tip: Have a helper support the dryer to prevent tipping during detachment. - 5
Clean interior duct sections
Insert the vent brush and push lint out while vacuuming the loosened lint. Work in small sections, moving progressively deeper into the duct. Clear as much lint as possible before reassembling.
Tip: Take breaks if you encounter heavy lint buildup to avoid overheating the vacuum. - 6
Seal joints and reconnect duct
Reconnect the duct, reseal joints with metal foil tape, and re-tighten clamps. Ensure joints are airtight and smooth without protruding materials. Avoid tightening screws to the interior of the duct where lint can accumulate.
Tip: Test joint integrity by applying a gentle puff of air and listening for leaks. - 7
Test airflow and safety check
Plug the dryer back in and run a short cycle to observe airflow. Check exterior vent for strong, steady airflow. If airflow is weak, re-check connections and ensure no blockages remain.
Tip: If you smell burning lint or hear unusual noises, shut off power immediately and reassess. - 8
Document and schedule maintenance
Record the work performed and plan future cleanings. A simple calendar reminder helps prevent blockages from returning. This keeps the vent system safer and more efficient over time.
Tip: Keep a maintenance log with dates and notes for future reference.
Common Questions
How often should I clean my dryer vent?
For most homes, a thorough interior cleaning and external cap check every 6-12 months is reasonable. If you notice longer drying times, increased heat, or a scorching smell, inspect sooner.
Most homes benefit from a vent check every six to twelve months, or sooner if you notice longer drying times or heat buildup.
Can I use a vacuum to clean inside the vent?
A vacuum with a hose attachment can remove loose lint from accessible sections, but avoid forcing lint further into tight bends. Use a vent brush kit for deeper sections.
Yes, you can vacuum reachable lint, but use a brush for deeper areas and avoid pushing lint further in.
What are signs of a blocked vent?
Longer drying times, hotter dryer surfaces, a burning smell, or visible lint around the exterior cap indicate a blockage or poor airflow.
Watch for longer drying times, heat buildup, or lint around the vent exterior.
Is a flexible vent duct safe for long runs?
Rigid or semi-rigid metal ducts are preferred. Flexible plastic or foil ducts can trap lint and sag, reducing airflow and increasing fire risk.
Rigid metal ducts are best; avoid flexible plastic or foil ducts for safety and efficiency.
Do I need to hire a professional for vent replacement?
If you discover crushed sections, extensive leaks, or wall deposits, professional installation is advised to ensure a proper seal and safe routing.
If you see damage or complex routing, a professional should handle replacement.
What tools are essential for a DIY vent fix?
You’ll need a vent brush, vacuum, flashlight, foil tape, duct clamps, screwdrivers, gloves, and a replacement vent cap if needed.
Have a vent brush, vacuum, tape, and basic hand tools ready before starting.
Watch Video
Key Points
- Inspect exterior vent cap regularly and keep it clear.
- Clean lint from both the trap and interior ducts.
- Seal joints with foil tape and avoid duct tape.
- Avoid damaged or crushed ducts—replace when needed.
- Establish a simple maintenance schedule to prevent fires and improve efficiency.