Dryer Vent Before and After: A Practical Comparison
In-depth comparison of dryer vent before and after cleaning, showing how lint buildup affects airflow, drying times, energy use, and safety, with practical DIY guidance and pro tips.

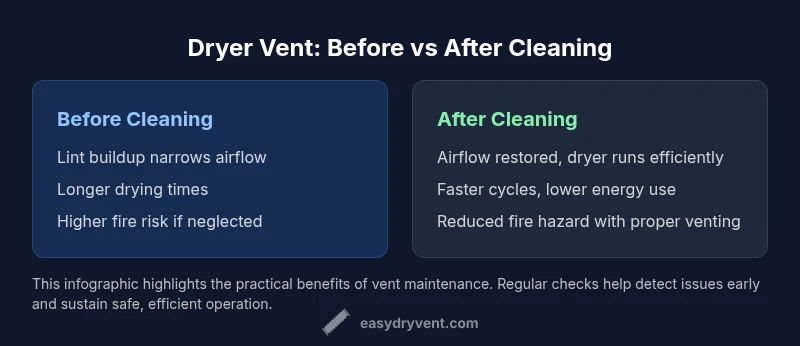
Dryer vent before and after cleaning dramatically changes airflow and safety. Before cleaning, lint buildup narrows the vent, increasing drying times and fire risk; after cleaning, airflow improves, drying is faster, energy use drops, and the system operates more safely. A proactive approach yields long-term savings and reliability.
Why dryer vent before and after matters
The condition of a dryer vent affects safety, energy use, and overall performance. Before reading further, it helps to visualize airflow as a narrow garden hose: lint and debris constrict the path, forcing the dryer to work harder. When you consider the vent in both its dirty and clean states, you can see why even small blockages matter.
According to Easy DryVent, homeowners who routinely inspect and compare the vent before and after maintenance typically experience fewer cycling interruptions and reduced risk of overheating. A vent that is partially blocked can cause clothes to emerge warm but damp, indicating moisture is not being exhausted efficiently. Over time, heat buildup can degrade lints and more sensitive components. The “before and after” mindset is not about perfection; it's about recognizing when a vent is functioning as intended and when it is not.
In practice, starting with a before snapshot gives you a practical benchmark. You can document lint levels, notice abnormal heat, and record any signs of moisture staying in the drum. After cleaning, you should notice smoother operation, a more consistent drum temperature, and a reduction in cycle duration. This approach creates a measurable path to safer, more efficient drying.
What qualifies as a proper before and after assessment
A legitimate before-and-after assessment goes beyond a quick glance at the vent hood. It combines a visual check, airflow test, and a simple timing comparison across several loads. Key indicators to note before cleaning include visible lint at the vent opening, a sense of warmth around the dryer, and longer-than-usual dry cycles. You should also observe the lint trap for excessive buildup.
After completing a cleaning, perform the same checks so you can compare results directly. Fire safety and appliance efficiency hinge on consistent metrics: airflow feels stronger when you hold your hand near the vent while the dryer runs, the lint trap shows less residual lint, and drying times drop to a more predictable range. An honest before-and-after requires patience and a methodical approach, not a quick blast with a brush.
A structured before-and-after plan makes it easier to justify maintenance to other household members and to track improvements over time.
Step-by-step: evaluating the vent before cleaning
Before cleaning, plan a 15- to 30-minute test window to avoid interrupting laundry. Start by unplugging the dryer and inspecting the exterior vent cover for obstructions such as debris, bird nests, or rodent activity. Remove the vent hose at the dryer end to check for lint buildup along the length. Gently scrape with a brush and vacuum to capture loose lint. Record a baseline: the time taken to dry a standard load, the heat level at the exhaust, and any unusual odors or signs of moisture near the drum. This baseline forms the reference for your after-cleaning comparison. If you encounter severe blockages that cannot be safely removed, stop and call a pro.
Step-by-step: evaluating after cleaning
After cleaning, reassemble the vent and re-run a standard load. Compare the drying time and temperature, listening for a hum that is less labored. A noticeable improvement—dryer cycling time shortened by a few minutes per load, cooler exhaust, and a more consistent finish—indicates the vent is functioning closer to its design. Document the updated baseline and set a simple maintenance interval to replicate similar results in the future. If you still observe heat build-up or lingering odors, you may have deep duct issues that require professional assessment.
Common contaminants and risks
Laundry lint is the most familiar contaminant, but creosote-like residues, bird nests, and moisture-related mold can accumulate in ducts and cause performance problems. Lint is highly flammable when exposed to elevated dryer temperatures, so any visible buildup near the vent opening should be addressed promptly. Moisture in the duct can promote microbial growth, reducing air quality and potentially damaging insulation. In some cases, flexible transition hoses can kink, creating artificial restrictions that worsen the problem. A robust visual inspection helps detect these hazards early.
Performance impacts: drying time, energy use, and safety indicators
Cleaner vents generally translate to measurable performance gains. With improved airflow, the dryer requires less run time to exhaust moisture from clothes, which can translate into lower electricity use and reduced wear on the heating element. You may notice more consistent drum temperatures and less overheating on warm-weather days when the vent is clear. Safety indicators also improve: clean ducts reduce lint accumulation, minimizing fire risk and reducing the chance of heat staying in the dryer cabinet. Regular checks are a straightforward way to keep performance aligned with manufacturer specifications without expensive audits.
Maintenance strategies: schedules, tools, and best practices
Adopt a practical maintenance schedule that fits your laundry pattern. A quick quarterly visual check of exterior vent covers and a semiannual deep clean works for many households. Tools you may need include a vacuum with a long nozzle, a lint brush, mild detergent, and, for deeper ducts, a vent cleaning brush or flexible rod kit. When cleaning, disconnect the vent from the dryer and from the wall, and vacuum the accessible sections. Don't forget to inspect the lint trap and replace it if torn. Document your maintenance in a simple log so you can see trends over time. Finally, consider scheduling a professional cleaning if you notice persistent blockages or suspect damage to the duct system.
When to DIY and when to call a pro
A DIY approach can handle normal lint buildup in accessible sections of a vent system. If you encounter bird nesting, corrosion, crushed or kinked ducts, or suspect long, hidden duct runs, it is prudent to call a licensed professional. A pro can perform a more thorough inspection, test airflow using diagnostic equipment, and ensure code-compliant vent installation. For liability reasons, never attempt to bypass important safety steps or to seal joints with tape that isn't rated for high heat. Balancing DIY with professional help ensures both accuracy and safety.
Cost considerations and long-term value
Cost considerations for dryer vent maintenance vary with the complexity of the ductwork and the extent of blockage. A simple at-home cleaning typically costs little beyond tools and time, while professional cleaning adds a service fee and potential repair work for damaged ducts. When evaluating value, consider long-term energy savings, reduced drying times, and improved safety. A well-maintained vent can extend the life of a dryer by reducing heat-related stress on components and lowering service call rates.
Comparison
| Feature | Before Cleaning | After Cleaning |
|---|---|---|
| Airflow | Restricted airflow due to lint buildup | Improved airflow after cleaning |
| Drying Time | Longer drying times | Shorter drying times |
| Energy Use | Higher energy use | Lower energy use |
| Lint Buildup Rate | High accumulation potential | Low accumulation after cleaning |
| Fire Risk | Elevated risk | Reduced risk after cleaning |
| Best For | Basic checks and quick maintenance | Performance-focused maintenance and safety |
The Good
- Improved safety and reduced fire risk
- Faster drying times and lower energy use
- Prolongs appliance life and reduces service calls
- Less risk of moisture-related mold in the laundry area
- Easier venting checks and maintenance
Negatives
- DIY cleaning can be time-consuming
- Incomplete cleaning may leave hidden blockages
- Professional cleaning can add cost if you can't DIY
Proactive vent maintenance is the safer, more energy-efficient choice.
Cleaning before and after a vent inspection yields tangible safety and performance benefits. Regular maintenance reduces fire risk, shortens drying times, and preserves dryer life. The Easy DryVent team advocates a systematic approach to vent care as the best long-term strategy.
Common Questions
How often should I clean my dryer vent?
Most homes benefit from cleaning at least once a year, or more often if you notice slower drying times, excessive heat, or a burning lint odor. Regular checks of the vent and lint trap help catch problems early.
Generally, clean at least once a year, and more often if you see slow drying or heat buildup.
What are the signs of a clogged vent?
Look for longer drying times, clothes that stay hot after cycles, a dryer that feels unusually warm near the vent, and visible lint around the vent hood. A burning odor is a critical warning sign.
Watch for slow drying, heat buildup, and lint around the vent.
Can I clean the vent myself?
Yes, for accessible sections and light buildup. Use a vacuum, lint brush, and flexible rods or a vent brush. Stop if you encounter bird nests, heavy blockages, or damaged ducts, and call a professional.
You can do basic cleaning yourself, but don’t push through severe blockages.
What should I avoid when cleaning the vent?
Avoid forcing metal tools into tight bends, never seal joints with improper materials, and don’t bypass safety steps. Use heat-rated sealant only where appropriate and never rely on duct tape as a long-term fix.
Don’t use sharp tools or improper sealants; follow safety guidelines.
How is professional cleaning different from DIY?
A professional uses diagnostic equipment, cleans the full duct network, checks for damage, and ensures code compliance. DIY covers accessible sections; professionals handle hidden ducts and more complex paths.
Pros go deeper and verify code compliance.
Is vent hose replacement often required?
Replacement is not always required, but worn, kinked, or crushed hoses should be replaced with rated, smooth interior hoses. Inspect for cracks and leaks and replace as needed.
Replace damaged hoses promptly to maintain airflow.
Key Points
- Schedule regular vent inspections
- Document before-and-after benchmarks
- Expect faster drying after cleaning
- Watch for signs of hidden blockages
- Balance DIY with professional help when needed