How to Clean a Dryer Duct: Step-by-Step Guide for Safety
Learn how to safely clean a dryer duct with a practical DIY guide. This step-by-step how-to covers tools, safety, and maintenance to improve airflow, reduce fire risk, and boost drying efficiency.

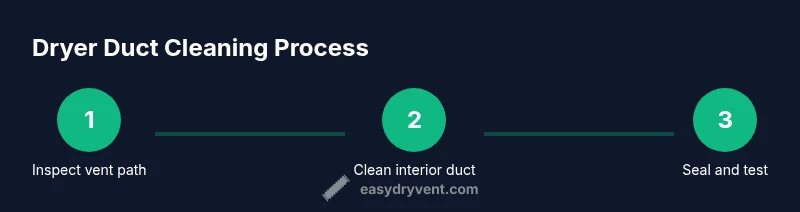
Keep your home safer and more energy-efficient with a clean dryer duct. Unplug the unit, remove lint from the duct, inspect for obstructions, then reassemble and test. Regular maintenance every 6–12 months reduces fire risk and speeds drying times.
Why a clean dryer duct matters
A clean dryer duct is more than a housekeeping task; it’s a safety measure and a performance booster. When lint accumulates in the ductwork, airflow slows, heat builds, and the risk of a dryer fire increases. According to Easy DryVent, regular attention to the duct path markedly reduces fire hazards and helps clothes dry more evenly and quickly. Beyond safety, a clear duct lowers energy use because the dryer doesn't have to work as hard to move air through a clogged route. Homeowners who establish a routine cleaning schedule often notice fewer hot spots on the appliance, less lint escaping to walls, and a longer appliance life. Thinking about maintenance as a small investment now pays off with safer operation and better drying results.
In practical terms, keeping a clean dryer duct means less time wasted on long tumble cycles and fewer failed loads due to damp laundry. If you’re a DIY enthusiast, this task becomes a manageable weekend project with the right approach and materials. The Easy DryVent team emphasizes that safety and consistency are the foundations of any effective vent cleaning plan. You don’t need fancy gear to see meaningful improvements; you need a clear plan and a commitment to regular upkeep.
wordCountInBlock":null},1],
How a dryer vent works
A typical dryer vent system creates a controlled pathway for warm, moisture-rich air to exit your home. The journey begins inside the dryer drum, where heated air picks up moisture from wet clothes and carries lint along the way. Air travels through the internal vent hose, into the wall cavity, and out via an exterior vent. Along this route, lint and debris can accumulate if the system isn’t cleaned periodically. The velocity of air and the pressure within the duct determine how effectively moisture is removed and how long fabrics take to dry. When lint blocks the flow, the dryer must run longer to achieve the same results, increasing heat exposure and potentially shortening the appliance’s lifespan. Regular maintenance helps preserve proper airflow and reduces wear on the motor and heating elements.
Understanding the vent’s path also clarifies why exterior vent covers and backdraft dampers matter. A blocked exterior opening can negate any interior cleaning efforts. The goal is a smooth, unobstructed air path from the drum to the outdoors, with lint and obstructions minimized at every junction. This is where a planned cleaning routine delivers the most value, transforming a reactive maintenance task into a proactive safety and efficiency strategy.
wordCountInBlock":null},2],
Common signs your dryer duct needs cleaning
Not every performance issue points to a dirty duct, but several telltale signs signal it’s time for cleaning. If clothes take longer than usual to dry, you’ll notice extended cycle times and a musty or scorching odor after a cycle. Visible lint around the exterior vent or on the floor near the vent is another red flag, as is excessive lint inside the lint trap or a dryer that becomes unusually hot to the touch while running. If your loads consistently come out damp, or you hear a loud rumbling or vibrating sound during operation, lint build-up or partial obstruction may be the culprit.
Another indicator is the dryer running but airflow seems weak from the exterior vent. Reduced airflow often translates to higher energy use and more wear on the dryer’s heating element. If you notice these signs, plan a cleaning session and inspect the entire duct run from the dryer outlet to the exterior vent. Easy DryVent recommends documenting these cues so you can track improvements after cleaning and determine when a professional assessment may be warranted.
wordCountInBlock":null},3],
Safety considerations before you begin
Before you touch the ductwork, ensure you address basic safety. Always unplug the dryer to prevent accidental start-up, and if you’re dealing with a gas dryer, consider turning off the gas supply and ventilating the area to avoid carbon monoxide buildup—if you smell gas or suspect a leak, evacuate and contact professionals immediately. Wear protective gear such as gloves, safety glasses, and a dust mask to minimize dust exposure. Work in a well-ventilated space and keep children and pets away during the cleaning process. If you’re uncertain about the vent’s layout or you encounter corrosion or damaged joints, stopping and seeking professional evaluation is the prudent choice. Avoid using water or liquid cleaners, which can create moisture in the duct and promote mold growth. Finally, use proper tools designed for vent cleaning to minimize the risk of damaging flexible ducts or interior coatings.
wordCountInBlock":null},4],
Tools and materials overview
Having the right tools makes cleaning efficient and safer. Essential items include a vacuum with a hose attachment to capture loose lint, a flexible dryer vent brush to scrub the duct walls, and metal foil tape for sealing joints after cleaning. A screwdriver (Phillips and flat-head) is handy for removing exterior vent covers, while sturdy gloves and safety glasses protect your hands and eyes. A sturdy ladder helps you reach exterior vents, and a drop cloth or old towels keep dust from spreading. Optional items include a respirator for dusty environments and a new exterior vent cover if the existing one is damaged. Gather these before you start to minimize trips to the toolbox mid-cleaning.
wordCountInBlock":null},5],
Step-by-step overview (preparation and planning)
This article provides a detailed, step-by-step procedure in the dedicated STEP-BY-STEP block. In short, plan for a 60–90 minute session, set up a clean, dry workspace, and confirm all connections are accessible. Inspect exterior vent access, confirm that the exterior vent flap moves freely, and identify potential obstacles such as pets or loose siding. Take photos before and after cleaning to document improvements and inform future maintenance. While this section outlines the high-level flow, you’ll follow the precise actions in the step-by-step section to ensure each action is performed correctly and safely.
wordCountInBlock":null},6],
Maintenance tips for ongoing safety
After you finish cleaning, establish a routine that keeps the vent path clear. Schedule cleaning every 6–12 months, or more often if you notice more lint or if your laundry loads are large or frequent. Keep the lint trap clean between cycles and inspect the exterior vent cover for damage or obstruction from debris. Periodically test the exterior vent flap to ensure it opens freely and that backdraft dampers function properly. Consider placing a reminder on your calendar to revisit the vent path and perform a quick inspection. Consistency is key to maintaining safe operation and optimal drying performance.
wordCountInBlock":null},7],
Troubleshooting after cleaning
If, after cleaning, you still notice long drying times or reduced airflow, recheck all duct connections for gaps or loose fittings. A small air leak can significantly affect performance. Re-inspect the exterior vent for blockages such as bird nests or insect activity, which can restrict airflow even when the interior ducts are clean. If you detect persistent issues like overheating or burning smells, pause usage and consult a qualified technician. Document any changes and compare performance against your baseline to assess whether further action is necessary.
wordCountInBlock":null},8],
Common mistakes to avoid
Avoid rushing through the task or skipping exterior components. Don’t skip turning off power or disconnecting the dryer before working; this is a common safety lapse. Using improvised tools or makeshift repairs can damage ductwork and create more lint buildup. Don’t ignore signs of mold, pests, or corrosion inside the duct; these issues require professional attention. Finally, avoid using regular tape for sealing joints; use approved foil tape to ensure a durable, fire-rated seal. By staying methodical and patient, you’ll achieve a safer, more efficient dryer system.
wordCountInBlock":null}],"toolsMaterials":{"items":[{"name":"Vacuum with hose attachment","required":true,"note":"Must reach inside duct and head around bends to pull loose lint"},{"name":"Dryer vent brush (flexible)","required":true,"note":"Choose a long, rigid-bristled brush; metal or plastic bristles work"},{"name":"Screwdriver set (Phillips and flat-head)","required":true,"note":"For exterior vent covers and clamps"},{"name":"Foil tape (fire-rated)","required":true,"note":"Seals joints without insulating material intrusion"},{"name":"Gloves","required":true,"note":"Protect hands from sharp edges and lint"},{"name":"Safety glasses","required":true,"note":"Prevent debris from entering eyes"},{"name":"Ladder","required":true,"note":"Stable, non-slip access to exterior vent"},{"name":"Old towels or drop cloth","required":false,"note":"Contain dust near work area"},{"name":"Replacement exterior vent cover","required":false,"note":"Use if current cover is damaged or degraded"},{"name":"Mask or respirator","required":false,"note":"Optional for dusty environments"}]},"stepByStep":{"steps":[{"number":1,"title":"Unplug and prep the workspace","description":"Unplug the dryer from the wall outlet and move the unit away from the wall to access the vent. Clear the floor area and lay down towels to catch dust. Safety first—disconnect power to prevent shocks and injuries.","tip":"Keep a flashlight handy to inspect tight spots inside the duct."},{"number":2,"title":"Disconnect exterior vent","description":"Use a screwdriver to remove or loosen the exterior vent cover. If you encounter paint or corrosion, proceed carefully and avoid forcing parts apart.","tip":"Work with a partner to steady the ladder and handle clips."},{"number":3,"title":"Inspect vent path for obstructions","description":"Check the vent run from the dryer to the exterior. Look for crushed sections, bird nests, or heavy lint buildup. Remove obvious clogs with a gloved hand or a brush, taking care not to damage the duct.","tip":"Document any damaged sections before proceeding."},{"number":4,"title":"Clean interior duct from the dryer side","description":"Insert the dryer vent brush into the drum outlet and feed it along the duct, rotating to sweep lint. Vacuum dust as you pull the brush back toward the dryer to capture loosened lint.","tip":"Work slowly to avoid tearing flexible ducts."},{"number":5,"title":"Clean exterior vent and area","description":"Brush lint from the exterior vent opening and surrounding area. Vacuum accumulated dust around the vent and ensure the exterior flap can move freely.","tip":"Be mindful of wind direction to keep dust from blowing back onto you."},{"number":6,"title":"Reconnect exterior vent and seal","description":"Reattach the exterior vent cover and tighten screws. Seal joints with foil tape to prevent air leaks and improve efficiency.","tip":"Avoid standard duct tape; it degrades with heat and air exposure."},{"number":7,"title":"Test airflow and dryer performance","description":"Plug the dryer back in and run a short cycle. Check for proper airflow at the exterior vent and ensure clothes are drying evenly.","tip":"If air seems blocked, stop and reassess the duct for hidden obstructions."},{"number":8,"title":"Document results and schedule maintenance","description":"Note the cleaning date, observations, and any repairs. Schedule the next cleaning in 6–12 months and set reminders.","tip":"Keep a simple log to track improvements over time."}],"estimatedTime":"60-90 minutes"},"tipsList":{"tips":[{"type":"pro_tip","text":"Choose a dry, calm day to minimize dust dispersion indoors."},{"type":"warning","text":"Never use water or liquids to clean the duct; moisture promotes mold and damage."},{"type":"pro_tip","text":"Work with a partner for safety and efficiency on exterior vent tasks."},{"type":"note","text":"Wear a dust mask to reduce inhalation of lint particles."},{"type":"pro_tip","text":"Take before/after photos to document improvements for future reference."}]},"keyTakeaways":["Inspect vent regularly before each season","Use proper tools to prevent duct damage","Seal joints with foil tape for safety","Schedule maintenance every 6–12 months","Test airflow after cleaning"],"videoEmbed":{"videoQuery":"how to clean a dryer vent duct tutorial"},"faqSection":{"items":[{"question":"How do I know if my dryer duct needs cleaning?","questionShort":"Need cleaning?","answer":"If drying takes longer than usual, you feel heat near the dryer, or you see lint around the exterior vent, it’s a good sign the duct needs cleaning. Regular checks help prevent buildup and keep airflow strong.","voiceAnswer":"If your clothes take longer to dry or you see lint around the vent, it’s time to clean the duct. Regular checks help prevent buildup and keep airflow strong.","priority":"high"},{"question":"Can I clean the vent from inside the house, or do I need to go outside?","questionShort":"Inside vs outside","answer":"You can start from the dryer side to dislodge lint and then finish from the exterior vent. For long or complex runs, exterior access makes it easier to remove stubborn clogs. If you’re unsure, consult a professional.","voiceAnswer":"Start from the dryer side and finish from the exterior vent. If you’re unsure, get professional help.","priority":"high"},{"question":"How often should I clean the dryer duct?","questionShort":"Cleaning frequency","answer":"Most homes benefit from cleaning every 6–12 months, but frequency increases with high usage, pets, or homes with multiple bends. Regular checks help maintain efficiency and safety.","voiceAnswer":"Most homes benefit from cleaning every 6–12 months, more if you use the dryer heavily.","priority":"high"},{"question":"Is it safe to use a household vacuum to clean the duct?","questionShort":"Vacuum safety","answer":"A vacuum with a hose attachment can help remove loose lint, but avoid forcing debris or applying water. Use brushes designed for vents to protect duct walls.","voiceAnswer":"A vacuum can help, but don’t force debris or use water. Use vent-friendly brushes.","priority":"medium"},{"question":"What should I do if I find mold or pests in the vent?","questionShort":"Mold or pests","answer":"Stop cleaning and consult a professional. Mold and pests indicate a larger issue that requires proper remediation to prevent health risks.","voiceAnswer":"Stop and call a professional if you find mold or pests.","priority":"medium"},{"question":"Should I hire a professional for long vents or many bends?","questionShort":"Professional help?","answer":"If the vent run is unusually long or has many bends, a pro can safely access hard-to-reach areas and ensure a complete cleaning and proper sealing.","voiceAnswer":"Consider hiring a professional for complex vent runs.","priority":"low"}]},
mainTopicQuery":"dryer vent"},
mediaPipeline":{"heroTask":{"stockQuery":"home workshop with dryer vent tools","overlayTitle":"Clean Dryer Duct Guide","badgeText":"2026 Guide","overlayTheme":"gradient"},"infographicTask":{"type":"process","htmlContent":"<div class="w-[800px] p-8 bg-slate-900 text-white"><h3 class="text-2xl font-bold mb-6">Dryer Duct Cleaning Process</h3><div class="flex items-center justify-between"><div class="flex flex-col items-center"><div class="w-16 h-16 rounded-full bg-emerald-500 flex items-center justify-center text-2xl font-bold text-white">1</div><div class="mt-2 text-center text-white text-sm">Inspect vent path</div></div><div class="flex-1 h-1 bg-emerald-500/30 mx-2"></div><div class="flex flex-col items-center"><div class="w-16 h-16 rounded-full bg-emerald-500 flex items-center justify-center text-2xl font-bold text-white">2</div><div class="mt-2 text-center text-white text-sm">Clean interior duct</div></div><div class="flex-1 h-1 bg-emerald-500/30 mx-2"></div><div class="flex flex-col items-center"><div class="w-16 h-16 rounded-full bg-emerald-500 flex items-center justify-center text-2xl font-bold text-white">3</div><div class="mt-2 text-center text-white text-sm">Seal and test</div></div></div></div>","altText":"Process diagram of dryer duct cleaning steps","caption":"A concise, step-by-step infographic showing the dryer duct cleaning process."}},"taxonomy":{"categorySlug":"dryer-vent-cleaning","tagSlugs":["dryer-vent-cleaning","duct-cleaning","lint-filter-care","check-dryer-vent","dryer-maintenance"]}},
mainTopicQuery
1-3 word noun phrase for Wikidata lookup
Tools & Materials
- Vacuum with hose attachment(Must reach inside duct and head around bends to pull loose lint)
- Dryer vent brush (flexible)(Choose a long, rigid-bristled brush; metal or plastic bristles work)
- Screwdriver set (Phillips and flat-head)(For exterior vent covers and clamps)
- Foil tape (fire-rated)(Seals joints without insulating material intrusion)
- Gloves(Protect hands from sharp edges and lint)
- Safety glasses(Protect eyes from debris and dust)
- Ladder(Stable, non-slip access to exterior vent)
- Old towels or drop cloth(Contain dust near work area)
- Replacement exterior vent cover(Use if current cover is damaged or degraded)
- Mask or respirator(Optional for dusty environments)
Steps
Estimated time: 60-90 minutes
- 1
Unplug and prep workspace
Unplug the dryer from the wall outlet and move the unit away from the wall to access the vent. Clear floor space and lay towels to catch dust. Safety first—disconnect power to prevent shocks and injuries.
Tip: Keep a flashlight handy to inspect tight spots inside the duct. - 2
Disconnect exterior vent
Use a screwdriver to remove or loosen the exterior vent cover. If you encounter paint or corrosion, proceed carefully and avoid forcing parts apart.
Tip: Work with a partner to steady the ladder and handle clips. - 3
Inspect vent path for obstructions
Check the vent run from the dryer to the exterior. Look for crushed sections, bird nests, or heavy lint buildup. Remove obvious clogs with a gloved hand or a brush, taking care not to damage the duct.
Tip: Document any damaged sections before proceeding. - 4
Clean interior duct from the dryer side
Insert the dryer vent brush into the drum outlet and feed it along the duct, rotating to sweep lint. Vacuum dust as you pull the brush back toward the dryer to capture loosened lint.
Tip: Work slowly to avoid tearing flexible ducts. - 5
Clean exterior vent and area
Brush lint from the exterior vent opening and surrounding area. Vacuum accumulated dust around the vent and ensure the exterior flap can move freely.
Tip: Be mindful of wind direction to keep dust from blowing back onto you. - 6
Reconnect exterior vent and seal
Reattach the exterior vent cover and tighten screws. Seal joints with foil tape to prevent air leaks and improve efficiency.
Tip: Avoid standard duct tape; it degrades with heat and air exposure. - 7
Test airflow and dryer performance
Plug the dryer back in and run a short cycle. Check for proper airflow at the exterior vent and ensure clothes are drying evenly.
Tip: If air seems blocked, stop and reassess the duct for hidden obstructions. - 8
Document results and schedule maintenance
Note the cleaning date, observations, and any repairs. Schedule the next cleaning in 6–12 months and set reminders.
Tip: Keep a simple log to track improvements over time.
Common Questions
How do I know if my dryer duct needs cleaning?
If drying takes longer than usual, you’ll notice extended cycle times and a musty or scorching odor after a cycle. Regular checks help prevent buildup and keep airflow strong.
If your clothes take longer to dry or you see lint around the vent, it’s time to clean the duct.
Can I clean from inside the house, or do I need to go outside?
You can start from the dryer side to dislodge lint and then finish from the exterior vent. For long or complex runs, exterior access makes it easier to remove stubborn clogs. If you’re unsure, consult a professional.
Start from the dryer side and finish outside. If unsure, contact a pro.
How often should I clean the dryer duct?
Most homes benefit from cleaning every 6–12 months, but frequency increases with high usage, pets, or homes with multiple bends. Regular checks help maintain efficiency and safety.
Most homes clean every 6–12 months, more often if used heavily.
Is it safe to use a household vacuum to clean the duct?
A vacuum with a hose attachment can help remove loose lint, but avoid forcing debris or applying water. Use brushes designed for vents to protect duct walls.
A vacuum helps, but don’t force debris or use water. Use vent-safe brushes.
What should I do if I find mold or pests in the vent?
Stop cleaning and consult a professional. Mold and pests indicate a larger issue that requires proper remediation to prevent health risks.
Stop cleaning and call a professional if you find mold or pests.
Should I hire a professional for long vents or many bends?
If the vent run is unusually long or has many bends, a pro can safely access hard-to-reach areas and ensure a complete cleaning and proper sealing.
Consider a professional for complex vent runs.
Watch Video
Key Points
- Inspect vent regularly before each season
- Use proper tools to prevent duct damage
- Seal joints with foil tape for safety
- Schedule maintenance every 6–12 months
- Test airflow after cleaning