Why Your Dryer Is Getting Too Hot—and How to Fix It Safely
Urgent, practical troubleshooting for a dryer that is getting too hot. Learn safe steps, how to inspect vents, lint removal, and when to call a professional.

Most often, a dryer that’s getting too hot is caused by restricted airflow, usually from a clogged lint filter or a blocked exhaust vent. Start with the lint screen, then inspect the vent hose and exterior vent for obstructions. Check for a trapped dryer sheet buildup and ensure the drum isn't blocking air paths. If the dryer still overheats after cleaning, stop using it and contact a professional to assess electrical or thermal fuse issues.
Safety First: Why overheating matters
Overheating is not just a nuisance—it’s a real safety risk. When a dryer is getting too hot, lint can ignite, electrical components can degrade, and fabrics can scorch. According to Easy DryVent, the most common overheating scenario starts with restricted airflow causing heat to build up inside the drum. If you notice a burning smell, smoke, or heat radiating from the vent, stop the cycle immediately and unplug the dryer. Allow it to cool before inspecting. In this guide, we focus on safe, practical steps you can take today to address the root causes of overheating, avoid fires, and keep your laundry routine on track. The keyword to remember is caution: when the dryer is getting too hot, airflow is the enemy of safety.
Quick checks you can do before you tear anything apart
Before you dismantle anything, perform these simple checks that address the most common causes of a dryer that is getting too hot. First, unplug the unit to remove any risk of electric shock. Then remove and clean the lint screen, wiping away any lint buildup around the housing. Next, inspect the vent path from the back of the dryer to the exterior vent for obstructions, kinks, or crushed sections. Make sure the exterior vent hood opens freely and isn’t blocked by leaves, snow, or bird nests. Also verify that you’re not overloading the drum, which can force longer dry times and cause overheating. If these steps don’t restore proper airflow, proceed to the next section.
Understanding airflow: the path from lint screen to outdoors
Air must flow freely from the lint screen through the drum, into the vent, and outside. Any obstruction along this path can cause a dryer to overheat. A clogged lint screen reduces air intake, while a blocked vent restricts exhaust. Part of the challenge is that lint can migrate into the vent duct over time, and even a small obstruction can dramatically reduce airflow. When the dryer is getting too hot, you may notice clothes taking longer to dry, louder operating sounds, or warm air escaping from the vent. Maintaining clean pathways is essential for safe operation and energy efficiency. Easy DryVent emphasizes that consistent maintenance is a simple, effective shield against dangerous heat buildup.
Common causes of overheating
Multiple issues can lead to overheating. The most frequent is lint buildup inside the lint trap or dryer vent; this restricts airflow and traps heat. A blocked or crushed vent hose, long vent runs with many bends, or a blocked exterior vent hood also impede exhaust. Faulty safety components — such as a defective thermal fuse or cycling thermostat — may fail to regulate heat, causing the dryer to overheat even with clean vents. Finally, improper vent installation, such as using non-code-compliant ducts, can create backpressure that raises temperatures. Each cause requires a different fix, which we’ll cover in detail. If you’re unsure, prioritize airflow fixes first, then assess safety components if heat persists.
How to inspect and clean the lint screen and vent
Start by unplugging the dryer and removing the lint screen. Clean the screen with warm water and soap, removing all lint residue. Use a brush to scrub the screen cavity and vacuum the housing to remove lint fragments. Detach the vent hose at the back of the dryer and vacuum the inside of the duct as far as you can safely reach. Do the same at the exterior vent, removing any obstructions and ensuring the hood opens fully. Reconnect everything, keep transitions tight, and run a short test cycle with a light load to observe the airflow and temperature. If you still notice heat buildup, move to deeper diagnostics.
How to test after cleaning: evidence of proper airflow
To confirm airflow has improved, look for strong exterior airflow when the exterior vent is opened. A simple tissue test—hold a tissue near the vent and see if it moves vigorously—can be effective. Run a small load on a normal cycle and monitor the vent temperature. If the air feels cool at the vent and clothes dry more quickly, you’ve improved airflow. If heat persists, it may indicate a faulty thermostat or thermal fuse and you should stop using the dryer and call a professional.
When to replace parts vs. call a professional
Clean vents and lint screens fix most overheating problems, but some situations require professional service. If heat persists after cleaning or if you smell burning plastic, immediately stop using the dryer and contact a licensed technician. Components such as the thermal fuse, cycling thermostat, or heating element may fail, and attempting a DIY replacement can be dangerous. For safety-critical parts, rely on a qualified technician who follows local electrical codes. Prevention is better than repair: timely maintenance reduces the likelihood of serious failures.
Preventive maintenance: DIY tips to keep it cool
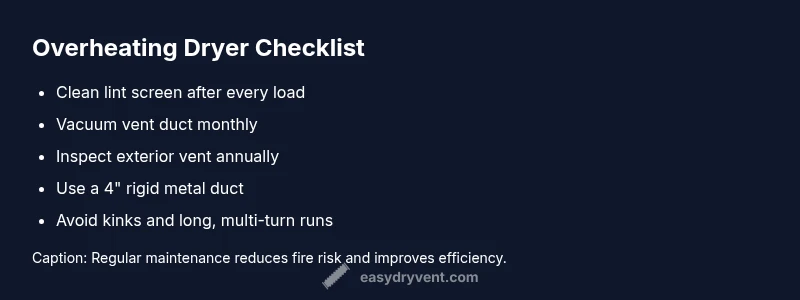
Create a simple maintenance routine to prevent the dryer from overheating. Clean the lint screen after every load and vacuum the lint trap housing monthly. Inspect and clear the vent hose and exterior vent at least once a year, or more often if you run high-load cycles. Use a high-quality vent hose with smooth interior surfaces to minimize lint buildup. Avoid using plastic or foil ducts and ensure the vent path has a clear slope toward the exterior. A well-maintained vent system reduces energy use and extends the life of your dryer.
How to choose the right venting setup for safety
Choose a venting configuration that minimizes restrictions and follows local codes. Use a rigid metal 4-inch duct, minimize elbows, and keep the vent length within the manufacturer’s recommended maximum. Replace damaged ducts and ensure all joints are sealed with metal foil tape (not duct tape). Install a backdraft damper if required by code and ensure the exterior vent is clear of obstructions. A safe venting setup not only reduces overheating risk but also improves drying times and energy efficiency. Easy DryVent recommends regular checks as part of routine maintenance to prevent the dryer from overheating in the future.
Steps
Estimated time: 60-90 minutes
- 1
Power down and unplug the dryer
Ensure the dryer is fully unplugged to eliminate any risk of electric shock. If it’s a gas dryer, turn off the gas supply and ventilate the area if you smell gas. Do not proceed with any cleaning while the power is connected. Safety first.
Tip: Always double-check the outlet with a quick visual before you touch anything. - 2
Access and inspect the lint screen
Remove the lint screen from its housing and clean it with warm water and mild soap. Brush away built-up lint from the cavity and wipe dry. Check the area around the housing for lint deposits that could migrate into the duct.
Tip: Use a dedicated lint brush or vacuum for best results. - 3
Vacuum the vent duct interior
With the dryer still unplugged, disconnect the vent hose from the back of the dryer and vacuum the inside of the duct as far as you can reach. Do the same from the exterior vent hood if accessible. Reattach the hose securely when done.
Tip: Do not force the hose through tight turns; a flexible, smooth path is best. - 4
Check exterior vent and hood
Clear any debris near the exterior vent and ensure the hood opens fully. Verify there are no bird nests or leaves blocking the opening. A free-flowing exterior vent is crucial for proper exhaust.
Tip: Keep the vent cover closed when not in use to avoid pests. - 5
Run a test cycle with a light load
Reconnect the vent, plug the unit back in, and run a short cycle with a small load. Observe the temperature and listen for any unusual sounds. If the dryer still vents hot air, move to deeper diagnostics.
Tip: Start with a low heat setting to compare temperature differences. - 6
Decide on next steps
If heat remains after cleaning and testing, suspect a faulty safety component or a less accessible vent issue. In this case, plan for professional service rather than attempting risky DIY repairs.
Tip: Document symptoms and steps you’ve taken to share with a pro.
Diagnosis: Dryer is getting too hot
Possible Causes
- highRestricted airflow from lint buildup
- highBlocked or crushed vent hose or exterior vent
- mediumFaulty thermal fuse or cycling thermostat
- lowExcessive vent length or backdrafts due to long runs
Fixes
- easyClean the lint screen and thoroughly vacuum the vent duct
- easyInspect and clear the vent hose and outdoor vent; straighten bends
- easyTest airflow with a quick cycle and observe temperature changes
- hardReplace the faulty thermal fuse or cycling thermostat with professional service
Common Questions
What causes a dryer to overheat?
Overheating is usually caused by restricted airflow from lint buildup or blocked vents, and can be worsened by faulty safety components. Regular vent maintenance helps prevent this.
Overheating is usually caused by restricted airflow from lint buildup or blocked vents, sometimes with faulty safety parts. Regular vent maintenance helps prevent it.
Can I fix overheating myself?
You can perform safe, basic checks like cleaning lint screens and exterior vents. Avoid replacing electrical safety parts yourself; if heat remains, seek professional service.
You can do basic safe checks, but don’t replace safety-critical parts yourself. If heat continues, call a professional.
How do I know if my vent is blocked?
Signs include a hot exterior vent, clothes taking longer to dry, and reduced airflow. A tissue or piece of paper near the vent that barely moves indicates restricted flow.
Look for hot vent exterior, longer drying times, and weak airflow. If a tissue barely moves near the vent, airflow is restricted.
Is overheating dangerous?
Yes. Overheating increases fire risk and can damage the dryer’s components. Immediate action should be taken if there’s burning odor or smoke.
Yes—it's dangerous and can cause a fire. If you smell burning or see smoke, stop and call for help.
How often should I clean the lint trap?
Clean the lint trap after every load. A monthly vacuum of the lint housing and yearly vent inspection further reduces overheating risk.
Clean the lint trap after every load, vacuum the housing monthly, and inspect the vent yearly.
When should I call a professional?
If heat persists after cleaning, or you notice burning smells, shut off power and contact a licensed technician. Electrical and safety components often require professional handling.
If the heat stays after cleaning or you smell something burning, stop using the dryer and call a pro.
Watch Video
Key Points
- Unplug before inspection and cleaning.
- Prioritize airflow by cleaning lint and vent paths.
- Test airflow after cleaning to confirm improvements.
- If heat persists, call a professional for safety-critical parts.
- Schedule annual vent maintenance to prevent overheating.