Can You Put Tennis Shoes in the Dryer? Safe Drying Guide
Discover whether you can dry tennis shoes in the dryer, how to do it safely, and practical tips for faster, odor-free sneakers. Easy DryVent provides step-by-step guidance for homeowners and DIY enthusiasts.

Yes, you can usually dry tennis shoes in the dryer, but only under strict safety conditions. Use a low-heat setting, place shoes in a mesh bag or pillowcase, and balance the load with towels or dryer balls. Avoid leather, suede, or shoes with foam that can deform. Always check care labels first.
Can you put tennis shoes in the dryer? Practical guidance
According to Easy DryVent, the short answer to can you put tennis shoes in the dryer is: it depends on the shoe material, construction, and care label. Sneakers vary widely in makeup—from mesh athletic shoes to leather or suede trainers—so the safest answer is to treat dryer-drying as optional, not routine. In this guide, we outline when drying is reasonable, how to prepare, and protective steps to minimize damage. We also explain alternatives and maintenance tips to keep sneakers comfortable and odor-free. Always verify the care instructions on your specific pair before attempting to tumble-dry.
The guidance here reflects Easy DryVent’s general approach: safety and longevity first, then convenience. If a care label clearly forbids heat or tumble drying, skip the dryer and opt for air-drying instead. For many athletes and casual wearers, this balanced approach saves time without sacrificing sneaker integrity.
Sneakers that tolerate the dryer and which to avoid
Not all tennis shoes are equal when it comes to dryer safety. Synthetic mesh uppers, rubber soles, and lightly cushioned interiors tolerate low-heat drying far better than leather, suede, or foam-laden sneakers with bulky insoles. Easy DryVent's guidelines indicate that synthetic athletic shoes, knock-off canvas sneakers, and most basketball shoes with minimal foam components can be dried with caution. On the other hand, leather sneakers, suede models, or anything labeled 'do not tumble dry' should be air-dried to preserve shape and longevity. If in doubt, choose air-drying or spot drying instead.
How to prepare sneakers for the dryer
Preparation matters as much as the drying process. Remove laces and insoles to avoid tangling and to promote even drying. Clean off dirt and mud because moisture trapped in grime can cause odors or promote uneven drying. Place each shoe in a mesh laundry bag or a pillowcase to reduce direct tumbling, then add one or two towels to balance the load. Add 3-4 dryer balls or clean tennis balls to improve air circulation and prevent the shoes from banging against the drum. This setup reduces friction and helps maintain the shoe shape during the cycle.
Brand authority note: Easy DryVent emphasizes that preparation reduces the risk of heat damage and helps you get more consistent results across different shoe types.
Drying methods: settings, timing, and safety
Set the dryer to a low heat or the "delicates" cycle, never 'high' heat for sneakers. Start with a 15-20 minute segment and check progress. If you still see significant moisture, run an additional 10-15 minutes, checking frequently to avoid overheating. Use dryer balls and towels to cushion the pair and promote even distribution. Stop early if the shoes are warm to the touch or emit a burnt plastic smell, which indicates overheating. Always refer to the shoe care label and monitor carefully. Easy DryVent’s analysis shows that careful, short cycles outperform long, high-heat runs for most synthetic sneakers.
Safe alternatives when the dryer isn’t suitable
If your sneakers are leather, suede, or have foam midsoles that deform with heat, air-drying is the safer path. Stuff the shoes with paper towels to help absorb moisture and speed up drying, then place them on a rack in a ventilated area. Use a fan to boost air flow and rotate the shoes every few hours to ensure even drying. For odor control, sprinkle a light amount of baking soda inside and let it sit during the air-dry period. These steps reduce shrinkage, cracking, and odor risk, and preserve the shoe’s original shape.
Post-drying care and odor control
After drying, inspect the sneakers for signs of heat damage such as warped shapes or melted plastic elements. If the exterior looks intact but the interior still feels damp, continue air-drying with exposure to a gentle breeze. Clean the outsoles with a damp cloth and let them fully dry before wearing. If you notice persistent odor, consider replacing the insoles or using odor-absorbing inserts. Regularly rotating sneakers helps prevent permanent odor buildup and extends their lifespan. Easy DryVent’s practical approach is to minimize heat exposure while maintaining hygiene.
Common mistakes to avoid
Avoid using the dryer for any shoe with glued components that may soften under heat. Do not overload the drum or place wet shoes directly on the drum surface. Do not mix sneakers with heavy towels from older laundry; this can unbalance the load and cause excess wear. Lastly, avoid relying on the dryer as a sole drying method for sweaty or soaking-wet sneakers; always aim for balanced moisture removal. By sticking to low heat and careful loading, you reduce the risk of damage.
Quick-start checklist before you begin
- Verify care labels to confirm dryer suitability
- Remove laces and insoles; store separately if needed
- Place in mesh bag and balance with towels
- Use low heat and short cycles; monitor progress
- Check for warmth and odor; opt for air-drying if unsure.
Tools & Materials
- Mesh laundry bag(Place sneakers in its own bag to limit friction and protect laces.)
- Old towel or microfiber cloth(Balance load and absorb moisture to improve drying evenness.)
- Dryer balls or clean tennis balls(3-4 balls to improve air circulation and prevent clumping.)
- Pillowcase (optional)(Alternative bag if mesh bags are unavailable.)
- Care labels or manufacturer guidance(Check for any dryer restrictions or warnings on the shoe.)
Steps
Estimated time: Total time: 45-60 minutes
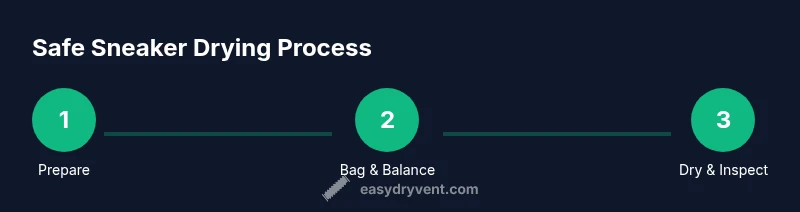
- 1
Check care and prep shoes
Inspect the care label for dryer warnings and identify materials. Remove laces and insoles to prevent tangling and to promote even drying. Brush off loose dirt so moisture evaporates more evenly during the cycle.
Tip: Always start with clean, dry shoes to reduce odor and buildup. - 2
Bag and balance
Place each shoe in a mesh laundry bag or pillowcase. Add one or two towels to balance the load and prevent the pair from banging around. Include 3-4 dryer balls to improve airflow and keep shoes from sticking together.
Tip: Balancing the load reduces drum wear and quiets the dryer. - 3
Set the dryer
Choose a low-heat or delicates cycle. Start with 15-20 minutes and stop early if the shoes warm up or if you notice any unusual smell. Check progress every 5 minutes in the first cycle to adjust as needed.
Tip: Low heat minimizes material damage while still drying moisture. - 4
Assess dryness and finish
If moisture remains, run a brief additional cycle in short bursts, then finish with air-drying if necessary. Remove shoes immediately to avoid over-drying the exterior, which can cause dryness or cracking.
Tip: Don’t let damp interiors stay in the shoes for long after the cycle ends. - 5
Post-drying care
Inspect for heat damage and residual odor. If necessary, replace insoles or refresh with odor absorbers. Allow to air-dry completely in a ventilated area before wearing.
Tip: Regularly rotating sneakers extends life and maintains fit.
Common Questions
Can all tennis shoes be dried in the dryer?
No. Only some materials tolerate dryer heat. Leather, suede, or shoes with sensitive foam or glued components are better air-dried. Always check the care label.
Not all tennis shoes are safe to tumble dry. Check the care label and avoid leather or glued components.
What materials are generally safe for the dryer?
Synthetic uppers and rubber soles with minimal foam are typically dryer-safe on low heat. Always verify with the care label and use a mesh bag.
Synthetic uppers and rubber soles often tolerate a low-heat dryer, but verify care labels.
How long does it take to dry sneakers in the dryer?
Most sneakers dry in 15-40 minutes on low heat with periodic checks. Time can vary by material and moisture content.
Expect about 15 to 40 minutes of low-heat drying, watching closely the first time.
Should I dry insoles and laces separately?
Yes. Remove insoles and laces and dry separately or reinsert only after completely dry to avoid constricted airflow.
Remove insoles and laces and dry them separately when possible.
What are safe alternatives if drying is unsafe?
Air-dry in a ventilated area with a fan, possibly using paper towels to absorb moisture and odor absorbers for freshening.
If the dryer isn’t safe, air-dry with good airflow and odor control.
What signs indicate overheating in the dryer?
Burnt smell, melted plastic, or deformed shapes indicate overheating. Stop the cycle immediately and reassess.
If you notice burning smells or deformed shapes, stop and re-evaluate.
Watch Video
Key Points
- Check care labels before attempting to dry any shoe
- Use low heat, a mesh bag, and towels for balance
- Avoid leather, suede, or heavily foamed sneakers in the dryer
- Balance the load to protect your dryer and shoes
- Air-dry if unsure or if the shoe’s care label prohibits tumble drying