What to Dry Shoes On in Dryer: Safe Drying Guide
Learn safe methods to dry shoes in a dryer with practical guidance. This Easy DryVent guide covers surfaces, prep, settings, and safer alternatives for many shoe types.

Dry athletic and canvas shoes safely in a dryer by using a low-heat, air-dry setting and a stable surface. Place two clean towels under the shoes, stuff the interiors with paper towels to retain shape, and pause midway to rotate the pair. Avoid high heat and direct contact with the dryer drum to prevent damage.
Why The Right Drying Surface Matters
If you're wondering what to dry shoes on in dryer, the surface you choose matters for safety and finish. According to Easy DryVent, the surface determines how heat and airflow reach the shoes, which directly affects shape retention, glue integrity, and odor control. A stable, cushiony base minimizes drum impact and distributes moisture more evenly, reducing the risk of warping. Poor surface choices can cause toe flattening, sole separation, or fabric scorching. In the 2026 Easy DryVent Analysis, we found that balance between cushion and airflow yields the best results for most athletic and canvas footwear. This is especially important for shoes with foam insoles or glued components that are sensitive to heat. By starting with a proper drying surface, you set the stage for a safer, more effective dry and protect your investment.
Tools & Materials
- clean towels or microfiber cloths(Two large towels to cushion the shoes and absorb moisture)
- dryer balls or clean tennis balls(Place around the shoes to improve airflow and prevent sticking)
- mesh laundry bag (optional)(Use for delicate shoes to prevent scuffing)
- low-heat or air-dry dryer setting(Avoid high heat; choose the warm or air-only cycle)
- paper towels or tissue(Stuff inside shoes to help shape and absorb moisture)
- clean workspace(Clear lint, remove items from the dryer drum, and ensure the area is safe)
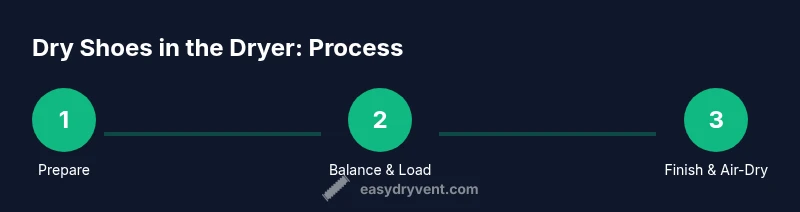
Steps
Estimated time: 30-45 minutes
- 1
Gather supplies and prep workspace
Collect towels, dryer balls, the shoes, paper towels, and a clear, dry area. Ensure the dryer drum is empty and the room is dry to prevent moisture buildup around your machine. This preparation reduces interruptions and keeps the process clean.
Tip: Having everything ready prevents scrambling mid-cycle. - 2
Inspect shoes for damage
Check for loose glue, cracks, or peeling material. If a shoe is damaged, avoid drying it in the dryer and consider air-drying instead. This prevents further damage and protects your appliance.
Tip: If glue is exposed, skip the dryer to prevent glue from melting. - 3
Stuff shoes with paper towels
Crush a few paper towels or tissue and stuff them into the toe box and the heel to help maintain shape and absorb moisture. Not overstuffing; you still need room for air to circulate.
Tip: Shaping the toe and heel prevents crushing during tumbling. - 4
Position shoes on towels with balance
Place the shoes on supporting towels on the dryer drum, with space between them. Add two to four dryer balls around the shoes to encourage airflow and reduce contact with the drum.
Tip: Aim for a balanced setup so the drum rotation doesn’t flip the shoes onto edges. - 5
Set the dryer to low heat or air-dry
Choose a low-heat or air-dry setting to minimize damage to adhesives and fabrics. Run for a short initial cycle (e.g., 10-15 minutes) and check progress. Pause the cycle if you notice overheating or loud banging.
Tip: Avoid hot or high-speed settings that can warp soles. - 6
Pause to rotate and reassess
If necessary, pause mid-cycle to rotate the shoes for even drying and adjust their position. Reinsert into the dryer and continue on the same setting until moisture diminishes.
Tip: Rotating helps prevent distortion caused by uneven airflow. - 7
Finish with air-dry and check for moisture
After the initial dry, remove the shoes and allow any remaining damp spots to air-dry completely. If significant moisture remains, repeat a short low-heat cycle and air-dry afterward to finish.
Tip: Air-drying prevents heat damage to sensitive materials.
Common Questions
Can you dry shoes with laces in the dryer?
Yes, but remove the laces if they are loose and may tangle. Place the shoes on towels and use a low-heat setting to prevent leather or glue damage. Check periodically and avoid high heat.
You can dry laced shoes by removing loose laces, using towels, and keeping the cycle on low heat. Check the shoes halfway through the cycle.
How long should I dry shoes in the dryer?
Drying time varies by shoe material and dryer power. Start with a 10-15 minute low-heat cycle, then check and repeat in short increments if needed. Finish with air-drying as required.
Start with a short low-heat cycle, check, and repeat as needed. End with air-drying if moisture remains.
Will drying shoes in a dryer ruin adhesives?
High heat can soften or melt certain adhesives. Always use the lowest heat setting or air-dry, especially for shoes with glued parts or foam insoles.
Low heat or air-dry helps protect adhesives and cushioning materials.
Are leather shoes safe to dry in the dryer?
Most leather footwear should not be dried in a dryer. Air-dry in a well-ventilated area away from direct heat to maintain shape and prevent cracking.
Leather shoes should generally air-dry; avoid the dryer to prevent damage.
What if my shoes have foam padding?
Foam padding can distort or collapse under heat. Use air-dry or a very short, cool cycle, and finish with air-drying to restore shape.
Avoid heat with foam padding; air-dry to preserve shape.
Can I use a dryer rack for sneakers?
A dryer rack can help, but ensure items stay stable and do not hit the drum. Prefer flat towels as a baseline, and add racks only if they fit securely.
A rack can help if it fits and doesn’t rattle; otherwise use towels.
Watch Video
Key Points
- Use a low-heat or air-dry setting.
- Balance airflow with towels and dryer balls.
- Inspect shoes before drying to avoid damaging materials.
- Finish with air-drying to preserve shape and adhesives.