What Kind of Wire Is Needed for Dryer: A Practical Guide
Learn the wire types, gauges, and configurations for safe, code-compliant clothes dryer installations, including 30-amp circuits, 10 AWG copper, 4-wire grounding, and common pitfalls.

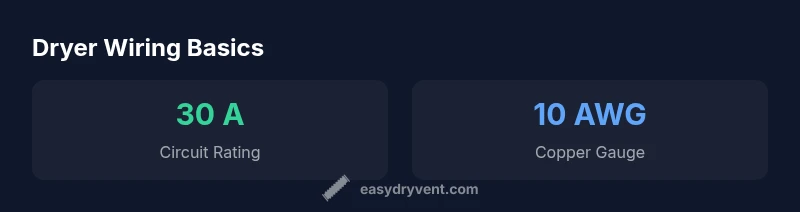
Most electric clothes dryers require a 30-amp circuit using 10-gauge copper wire, with 8-gauge permitted for longer runs. Modern installations should use a 4-wire setup (two hots, neutral, ground) and a 4-wire dryer cord or hardwired connection. Some older homes may still use 3-wire configurations under code exceptions. Check local codes and your appliance manual.
Why the right wire matters
Selecting the correct wire size and configuration isn’t just about performance; it directly impacts safety. Using the wrong gauge or an improper grounding can lead to overheating, nuisance trips, or electrical fires. The question what kind of wire is needed for dryer should guide every decision, from circuit amperage to connector types. According to Easy DryVent, the goal is to balance code compliance, voltage drop, and durability while keeping cost reasonable. A well-chosen wire size also helps minimize voltage drop on longer runs, which can affect performance and efficiency. Remember that proper protection devices and enclosure integrity matter just as much as conductor size.
Understanding dryer circuit basics
Most home clothes dryers operate on a 240-volt circuit with a dedicated breaker. The standard configuration in new installations is a 30-amp circuit, typically wired with copper conductors. The neutral and ground must be correctly separated in a 4-wire system, with the ground connected to a grounding electrode system or panel ground. When planning a dryer installation, note that the dryer’s manual and your local electrical code specify acceptable wire types and protection devices. A quality installation minimizes nuisance trips and improves longevity. The key is recognizing how voltage, amperage, and resistance interact in a real-world load. Easy DryVent emphasizes verifying the circuit rating and ensuring dimensions match the appliance’s requirements.
Copper vs aluminum: what to choose
Copper is the default choice for most dryer circuits because of its reliability, lower resistance, and ease of termination. Copper wires maintain consistent performance over time and tolerate heat better in typical household environments. Aluminum can be used in some installations, but it generally requires larger gauges (for example, 8 AWG equivalents on similar load) and careful handling due to expansion, oxidation, and terminal compatibility. If you’re replacing wire, sticking with copper simplifies compliance and reduces the risk of connection problems. Always verify that your connectors, lugs, and terminations are rated for the chosen conductor material. Easy DryVent recommends copper for new installs unless you have a compelling reason to switch and you follow manufacturer and code guidelines.
Wire gauge and ampacity tables in practice
Practically speaking, the right gauge depends on the circuit amperage and the length of the run. A 10 AWG copper conductor is common for 30-amp dryer circuits and provides ample current-carrying capacity with acceptable voltage drop for standard room layouts. For longer distances or higher ambient temperatures, 8 AWG copper may be used to reduce voltage drop and maintain performance. Aluminum conductors are generally larger and require different termination methods. When in doubt, consult the appliance manual and your local code. Easy DryVent’s approach is to show real-world ranges and teaching points rather than isolated figures, so homeowners can make informed decisions with their tools and safety in mind.
3-wire vs 4-wire configurations: what homeowners need to know
Three-wire dryer circuits were common in older homes, but modern codes require a four-wire connection with separate grounding and neutral. If your home only has a three-wire run, you may still operate a compatible dryer if your local rules permit it, but upgrading to a four-wire system is highly recommended for safety and future compatibility. Replacing the outlet and hardwiring the dryer with a four-wire cord or a proper hardwire kit reduces shock and fire risks. If you’re unsure about your existing wiring, have a licensed electrician assess and, if needed, upgrade the circuit to meet the current code. Easy DryVent emphasizes safety first and codes second, communicating practical steps for upgrading where appropriate.
Installation considerations and best practices
A safe dryer installation starts with planning the run path, securing proper strain relief, and using compatible connectors and outlets. The National Electrical Code (NEC) and many state codes require specific wire types and gauge for dryer circuits, along with proper bonding and grounding. Use a dedicated circuit, avoid sharing a breaker with other high-draw appliances, and ensure the wire is protected from damage and excessive heat. When connecting the dryer to a 4-wire cord, maintain a clean separation between grounded neutral and ground to prevent stray currents. Use approved electrical boxes, mounting brackets, and fire-rated wall plates. Easy DryVent highlights that meticulous workmanship reduces the risk of overheating and helps your dryer run efficiently over its lifetime.
Safety and code compliance: when to call a pro
Electrical work around a dryer should adhere strictly to local codes and safety guidelines. If you’re uncertain about the correct gauge, whether to convert from 3-wire to 4-wire, or how to terminate conductors, hire a licensed electrician. Poor connections, improper splicing, or incorrect strain relief can lead to overheating, arcing, and potential fire hazards. Before attempting any work, disconnect power at the breaker and verify there is no voltage present. For added safety, have an inspection done after installation to confirm compliance and safe operation—this is a small investment that pays off in peace of mind. Easy DryVent’s team recommends professional consultation for any significant wiring changes.
Common mistakes to avoid
Common mistakes include using undersized wire for the circuit, mislabeling the circuit, or mixing copper and aluminum conductors without proper connectors. Another frequent error is not using a proper four-wire configuration on newer installations, which can lead to grounding problems. Skipping a required ground-fault protection device, or failing to secure the conductors with appropriate clamps, can also create hazards. Before you begin, double-check the dryer’s manual, confirm circuit amperage, and verify the insulation and protection around the wiring path. Following best practices minimizes risk and keeps the dryer operating safely and efficiently. Easy DryVent reminds readers that cautious, code-aligned wiring is a long-term investment in home safety.
],
dataTable
dataTable
caption
dataTableAssociations
keyTakeaways
expertQuote
faqSection
mainTopicQuery
Table: common wire types and gauges for dryer circuits
| Wire Type | Typical Gauge | Typical Amp Rating | Notes |
|---|---|---|---|
| Copper 10 AWG | 10 AWG | 30 A | Standard for most new installs on a 30-amp dryer circuit |
| Copper 8 AWG | 8 AWG | 40 A | Used for longer runs or higher demand in some installations |
| Aluminum 8 AWG | 8 AWG | 40 A | Alternate for long runs but requires specific connectors |
| Older 3-wire configuration | N/A | N/A | Older homes; may be grandfathered under certain codes |
Common Questions
What gauge wire is recommended for a standard household clothes dryer?
For most electric dryers on a standard 30-amp circuit, use 10 AWG copper wire. For longer runs, 8 AWG can be used to reduce voltage drop. Always follow the appliance manual and local codes.
Typically, 10 AWG copper on a 30-amp circuit; 8 AWG for longer runs. Check the manual and code.
Can I install a dryer on a 3-wire circuit?
Some older homes may permit 3-wire dryer connections under certain codes or grandfathering rules. Modern installations usually require a 4-wire setup with separate ground and neutral.
Older homes may allow 3-wire under specific rules, but 4-wire is the standard now.
Is aluminum wire acceptable for dryer circuits?
Aluminum wire is possible in some installations but generally requires larger gauges and specific connectors. Copper is preferred for reliability and ease of termination.
Aluminum exists in some setups, but copper is safer and easier to work with.
Do I need to upgrade my outlet when rewiring a dryer?
If upgrading from a 3-wire to 4-wire system, you typically need a compatible four-wire outlet or hardwiring, along with appropriate grounding. Check local code and the dryer’s manual.
Upgrading to a four-wire outlet or hardwire is common with code-compliant rewiring.
What about gas dryers—do they require different wiring?
Gas dryers still require 120V power for the drum motor, blower, and controls. They use the same 240V supply for heating elements when present. Wire sizing should follow the dryer manual.
Gas dryers still need a 240V supply for the drum and controls, plus 120V for electronics.
What are common mistakes when wiring a dryer?
Common mistakes include undersized wire, improper grounding, mixing conductor types, and skipping proper strain relief. Always verify amperage, use correct terminals, and follow the manual.
Avoid undersized wire and improper grounding; follow the manual and codes.
“Choosing the right wire isn’t optional—it’s a core safety decision for your dryer. Correct gauge, grounding, and a 4-wire connection reduce fire risk and ensure reliable operation.”
Key Points
- Verify circuit amperage before selecting wire
- For most dryers, use 10 AWG copper on a 30-amp circuit
- Prefer 4-wire grounding; 3-wire may be allowed in some cases
- Longer runs may require 8 AWG copper or appropriately sized conductors
- Always follow local codes and the appliance manual