What Dryer Cycle for Shoes: Safe, Gentle Drying Guide
Discover the best dryer cycle for shoes, how to prep sneakers and leather, and safety tips to protect your dryer. Easy DryVent offers practical, guided advice for DIY homeowners.

To dry shoes safely, choose a delicate or no-heat cycle, ideally with towels to balance the load. According to Easy DryVent, the right cycle minimizes heat exposure and protects adhesives and materials. Prep footwear (remove laces, insoles), use a mesh bag for sneakers, and check progress every 20 minutes to avoid overdrying.
Why the right dryer cycle matters for shoes
Shoes are not a uniform laundry item. They come in different materials—canvas, mesh, leather, rubber, and foam—and each reacts differently to heat and tumbling. Using a harsh or inappropriate cycle can warp soles, separate adhesives, crack uppers, or shorten the life of athletic footwear. The wrong cycle also risks leaving moisture trapped inside, which invites odors and mildew.
This is why selecting the correct dryer cycle is more than a preference; it’s a safety and maintenance decision. In this guide, Easy DryVent outlines practical, material-aware drying strategies that homeowners can adopt without specialized equipment. The main idea is to minimize heat exposure, limit motion that strains seams, and control moisture removal. A gentle, low-heat or no-heat cycle, paired with appropriate balancing and containment, is typically enough for most casual footwear.
Key factors to consider include the shoe material, the presence of padding or adhesives, and whether the shoes are damp from sweat or water. For sneakers made of synthetic fabrics, a delicate cycle with a few towels to balance the load often works well. Leather or suede require extra caution; they may tolerate only air-dry or a deliberately extended cool-down period in a ventilated space. Always monitor for signs of heat distress and stop if you notice cracking, warping, or unusual odors.
Additionally, running a short test on one pair of old sneakers before loading the rest can prevent accidental damage. Your dryer’s manual will help you locate the delicate setting and any cap on dryer time. If you don’t have a dedicated heat-free option, consider air-drying on a rack or towel instead. By understanding the nuances of material behavior, you can extend the lifespan of your footwear and keep your laundry routine efficient.
What counts as a safe cycle for different shoe materials
Different shoe materials have different tolerances. Canvas and mesh fabrics are generally more forgiving and respond well to delicate or air-dry settings with minimal agitation. Synthetic sneakers (like many athletic shoes) usually tolerate a gentle tumble on low heat, but you should still avoid high heat that can shrink or warp the upper and distort the midsole. Leather and suede are the most sensitive; many experts recommend avoiding the dryer altogether for these materials and instead using air-drying methods with good ventilation. Foam insoles can deform if overheated, so keep the cycle short and inspect periodically.
When in doubt, test a small area or a single shoe before committing to a full load. If your dryer has an “no heat” or “air” option, that setting is ideal for most casual shoes. If you must use a tumble cycle, place each shoe in a separate, breathable bag or a mesh laundry bag to minimize friction. Always remove excess moisture first with a towel wipe or squeeze-and-blot technique, then allow a margin of safety when deciding drying time. Remember that materials like rubber or certain adhesives may emit fumes if overheated, so prioritize safety and patience over speed.
Other factors include the shoe’s construction and the presence of stitching, logos, or embellishments. Shoes with glued components can separate at high heat; shoes with stitched or reinforced seams are more resilient but still risk warping under aggressive cycles. By matching the cycle to the material and integrating protective steps, you can balance dryer efficiency with footwear longevity.
Preparation: how to prep shoes before drying
Preparation is where most people improve outcomes. Start by removing laces and taking out insoles to help air reach all parts of the shoe. Laces can tangle or bunch inside the drum, so store them separately. Wipe away dirt or mud with a damp cloth and allow the shoes to dry surface moisture before loading them into the dryer. If shoes are very damp, pat them with a towel to remove excess moisture—this reduces the time needed in the dryer and protects internal components.
Choose a mesh bag or pillowcase to contain each shoe, especially for sneakers or shoes with delicate uppers. Placing two shoes of similar weight inside one mesh bag helps balance the load and reduces rattling. Place inflated or bulky items in a way that they don’t press against the dryer’s drum walls. For white sneakers and lighter fabrics, a short wash of residual water on the surface is fine, but avoid saturating the inner materials.
Balance the load: add towels or other soft items to fill gaps and prevent percussive banging. This not only protects the shoes but also minimizes wear on the drum and reduces stress on the dryer motor. Ventilate the laundry area if possible, especially when drying multiple pairs, to mitigate humidity buildup and any warmth that could affect indoor air quality.
Drying scenarios: sneakers, sandals, dress shoes, and more
Athletic sneakers and canvas sneakers are the most common items people dry inside a home dryer. For these, a delicate or low-heat cycle, with a few towels to balance the load, works well. Sneakers commonly benefit from being placed in a breathable bag and dried in short bursts, checking progress after 15–20 minutes. If you notice curvature or the shoe’s shape starting to distort, stop the cycle and reduce heat further or air-dry entirely.
Sandals and flip-flops with foam or rubber components often dry quickly, but you should avoid heat-sensitive materials like leather straps or decorative hardware. Consider air-drying sandals on a rack if the weather is mild and dry; a few warm days can speed this process without stressing the materials. Dress shoes, especially leather formal footwear, usually should not go in the dryer. Instead, use a fan-assisted airflow or a dedicated shoe dryer, or simply air-dry in a ventilated space. When you must use heat, keep cycles as short as possible and monitor closely for signs of damage.
For specialty footwear (glow-in-the-dark soles, rubberized uppers, or heavily glued constructions), consult the manufacturer guidelines first. If the shoes carry any care labels or brand-specific maintenance instructions, follow those recommendations to minimize risk and preserve warranty coverage.
Common mistakes and how to avoid them
A frequent mistake is using a standard high-heat cycle on all shoe types. This can warp uppers, degrade glue, and shorten the lifespan of the sole. Always opt for a delicate or air-dry setting and avoid cranking up the heat. Another error is loading shoes without balancing the drum; heavy items banging against the drum can fatigue internal components. Use towels or other soft items to cushion and balance the load.
Over-drying is also problematic. Shoes can become stiff, brittle, or misshapen when left in heat for too long. Start with small time increments and remove items as soon as they’re dry. Don’t rely on the dryer alone to pull moisture from sweat; consider air-drying overnight in a ventilated space for best results. Finally, neglecting dryer maintenance—like a clogged lint filter or a blocked vent—can reduce efficiency and pose fire hazards. Clean lint traps after every load and keep the dryer vent clear.
If in doubt, when you have leather or suede, avoid the dryer entirely and use air-drying methods with proper protection for the materials. Always read the footwear care labels and, if uncertain, contact the manufacturer for approved drying methods. The general rule is gentle, controlled drying over aggressive heat.
Maintenance and aftercare for your dryer and footwear
Keeping your dryer and footwear in good condition depends on routine maintenance and mindful drying practices. After drying shoes, inspect the drum for any scuffs or material transfer and wipe down the interior to remove lint and moisture residues. Regularly clean the lint trap and ensure the vent hose is free of obstructions to prevent overheating and improve efficiency. A clean vent system lowers energy use and reduces the risk of dryer fires.
For footwear, allow ample air circulation after drying, particularly for leather and suede. Use shoe trees or stuffing (newspaper or towel) to help preserve shape as they cool. Do not stack multiple drying sessions back-to-back if your shoes still feel damp; moisture trapped inside footwear can cause odor and mold. If you’re dealing with persistent odors, consider a winterize routine like placing a deodorizing sachet inside the shoes between wears and ensuring proper drying space is free of moisture buildup.
Finally, review the manufacturer’s guidance on heat exposure for each material. When in doubt, prioritize air-drying or a strictly no-heat cycle for delicate materials. A mindful, methodical approach keeps both your footwear and the dryer functioning safely for years.
Quick-start recap: choosing cycles, prep steps, and safety reminders
- Use delicate or no-heat cycles for most shoes; avoid high heat except for purpose-built footwear that tolerates it.
- Prep thoroughly: remove insoles, laces, wipe away moisture, and balance the load with towels.
- Use a mesh bag for sneakers to minimize abrasion and friction.
- Monitor progress and avoid overdrying; several short sessions are safer than one long run.
- Maintain the dryer: clean lint traps and keep vents clear to reduce fire risk and improve efficiency.
Tools & Materials
- Dryer with delicate or no-heat setting(Check that your model includes a delicate or air-dry option)
- Mesh laundry bags or breathable pillowcase(One bag per shoe to minimize friction)
- Clean towels or balancers(2-4 towels to balance the load)
- Shoe drying rack or flat surface(Optional if your dryer is heavily loaded)
- Ventilation for drying area(Open window or run a fan to reduce humidity)
- Soft brush or cloth(For pre-cleaning dirt from uppers)
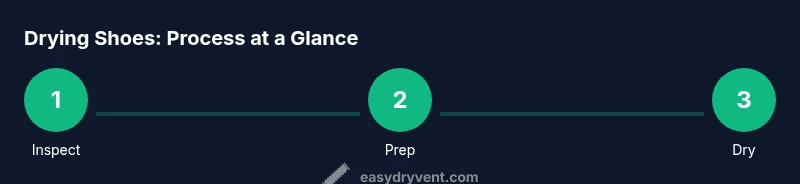
Steps
Estimated time: 45-60 minutes
- 1
Inspect shoes and materials
Examine each pair for material type, adhesives, and any care labels. This helps determine whether a delicate or air-dry cycle is appropriate. If a shoe has leather or suede, plan to avoid the dryer or use minimal heat.
Tip: When in doubt, test a small area on the shoe before proceeding. - 2
Remove laces and insoles
Take out laces and insoles to improve airflow and reduce pressure points inside the shoe. Optionally wash laces separately if they are dirty. Drying insoles separately prevents them from warping and speeds up the process.
Tip: Laces can tangle in the dryer; place them in a small mesh bag. - 3
Blot excess moisture
Use a towel to blot the exterior and wipe away visible moisture. This step reduces total drying time and minimizes the risk of pooling water that can damage the dryer or create odor.
Tip: Avoid wringing or twisting; this can twist sole shapes. - 4
Load shoes in mesh bags and balance
Place each shoe in its own mesh bag to limit abrasion. Load bags into the dryer with towels or balancers to keep the drum balanced and reduce banging.
Tip: Ensure bags are loose enough to allow air to circulate. - 5
Set cycle and run short intervals
Choose a delicate or no-heat cycle and run short intervals, checking after 15–20 minutes. If still damp, run another short cycle rather than extending heat.
Tip: Stop early if you notice heat distress or unusual odors. - 6
Air-dry final and inspect
After the dryer run, remove shoes and inspect for remaining moisture. If needed, air-dry on a rack or ventilated surface until fully dry to preserve shape and material integrity.
Tip: Use a fan to speed up the air-drying phase if necessary.
Common Questions
Can you dry sneakers in a standard dryer?
Yes, but only with a delicate or no-heat cycle and in a mesh bag to minimize friction. Avoid high heat to protect the adhesive and fabric. Dry in short intervals and monitor progress.
Yes, sneakers can be dried in a standard dryer if you use a delicate cycle and a mesh bag, and you should watch them closely.
What setting should I use for shoes?
Use a delicate or air-dry setting with low heat, and place shoes in mesh bags or a laundry sock to limit movement. Balance the load with towels to prevent banging.
Choose a delicate or air-dry setting and balance the load with towels.
Is it safe to dry leather or suede shoes in the dryer?
Generally not recommended. Heat can crack leather and damage suede. If you must, use the coolest setting and air-dry as much as possible or use professional leather care methods.
Leather and suede are best air-dried; avoid the dryer when possible.
How can I dry shoes faster without heat?
Use a fan or open air-drying space and blot moisture beforehand. Stuffing shoes with newspaper or towels can help absorb moisture while venting aids faster drying.
Fan and air-drying speed up the process without heat.
Can drying shoes in the dryer damage my machine?
If used improperly, there is a risk of wear on drum components or lint buildup. Always monitor loads, clean the lint trap, and keep vents clear to minimize risk.
Only if you ignore safety steps; regular maintenance reduces risk.
Watch Video
Key Points
- Choose delicate or no-heat cycles for most shoes.
- Prep shoes completely and balance the load for safety.
- Avoid high heat on leather or suede footwear.
- Use mesh bags to protect uppers and laces.
- Maintain dryer vents and lint traps regularly.