Frigidaire Affinity Dryer Maintenance: A Practical DIY Guide
Comprehensive DIY guide for maintaining a frigidaire affinity dryer, focusing on safety, efficiency, and reliable performance. Easy DryVent shares practical tips, step-by-step checks, and troubleshooting guidance for homeowners seeking hands-on maintenance.

In this guide you will learn how to inspect, clean, and troubleshoot a frigidaire affinity dryer for safety and efficiency. You'll follow a step-by-step maintenance routine, identify common dryer issues, and know when to call a professional. According to Easy DryVent, regular lint removal and vent checks reduce fire risk and improve drying performance.
Understanding the Frigidaire Affinity Dryer and Its Vent System
The Frigidaire Affinity dryer family is designed for efficient drying in compact, modern homes. Central to performance is the vent system and lint management. The Easy DryVent team emphasizes that the dryer's exhaust path, from the front drum to the exterior vent, directly affects heat buildup, airflow, and overall safety. A clean lint filter and an unobstructed vent route are not optional; they form the core of reliable operation. Regular checks help prevent reduced airflow, longer cycle times, and potential fire hazards. When you begin, inspect the exterior vent hood for debris and ensure the vent run is as short and straight as possible. Easy DryVent analysis shows that even minor bends or crushed ducts can reduce airflow by noticeable margins, increasing energy use and motor wear.
For readers tackling a frigidaire affinity dryer, remember: the vent system and lint management are the first things to check if you notice slow drying or overheating. This is where most DIY maintenance makes the biggest difference in both safety and performance.
Safety Foundations for DIY Maintenance
Safety is the foundation of any maintenance task. Before you touch the appliance, unplug it and disconnect the power if you can reach the plug safely. If your unit is gas-powered, shut off the gas supply according to local codes and ensure there’s adequate ventilation in the work area. Wear gloves to protect your hands from sharp metal edges and use a flashlight to inspect tight spaces. Avoid working on a live electrical component or with wet hands. Easy DryVent emphasizes that you should never bypass safety steps or rush through tasks; a moment of caution now prevents costly damage later. Keep children and pets away from the workspace, and ensure the area around the dryer remains dry to prevent slips or electric shocks.
Tools and Materials You’ll Need (Overview)
Before you start, assemble the following tools and materials so you aren’t hunting for parts mid-task. Having the right gear ready reduces downtime and keeps the project focused. This section provides an overview of essentials and optional items that speed up the process.
- A vacuum cleaner with a hose attachment for lint and dust
- A microfiber cloth for delicate surfaces
- A screwdriver set and a nut driver for panel access
- A flashlight or headlamp to illuminate hard-to-see areas
- Replacement lint screen or spare screens
- Exterior vent brush or dryer vent cleaning kit
- Flexible duct brush for the interior vent run
- Duct tape or foil tape for securing connections
- A moisture- and heat-safe sealant if needed for repairs
- A digital thermometer or IR thermometer to verify heat levels when testing
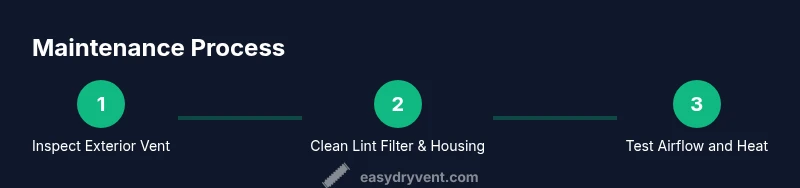
The Step-by-Step Maintenance Routine (Overview)
This section lays out a high-level maintenance routine that you will implement during the hands-on steps. The routine focuses on three core pillars: lint management, vent integrity, and heat-sensing checks. You will follow a logical sequence that minimizes disruption and maximizes safety. After you complete the hands-on steps, run the dryer on a no-load or air-dry setting to observe airflow and heat output. If you notice inconsistent heat, unusual noises, or a burning smell, stop immediately and consult a professional. Easy DryVent notes that consistent, small checks are more effective than infrequent, large interventions.
Troubleshooting Common Frigidaire Affinity Dryer Issues
Dryers sometimes reveal problems that are easy to address with routine maintenance. Common issues include long drying times, excessive heat, and a persistent musty odor. Long drying times are frequently caused by restricted airflow from lint buildup or a blocked vent. Excess heat may indicate a blocked vent, a malfunctioning moisture sensor, or a clogged blower housing. A musty smell can come from damp lint buildup inside the ductwork or a moisture issue in the drum area. By systematically inspecting the lint trap, vent duct, and exhaust path, you can often identify and resolve these symptoms without replacing major components. If the problem persists after cleaning and reseating connections, it’s time to consider professional diagnostics.
Vent Cleaning Best Practices and Frequency
Vent cleaning should be performed regularly to maintain safe and efficient operation. The general recommendation is to inspect the vent every 3-6 months for households with regular use, and at least once a year for lighter usage. When cleaning, start at the exterior vent cap and work inward, removing lint and debris along the entire length of the duct. Use a vent brush or flexible brush designed for dryer ducts to avoid damaging the duct. After cleaning, reattach and seal joints securely to prevent leaks. If you encounter resistance or signs of damage, stop and replace sections rather than forcing a passage through a kink or crushed area. Regular maintenance reduces energy consumption and prolongs the life of the unit.
Energy Efficiency and Drying Performance Tips
Efficient dryers use less energy when cycles are chosen wisely and lint is managed consistently. Opt for the Auto Dry or Sensor Dry setting if your model supports it, as these modes prevent over-drying and save energy. Clean lint screens after every load, and ensure the vent is free of obstructions to maximize airflow. A well-maintained vent reduces cycling time and lowers the risk of overheating. Consider scheduling seasonal checks and replacing damaged ducts promptly. Over time, even modest improvements in airflow can yield noticeable energy savings and faster drying results.
When to Call a Pro
DIY maintenance covers many fundamentals, but some issues require professional expertise. If you notice persistent overheating, unusual noises from the blower, or visible damage to ducts, vents, or seals, contact a licensed technician. Replacing compromised ductwork or faulty heat sensors is best left to trained professionals who can test safety systems and ensure proper venting. If you smell burning during operation, unplug the unit immediately and schedule service. Early professional intervention can prevent costly repairs and ensure your Frigidaire Affinity dryer remains both safe and efficient.
Tools & Materials
- Vacuum with hose attachment(Use a narrow nozzle to reach tight spaces and behind the lint trap.)
- Microfiber cloth(For wiping down the lint trap housing and drum rim.)
- Screwdriver set(Phillips and flat-head for access panels.)
- Nut driver(For vent connections and clamp screws.)
- Flashlight or headlamp(Illuminate dark duct runs and behind panels.)
- Replacement lint screen(Keep on hand for wear or damage.)
- Exterior vent brush(Clears debris from outdoor cap and short duct runs.)
- Flexible duct brush(Reaches bends inside the vent run.)
- Duct tape or foil tape(Seal duct joints after cleaning.)
- Thermal/IR thermometer(Check exit air temperature for anomalies.)
Steps
Estimated time: 60-90 minutes
- 1
Disconnect power and prepare workspace
Unplug the dryer and move it gently away from the wall to access the vent and panels. Confirm there is no power at the plug and that the area is dry. This step prevents electric shock and protects you while you inspect internal components.
Tip: Always verify absence of power with a non-contact tester before touching the plug or rear panel. - 2
Inspect exterior vent and hood
Go outside and look for lint, debris, or obstructions around the vent hood. Clear any buildup from the exterior cap and ensure the vent run is clear for a smooth exhaust path.
Tip: Use a flashlight to spot gaps or crushed sections you can’t see from the inside. - 3
Remove lint screen and clean housing
Take out the lint screen and wipe its housing. If the area behind the screen is dusty, use a vacuum to remove buildup. Reinsert a clean screen or replace if damaged.
Tip: Do not wash a metallic lint screen with harsh chemicals that could corrode the screen. - 4
Inspect vent hose and connections
Check the vent hose for kinks, cracks, or disconnections. Tighten clamps and reseal joints as needed to prevent leaks and ensure proper airflow.
Tip: If you find damaged sections, replace the hose rather than attempting a quick fix with tape. - 5
Clean interior blower housing and drum area
With the dryer unplugged, use the vacuum and brush to clean the blower housing and the drum rim. Remove any lint clusters you can reach without disassembling essential components.
Tip: Be careful around fans and belts to avoid misalignment or injury. - 6
Reconnect vent system and test run
Reconnect all ducts securely, reattach the exterior vent cap, and plug the unit back in. Run a no-load or air-fluff cycle to check airflow and heat consistency. Listen for unusual noises.
Tip: If you detect abnormal heat during the test run, stop and recheck connections before operating with laundry. - 7
Document maintenance and schedule next check
Record the date of maintenance and note any parts replaced or cleaned. Schedule a follow-up inspection in 3–6 months or sooner if you notice changes in performance.
Tip: Keep a simple maintenance log to track when you last cleaned ducts and screens.
Common Questions
How often should I clean the lint filter on a Frigidaire Affinity dryer?
Clean the lint filter before every load. Inspect for tears or damage and replace as needed to maintain airflow.
Clean the lint filter before each load and check for wear; replace if damaged.
Can a clogged vent cause longer drying times and overheating?
Yes. A clogged vent restricts airflow, extends drying time, and can lead to overheating. Regular vent cleaning helps prevent this.
A clogged vent slows drying and can overheat the dryer.
What safety precautions should I take before doing maintenance?
Unplug the dryer, turn off gas if applicable, dry the area, and wear protective gloves. Avoid working near live circuits.
Always unplug first, then ensure the area is dry and safe to work in.
Is it safe to clean the vent from the outside without removing the dryer from the wall?
If you can access the exterior vent safely, you can clean it with appropriate brushes. Do not force or bend ducts excessively.
If you can reach the outside vent safely, you can clean it, but avoid bending ducts or forcing parts.
How do I know if I need a professional vent cleaning?
If lint buildup returns quickly after cleaning, or you notice reduced airflow or persistent odors, schedule a professional inspection.
If lint keeps coming back or you smell odd odors, call in a pro.
Watch Video
Key Points
- Inspect vent and lint trap during every use
- Keep exterior vent clear to prevent overheating
- Document maintenance and schedule regular checks
- Use proper tools to avoid damaging ducts
- Call a pro if you detect persistent issues or damage