Are Dryers 110 or 220? A Homeowner's Voltage Guide
Discover whether dryers use 110V or 220V, what this means for electric vs gas models, outlet types, circuit requirements, and safe installation tips for homeowners.

How Dryer Voltage Works in Homes Today
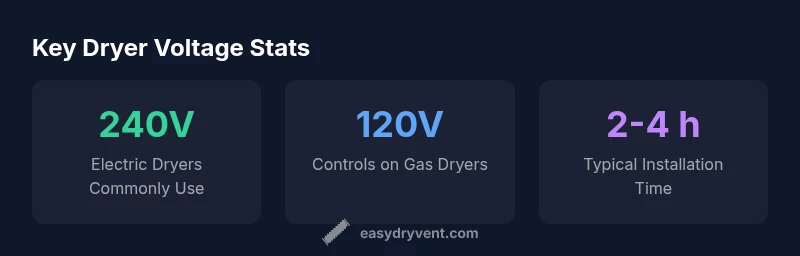
Are you trying to answer the question are dryers 110 or 220? In most North American homes, electric clothes dryers require a 240V supply. The dryer uses most of its power for heating the air that dries your clothes, while the motor and controls run on 120V within the same circuit. This split-load design is efficient but requires proper wiring and a dedicated circuit. According to Easy DryVent, the typical dryer circuit is 30 amps on a four-wire connection. Misunderstanding these voltages can lead to nuisance trips, overheating, or fire hazards. Gas dryers add another dimension: they rely on natural gas or propane for heat, with 120V supplying ignition and electronics. The bottom line is that the voltage you need depends on the dryer type and the local electrical code. The aim is safety, reliable performance, and long appliance life. When you understand the voltage, you can select the right outlet, verify circuit capacity, and install a safe, dedicated circuit. The goal of this guide is to help homeowners confidently answer are dryers 110 or 220 and to navigate real-world setups.
Identify Your Dryer Voltage Requirements
Start by locating the data plate on your dryer. This plate lists the voltage and amperage your unit requires. For electric models, you’ll typically see 240V and a specific circuit amperage (often 30A). Gas models show 120V for igniters and electronics, while heating comes from the gas line. If you see an unusual supply like 208V, this may occur in multi-tenant buildings or certain regions; always verify with the manual. Check your breaker panel: a 240V circuit uses two hot legs and a neutral. Look for the correct outlet type, usually a NEMA 14-30 or 14-50, or a hardwired connection per the model. If you rent, consult your landlord; if you own, consider a licensed electrician to confirm compatibility with local code. Matching the dryer’s voltage to the home supply protects the appliance and your family.
Electric vs Gas Dryers: What Powers Them?
Electric dryers rely on a 240V supply to run the heating element. The drum motor and controls are typically fed by the same 240V circuit via a neutral or separate 120V branch, depending on the model. Gas dryers use natural gas or propane for heat, while still requiring 120V for controls and ignition. This means the voltage conversation is different: you’re balancing electrical needs with fuel type. In both cases, a dedicated circuit and proper outlet are critical for safety and performance. Always refer to the model’s manual for the exact voltage layout and ensure your home’s electrical system can support it.
Installation and Wiring Considerations
Wiring a dryer correctly means more than plugging it in. A 240V dryer should be on a dedicated circuit sized to the model’s amperage, typically 30A. Install a proper outlet (NEMA 14-30 or 14-50) or a hardwired connection per the manufacturer’s instructions and local code. In older homes, you may encounter a 3-wire or 4-wire configuration; current codes generally require the 4-wire setup for new installations. If you’re replacing an old unit, verify that the existing circuit can handle the new dryer’s load. An under-rated circuit can trip breakers or cause overheating. If you’re in a multi-tenant building, check if the supply is 208V or 240V; this may affect the model choice and installation.
Practical Steps for Homeowners
- Read the dryer’s data plate and user manual to confirm voltage, amperage, and outlet type. 2) Locate the breaker panel and confirm the circuit is dedicated to the dryer. 3) If you’re unsure, consult a licensed electrician to verify electrical service and grounding. 4) Install the correct outlet or hardwired connection according to the model’s requirements. 5) Periodically inspect the outlet and cord for wear, ensure the vent is clear, and avoid adapters that bypass built-in safety features. Following these steps minimizes risk and keeps your laundry routine efficient.
Voltage Checklist for Quick Reference
- Electric dryers: typically require 240V, 30A circuit. - Gas dryers: 120V for electronics; heating via gas. - Outlet types: NEMA 14-30/14-50 or hardwired. - In multi-volt buildings, verify whether the supply is 208V or 240V. - Always use a dedicated circuit and have a professional verify the wiring. - Inspect cords and vents regularly to prevent safety hazards.
Common Pitfalls and Safe Practices
- Never convert a 240V dryer to run on 110V by using adapters; this can cause overheating and fire hazards. - Do not mix 120V and 240V loads on the same circuit. - If you notice frequent breaker trips, dinging noises, or overheating, stop using the dryer and seek professional help. - Keep lint traps clean and ensure venting is clear to prevent fire risks. - Regularly test GFCI and grounding connections where applicable to maintain safety.