What Is Wrong With My Samsung Dryer? A Practical Troubleshooting Guide
A practical, safety-focused guide to diagnose common Samsung dryer problems. Learn to identify power, heat, and vent issues, perform quick fixes, and decide when to call a pro — all from Easy DryVent.

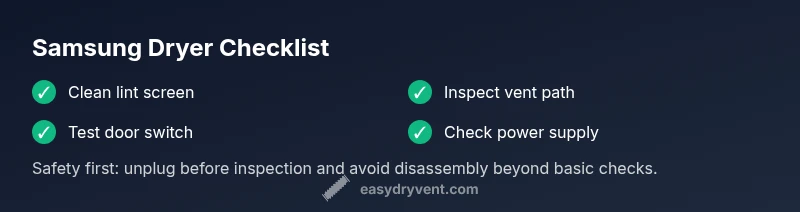
Most Samsung dryer faults come from two simple issues: a clogged lint filter or vent, and a tripped thermal fuse. Start by cleaning the lint screen, inspecting the vent for obstructions, and resetting the dryer’s circuit breaker. Then verify the door switch and start button are functioning; if the problem persists, proceed with deeper checks.
What is Wrong with My Samsung Dryer? Quick Diagnostic Mindset
If you’re wondering what is wrong with my samsung dryer, start with the basics. According to Easy DryVent, most issues fall into a small set of root causes: lint or vent blockages, a tripped thermal fuse, or faulty safety switches. These problems produce obvious symptoms like a dryer that won’t start, no heat, or unusual noises. In this section we’ll map those symptoms to practical checks you can perform safely, using a methodical, step-by-step approach.
Safety First: Power, Grounding, and Vent Safety
Before you poke around a hot appliance, unplug the dryer and turn off the circuit breaker. Inspect the power cord for damage and verify the outlet is delivering power with a known-good device. Poor grounding, loose connections, or a tripped GFCI can mimic dryer failure. Also consider vent safety: a blocked vent can cause overheating and trigger the thermal fuse. Easy DryVent emphasizes never bypassing safety components.
Common Causes: Lint, Vent Blockage, and Thermal Fuse
A clogged lint filter and restricted vent path are by far the most frequent culprits. They reduce airflow, lead to overheating, and can trip protective devices. Other frequent issues include a faulty door switch or a failed start button. In Samsung dryers, sensors may also misinterpret drum position or overheating, halting cycles unexpectedly. This block will help you separate symptoms from likely causes with practical checks.
Quick Checks You Can Do Now
- Inspect and clean the lint screen from every load. A dirty screen dramatically reduces airflow.
- Check the vent path for kinks, crush points, or visible obstructions; use a vent brush or robotic cleaner if available.
- Test the door switch by gently pressing it while the dryer is plugged in; if the switch feels loose or won’t click, replace it.
- Try a power cycle: unplug for 60 seconds, then plug back in and run a short test cycle. These steps are safe, repeatable, and often resolve immediate symptoms that frustrate homeowners.
Diagnostic-Flow Perspective: Symptom → Diagnosis → Solutions
This section aligns with a systematic troubleshooting flow. Start with the symptom you observe (no heat, no start, or unusual sounds), consider likely causes (power, vent, safety switches), and apply the corresponding fixes in order of simplicity. If you find yourself stuck, revert to the safest option first: power and vent inspection, then proceed to component testing.
Preventive Care and Safe Maintenance
Develop a routine that includes cleaning the lint screen after every load, inspecting the vent path monthly, and testing safety switches annually. Keeping the vent clear not only improves drying performance but also reduces fire risk. Easy DryVent recommends documenting when you perform inspections to track wear and anticipate replacements before a failure occurs.
When to Call a Professional
If your Samsung dryer still won’t operate after the basic checks, or if you encounter a burned smell, burning noise, or a warm-to-hot exterior during operation, it’s time to call a qualified technician. Electrical components like fuses and control boards require specialized tools and knowledge. A pro can safely diagnose internal faults and ensure code-compliant repairs.
Steps
Estimated time: 25-45 minutes
- 1
Verify power and safety
Unplug the dryer, check the outlet with a known-good device, and reset the circuit breaker. Confirm the dryer is properly grounded and the 240V supply is stable.
Tip: Do not bypass the breaker; a tripped breaker often signals an underlying issue. - 2
Inspect the lint screen and vent
Remove and clean the lint screen thoroughly. Inspect the vent hose for kinks or crushing and clear any blockages from the vent run.
Tip: Even small blockages dramatically reduce airflow. - 3
Test the door switch and controls
With the dryer unplugged, disconnect the switch wires to test continuity or replace the switch if it’s unresponsive.
Tip: A faulty door switch is a very common, inexpensive fix. - 4
Power cycle and run a diagnostic cycle
Plug back in, reset the breaker if needed, and run a short test cycle to observe behavior.
Tip: If the test cycle runs, observe heat delivery and door latch function. - 5
Check for overheating and the thermal fuse
If you notice heat is absent or smells burnt, consult a professional to test or replace the thermal fuse and inspect the heat source.
Tip: Thermal fuses require precise testing and may indicate venting issues. - 6
Assess control board symptoms
Electrical board faults may manifest as unresponsive controls or random cycle interruptions; a pro diagnosis is recommended here.
Tip: Document any error codes shown on the display for the technician.
Diagnosis: Dryer won't start, no heat, or stops mid-cycle
Possible Causes
- highPower issue or breaker tripped
- mediumDoor switch or start button faulty
- mediumLint screen or vent blocked
- lowThermal fuse blown or overheating
Fixes
- easyCheck outlet and reset the breaker; ensure dryer is powered with a proper 240V supply
- easyTest the door switch and replace if open or unresponsive
- easyClean lint screen and inspect vent for obstructions; clear with brush or vacuum if needed
- hardIf overheating occurred, replace the thermal fuse and inspect the vent for root causes
Common Questions
Why won't my Samsung dryer start?
Common causes are a power issue, a faulty door switch, or a tripped breaker. Verify power, inspect the door switch, and reset the circuit before trying again.
First check the outlet and breaker, then test the door switch and try again.
My Samsung dryer runs but there’s no heat. What should I check?
No heat often comes from vent blockages, a blown thermal fuse, or a clogged lint filter. Clean the lint screen, inspect the vent, and have the fuse tested if heat still doesn’t appear.
Clear the lint and vent, then check the fuse if heat isn’t produced.
Why does my dryer stop mid-cycle?
Mid-cycle stops are typically due to overheating protection, vent issues, or sensor faults. Check airflow, reset power, and consider professional testing if it persists.
Ensure airflow and cooling paths are clear, then reset the cycle.
How often should I clean the lint filter?
Clean the lint filter after every load to maximize efficiency and prevent fires. Regular vent checks help maintain safe operation.
Always clean the lint screen after each load.
When should I call a professional?
If basic checks don’t restore function, or you detect burning smells, unusual noises, or heat issues, call a qualified technician for a safe, code-compliant repair.
If in doubt or you smell burning, contact a professional.
Watch Video
Key Points
- Start with power and vent checks for fastest results
- Lint and vent cleanings are the most common fixes
- Safety components (door switch, thermal fuse) are frequent failure points
- Call a pro when electrical tests or heat issues arise