What Happens If Dryer Hose Comes Off: Urgent Troubleshooting Guide
Discover the risks when a dryer vent hose comes off and follow a practical, urgent troubleshooting plan to reconnect safely, improve drying efficiency, and prevent fires.

When the dryer vent hose comes off, hot air and lint vent into the room, causing longer drying times, higher energy use, and a serious fire hazard. Reconnect the hose securely, recheck clamps, and test airflow to ensure safe operation. This troubleshoot guide from Easy DryVent provides a practical, step-by-step approach to restore safe, efficient drying.
Understanding the Risks When the Dryer Hose Comes Off
A disconnected dryer vent hose can dramatically increase risk factors in your home. According to Easy DryVent, a loose or disconnected hose allows hot air and lint to escape into living spaces, which raises fire risk, reduces dryer efficiency, and can promote moisture problems like mold. When the hose detaches, clothing dries unevenly and takes longer, leading to higher energy costs. Even a small leak can compromise indoor air quality and create a secondary hazard for children and pets. In this section we’ll unpack what happens physically, emotionally, and financially when the hose comes off, so you know why a quick, correct fix matters. The connection point at both ends (dryer outlet and wall vent) is where most failures begin, so focus your attention there first. For DIY enthusiasts, this is a straightforward maintenance task that pays off in safety and performance.
Common Causes of Hose Detachment
Hose detachment usually happens due to a combination of wear, vibration, and improper installation. The most frequent culprits include loose hose clamps, damaged or cracked hoses, and a poorly seated vent connection at the dryer or wall vent. Over time, the hose can deteriorate from heat and lint abrasion, especially if a metal hose isn’t used or clamps aren’t rated for high temperatures. Obstructions in the vent path or kinked hoses also increase stress on the connection, accelerating loosening. Understanding these causes helps you target the right part of the system during inspection and avoid repeating the same mistake.
Immediate Safety Steps You Must Take Right Now
If you notice the hose has come off, stop using the dryer and perform immediate safety steps. Unplug the unit to prevent any chance of startup while you work. Do not touch hot surfaces. Visually inspect the hose and connections, and keep lint and debris away from the dryer exhaust area. If you smell burning or see visible smoke, evacuate and call emergency services. The first few minutes are critical for safety and set the stage for a proper fix. After disconnecting power, you’ll want to prepare the area: wear gloves, have a flashlight, and gather replacement parts ( hose, clamps, foil tape ) before you begin.
Diagnostic Flow Overview: Symptom → Diagnosis → Solutions
This section provides a high-level diagnostic flow that you can follow before attempting a fix. Start with the simplest checks: confirm the hose is detached, inspect clamps for tightness, and look for cracks or tears in the hose. If the hose and clamps appear intact but the hose still detaches, the issue may be a misaligned vent or a collapsed dryer vent pathway. If you detect heat at the hose end during an initial test, stop and reassess—excess heat can indicate a blockage or improper venting. The goal is to narrow down whether the problem is mechanical (hose/clamps), material (damaged hose), or ventilation (blocked duct).
Step-by-Step Fix: Reattach and Secure the Hose (Most Common Cause)
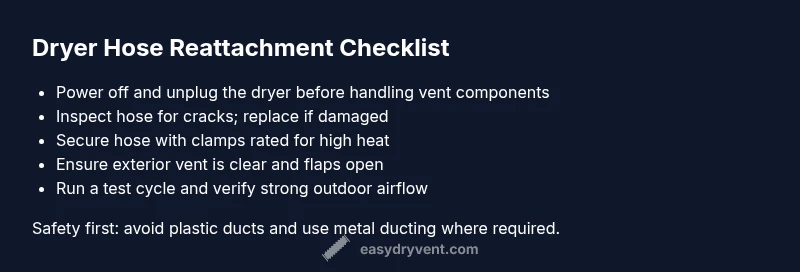
Follow these steps to fix the most common issue: a loose or detached hose. Start by powering off and unplugging the dryer. Remove the hose and inspect both ends for cracks or wear. Replace damaged components. Reattach the hose to the dryer outlet and wall vent, ensuring a snug fit. Use two qualified clamps or foil duct tape approved for dryer use to secure connections. Finally, run a test cycle with airflow checked at the exterior vent to confirm proper exhaust and absence of leaks.
Safety Tips, Warnings, and Common Mistakes to Avoid
Safety is non-negotiable. Always unplug the dryer before handling any vent components. Use metal ducting designed for high temperatures and avoid plastic or foil-only connections where not rated for heat. Do not rely on duct tape alone; it can fail under heat and lint, creating a fire hazard. A common mistake is over-tightening clamps, which can crush or deform flexible hoses. Instead, aim for a secure, airtight seal without damaging the hose. If you’re unsure about the vent path behind the wall or you see persistent leaks, it’s time to consult a professional.
Prevention: Maintenance Tips to Avoid Future Detachments
Preventing hose detachment starts with a simple, proactive maintenance routine. Inspect connections monthly for looseness and wear, and replace any cracked hoses or damaged clamps promptly. Ensure you’re using a rigid or semi-rigid metal vent hose rather than a flexible plastic alternative. Schedule a professional vent inspection at least once per year, especially in homes with older ductwork. Regular cleaning of the lint trap, interior cabinet, and exterior vent reduces lint buildup and improves airflow. Finally, consider upgrading to reinforced clamps and a vent hose rated for safe operation at your dryer's exhaust temperature.
Steps
Estimated time: 30-45 minutes
- 1
Power off and unplug the dryer
Begin by unplugging the dryer to prevent accidental startup while you work. If your model has a power switch behind a service panel, switch off at the breaker first. Allow the dryer to cool if it’s recently used to avoid burns. This initial safety step protects you from electrical shock and hot surfaces during inspections.
Tip: Keep the area dry and wear protective gloves during handling. - 2
Inspect the hose and connections
Carefully pull the hose away from both ends to inspect for cracks, tears, or brittleness. Examine the hose clamps or fasteners for looseness or corrosion. If you notice any damage, replace the hose and/or clamps before reattachment. Take photos if you plan to shop for replacements later.
Tip: Use a flashlight to see hidden cracks at the ends that aren’t obvious at a glance. - 3
Replace damaged parts
Install a new dryer vent hose and clamps if you found signs of wear or damage. Ensure the hose is the correct diameter for your model and rated material for heat exposure. Tighten clamps evenly without over-tightening, which can deform the hose. A secure, airtight seal is essential for proper operation.
Tip: Choose metal duct hose rated for dryer use; avoid non-rated plastics. - 4
Reconnect and secure the hose
Reconnect the hose firmly to the dryer outlet and the wall vent. Use two clamps or a combination of clamps and foil tape rated for high heat to form a tight seal. Confirm there are no kinks or sharp bends that could restrict airflow. The goal is a clean, straight path for exhaust air.
Tip: Position clamps about 1-2 inches from each end for a solid grip. - 5
Test airflow and vent clearance
Plug the dryer back in and run an empty cycle to test airflow. Go outside to feel for a strong, steady stream of air at the exterior vent. If airflow is weak or you detect heat near the connection, recheck seals and path for blockages. Address any leaks immediately.
Tip: If you can’t feel air at the exterior vent, stop the test and reassess the path for obstructions. - 6
Finalize safety checks and maintenance plan
Document the maintenance steps you performed and set a reminder for periodic checks. Create a simple routine: inspect connections monthly, clean lint from accessible areas, and schedule an annual vent inspection. This proactive approach helps prevent future detachments and keeps drying efficient.
Tip: Keep spare clamps and a short length of hose on hand for quick replacements.
Diagnosis: Dryer vent hose has come off or is visibly disconnected.
Possible Causes
- highLoose or damaged hose clamps
- highDisconnected hose from dryer or wall vent
- mediumBlocked vent path causing pressure buildup
- lowDamaged or worn hose
Fixes
- easyReconnect the hose to the dryer outlet and wall vent using approved clamps
- easyReplace damaged hose and clamps; secure with proper metal duct tape rated for dryer vents
- easyClean lint and debris from interior cabinet, hose, and vent; check for kinks or crushes
- mediumIf the issue persists, call a professional for a vent inspection and duct integrity check
Common Questions
What happens if the dryer hose comes off?
A detached hose lets hot air and lint escape into the room, reducing drying efficiency and increasing fire risk. Reattach securely and test airflow after repairs.
A detached hose sends hot air and lint into the room and can start a fire. Reattach it securely and test the airflow afterward.
Can a loose hose cause a fire?
Yes. Lint accumulation combined with hot exhaust can ignite if the hose is not properly connected. Address the issue immediately and ensure a solid seal.
Yes, loose hoses can be a fire risk due to lint and heat buildup. Fix it now and test the system.
What tools do I need to fix a dryer hose?
Typically, you’ll need a screwdriver, pliers, metal clamps rated for dryer use, foil tape, and a replacement vent hose if the old one is damaged.
You’ll likely need a screwdriver, pliers, proper clamps, foil tape, and a replacement hose if the old one is worn.
How often should I inspect my dryer vent hose?
Visual checks should happen monthly, with a more thorough professional vent cleaning recommended at least once a year.
Check once a month and have the vent cleaned annually for best results.
Is it safe to run the dryer after reconnecting the hose?
Yes, once the hose is reattached securely and airflow is confirmed, you can run a short test cycle to ensure everything works correctly.
Yes. Reconnect, test airflow, and then run a short test cycle.
Should I call a professional if the hose keeps coming loose?
Yes. Recurrent detachment may indicate duct damage, improper venting, or building code concerns that require expert inspection.
If it keeps coming loose, call a professional to inspect the entire vent path.
Watch Video
Key Points
- Inspect hose connections monthly and secure any loose clamps
- Replace damaged hoses immediately to prevent fire risk
- Test exterior vent airflow after reattachment
- Schedule annual professional vent inspections