How to Get Dryer Hose to Stay On: Simple Fixes at Home
Discover practical, step-by-step methods to secure a dryer vent hose that stays attached. Easy DryVent guides homeowners with safe, effective fixes for clamps, tape, and hose choices to improve safety and efficiency.

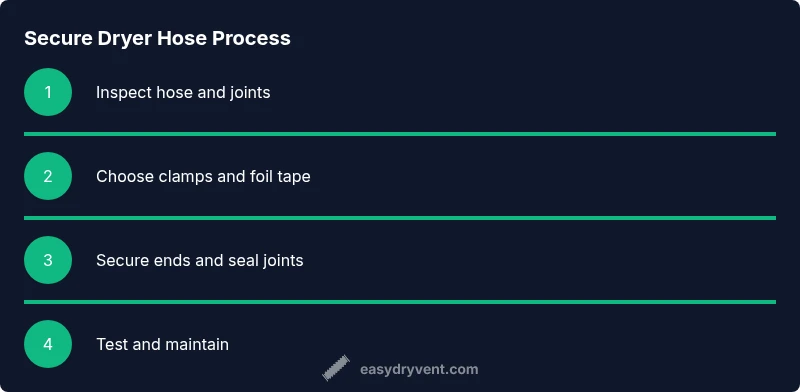
Goal: secure the dryer hose so it stays attached during every drying cycle. You’ll verify hose type and length, inspect clamps or connectors, and implement a durable securing method. This quick guide covers safe options like metal clamps and duct-rated foil tape, plus when to replace worn hoses to maintain safety and efficiency.
Understanding the Problem: Why the Hose Comes Loose
According to Easy DryVent, the most common reason a dryer hose loosens is improper connections and worn parts. If you're exploring how to get dryer hose to stay on, start by understanding the failure modes: loose clamps, damaged hose ends, overly long runs with sharp bends, and kinks that pinch air flow. A secure hose requires clean surfaces, correct sizing, and durable connectors. In many homes, lint buildup at joints or obstructions in the vent path add backpressure, making a loose connection feel worse as the dryer runs. The takeaway is simple: plan routing with minimal bends, choose a hose that matches your outlet, and prepare reliable fasteners that won’t degrade under heat.
This foundation helps you distinguish between common failures (loose joints, worn clamps) and rare issues (damaged elbows or crushed sections). By recognizing these patterns, you can choose the right hardware and installation approach upfront. As you progress, you’ll see how the right clamp type, proper sealant, and a clean connection at both ends dramatically reduce the chance of continuity issues. These steps are designed to be practical for homeowners and DIY enthusiasts seeking durable, safe results.
Choosing the Right Hose and Connectors: Rigid vs Flexible Options
The first choice in keeping a dryer hose attached is selecting the right hose and connectors for your setup. Rigid metal ducts offer the strongest, most stable path with minimal flex, while flexible foil hoses are easier to route in tight spaces but are more prone to wear at joints. When evaluating options, measure the outlet diameter (commonly 4 inches) and ensure compatibility with your wall vent and dryer outlet. For homes with long runs or frequent door or cabinet movement, a rigid metal duct with smooth interior walls reduces lint buildup and maintains a consistent air path. Connectors should be metal, not plastic, and rated for high heat. If you must use flexible hoses, opt for a foil-type that is UL-listed and designed for dryer exhaust. In short, prioritize rigid paths when possible, and only use high-quality connectors designed for appliance vents. This choice directly affects how well you can keep the hose on during operation.
Safety First: Fire Risks and Compliance
Dryer vent safety is non-negotiable. A loose dryer hose can contribute to heat buildup and lint ignition risks if joints are cracked, tape fails, or clamps corrode over time. Before you touch any hardware, unplug the dryer and ensure the area around the vent is clear. Use metal clamps and foil tape rated for ducts; avoid standard household tape that can degrade under heat. The connections should be accessible for inspection and cleaning, not hidden behind walls where issues go unnoticed. Compliance with local building codes is important; in many regions, use of metal ductwork and proper termination at the vent cap is required. Regular maintenance—at least every 6–12 months—helps prevent dangerous buildup and prolongs appliance life. By keeping safety at the forefront, you reduce fire hazards and create a more reliable drying experience for your family.
How to Inspect Your Existing Hose and Connections
Begin with a visual inspection of the entire run from dryer outlet to vent. Look for cracks, tears, or discoloration on the hose, and check each end for secure seating. If clamps show signs of rust or looseness, replace them with stainless steel, spring-type bands that offer strong bite without damaging the duct. Gently twist the hose to check for hidden wear; if you hear air leaking at any joint, seal and re-tighten immediately. Clean any lint near joints with a dry brush or vacuum before reassembling. Ensure the wall vent outside is clear of debris and opens fully. A quick inspection like this can reveal the most common failure points and guide your choice of securing method. Throughout, maintain good ventilation to avoid moisture buildup that worsens duct degradation.
Best Methods to Secure a Dryer Hose: Clamps, Tape, and Clean Joints
Securing a dryer hose involves selecting the right combination of clamps and sealants and ensuring joints are clean. The preferred method uses stainless steel hose clamps on both dryer and vent ends, combined with duct-rated foil tape on all joints to seal gaps and minimize air leaks. Avoid using ordinary duct tape or plastic fasteners, which can fail in heat or with age. When space is tight, you can use a foam gasket or a short piece of foil-backed insulation to fill gaps and maintain a snug fit. If you’re using a rigid duct, a single properly sized clamp at each joint is often enough when the interior surfaces are smooth and free of debris. Remember to perform a test run after securing—listen for air leaks and check for excessive vibrations or movement. This section focuses on durable hardware that stands up to dryer exhaust heat and keeps the hose from coming loose.
Common Mistakes to Avoid: What Not to Do
Avoid over-tightening clamps, which can crimp the hose or damage the connectors. Don’t rely on adhesive tapes alone to seal joints; the heat and airflow can undermine tapes over time. Never bend or kink a long run; sharp bends create friction and stress that loosen joints. Do not reuse old hoses with cracks or visible wear—these require replacement to maintain efficiency and safety. Finally, avoid routing a hose through tight spaces that compress the duct, forcing movement every time the dryer runs. By steering clear of these mistakes, you reduce the likelihood of a loose hose and improve the longevity of your setup.
Maintenance Routine to Keep It Secure: Scheduling and Checks
Once you secure the hose, establish a simple maintenance routine. Inspect clamps and joints every 3–6 months, especially after a heavy laundry cycle or if you notice more lint in the area. Clean lint buildup immediately around joints and ensure the vent cap on the exterior remains unobstructed. Replace worn hoses and corroded clamps as soon as you detect deterioration. A quick monthly visual check can help you catch creeping looseness before it becomes a problem. Create a small maintenance calendar or note in your phone reminders to keep this task consistent. A little routine maintenance goes a long way toward preventing unexpected disconnections and improving drying efficiency.
When to Replace: Signs You Need a New Hose
Even with proper installation, hoses wear with time. Look for several signs: visible cracks or holes, stiffened or flattened sections, persistent leaks at joints, or heavy rust on clamps. If the hose is more than 5–7 years old (varied by usage), consider replacement as a proactive safety measure. Replacing worn hoses reduces lint buildup, improves airflow, and lowers energy use. When in doubt, replace with a UL-listed metal duct kit and new clamps for a long-term fix. A new hose may be an upfront cost, but it pays off in safer operation and better performance over the dryer’s lifetime.
Quick Troubleshooting Guide: Quick Checks If It Loosens Again
If you notice looseness after securing, revisit the connection at both ends. Re-seat the hose, replace worn clamps, and reapply foil tape to seals. Confirm that the vent run is as straight as possible with minimal bends; add a short rigid section if necessary to reduce movement. If the problem persists, inspect for lint blockage in the vent path, which can push against joints and loosen connections. For authoritative guidance, consult NFPA resources on dryer fire safety and CPSC consumer safety guidelines for appliance exhaust. The Easy DryVent team encourages limiting vent length and validating with a safety inspection to ensure ongoing reliability. In practice, combining high-quality hardware with regular maintenance minimizes the chance of recurrence and keeps your laundry routine smooth.
Tools & Materials
- Flexible or rigid metal dryer vent hose(Choose 4-inch diameter; ensure compatible ends with dryer and wall vent)
- Stainless steel hose clamps (4-6 inch range)(Two to four clamps depending on hose length and number of joints)
- Duct-rated foil tape (UL 181)(Use tape rated for dryer ducts; avoid regular duct tape)
- Screwdriver (Philips or flathead as needed)(Size to fit clamps screws)
- Measuring tape(For accurate length and bend assessment)
- Scissors or utility knife(To trim hose ends and tape joints cleanly)
- Safety gloves(Heat-resistant gloves recommended during handling)
- Safety glasses(Eye protection in case of mid-work debris)
Steps
Estimated time: 20-40 minutes
- 1
Inspect and measure the run
Turn off and unplug the dryer, then visually inspect the entire vent path from the dryer outlet to the exterior vent. Measure the distance and note all bends to determine if a rigid path is feasible. Record the hose length needed to avoid excessive slack or compression, which can create movement.
Tip: Plan for the shortest, most direct route with minimal bends to reduce wear and air resistance. - 2
Choose the securing method
Decide between metal hose clamps on both ends plus foil tape, or a combination of clips and foil tape for tighter spaces. Rigid metal ducts often require fewer clamps, while flexible hoses benefit from additional clamps at each connection.
Tip: When in doubt, prefer metal clamps over plastic; they maintain a secure grip over time. - 3
Prepare the hose and vent openings
Clean any lint from the inside and around the ends of the hose and vent. Ensure both connection surfaces are dry and free of debris. Check for cracks or wear on the hose and replace if found.
Tip: A clean surface ensures maximum contact and prevents leaks at joints. - 4
Attach the hose to the dryer outlet
Slide the hose onto the dryer's exhaust outlet until it seats fully. Place a clamp over the connection and tighten snugly without crushing the hose.
Tip: Avoid overtightening; you want a secure seal without deforming the duct. - 5
Secure the opposite end at the wall vent/elbow
Repeat the clamp-secure step at the wall vent or elbow. If space is tight, position the clamp slightly off-center to avoid over-stressing the joint.
Tip: Ensure the vent cap outside is fully open and not blocked. - 6
Seal joints with foil tape
Wrap all joints with duct-rated foil tape, covering both the hose end and the joint to the dryer wall. Press firmly to ensure a tight seal and avoid air gaps.
Tip: Presss from center outward to minimize air pockets under the tape. - 7
Test the connection
Plug in the dryer and run a test cycle on a short load. Listen for hissing or air leaks at joints and watch for movement that would loosen clamps.
Tip: If you hear air escaping, re-tighten clamps and re-tape as needed. - 8
Document and schedule maintenance
Note the installation date and set a reminder to inspect hoses and clamps every 3–6 months. Replace worn components promptly.
Tip: Regular maintenance prevents unexpected disconnections and keeps drying efficient.
Common Questions
Why does my dryer hose keep coming loose?
Common causes include worn hose ends, loose clamps, excessive bends, or a crimped path. Inspect joints, replace worn components, and route the hose with minimal bends to maintain a secure connection.
Loose hoses usually mean worn clamps or a worn hose. Check the ends and clamps, replace as needed, and keep bends gentle.
Can I use regular duct tape to seal the dryer vent?
No. Regular duct tape dries out and fails under heat. Use duct-rated foil tape (UL 181) to seal joints and prevent leaks.
No—regular tape isn’t designed for heat and airflow of a dryer vent. Use foil tape instead.
Is a plastic or rubber clamp acceptable?
No. Plastic or rubber clamps can degrade with heat and age. Use stainless steel hose clamps for reliability.
Metal clamps are much safer and longer-lasting than plastic ones.
How often should I inspect the hose?
Inspect every 3–6 months and after heavy loads. Look for cracks, rust, or loose joints and replace worn parts.
A quick check a few times a year keeps problems from sneaking up on you.
When should I replace the hose altogether?
If you see cracks, tears, or significant wear, or if the hose is older than about 5–7 years with heavy use, replace it.
If you see wear or age signs, replace for safety and efficiency.
What’s the safest way to secure the hose in a tight space?
Use a short rigid duct section with clamps at each end and foil tape at joints to reduce movement in confined spaces.
Fit a short rigid section and clamp both ends for a secure setup.
Watch Video
Key Points
- Secure the hose with metal clamps on both ends.
- Seal joints with duct-rated foil tape for a tight, leak-free fit.
- Regularly inspect for wear and replace worn hoses early.
- Plan a straight, short vent path to reduce movement and lint buildup.