What Causes Dryer Belt to Break: A Practical Troubleshooting Guide
Learn what causes dryer belt to break, how to diagnose wear, and step-by-step replacement tips to keep your dryer safe and efficient. Easy DryVent guides homeowners through safe inspection, prevention, and fixes.

What causes dryer belt to break? The most likely cause is a worn, stretched, or overheated belt from normal use or overloading. A seized idler pulley or damaged drum bearings can also snap the belt under load. Quick checks: look for cracks/fraying on the belt and listen for squealing or rattling with the drum rotating.
What causes dryer belt to break
When homeowners ask what causes dryer belt to break, the short answer is typically wear and heat. Over time, the rubber belt stretches and weakens, reducing tension and increasing the chance of a snap. The Easy DryVent team often finds that repeated heating from clogged lint filters and poor airflow accelerates this wear. A belt can break not only from wear but from a seized pulley or a damaged drum bearing that suddenly imposes extra load on the belt. Regular inspection helps catch these signs early, before a complete belt failure leaves you with a non-working dryer. Early symptoms to watch for include a rumbling drum, a squealing belt sound during operation, or a visible crack emerging along the belt’s surface. The phrase what causes dryer belt to break isn’t a mystery when you consider material fatigue and mechanical stress across cycles.
Visual signs of belt wear
- Cracks, fraying, or a glossy, glazed surface on the belt
- Visible wear where the belt contacts pulleys
- Squealing noise when starting or during operation
- The drum not turning smoothly or taking longer than usual to dry
Regular visual checks can prevent a surprise failure. If you notice one or more of these signs, power down the dryer and proceed with a safe inspection. Easy DryVent emphasizes that catching belt wear early saves time, money, and frustration.
Why overloading accelerates belt failure
Overloading dries clothes faster but stresses the belt and pulleys. When the drum is packed beyond its design, the belt endures higher tension, heat, and friction. The result is accelerated aging, which shortens belt life. In practice, you’ll often find that belts break after many heavy loads, bulky items, or frequent high-heat cycles. Understanding how loading affects belt life helps homeowners avoid repeating the same mistake and extends the life of the belt and the entire dryer.
Heat and lint: a dangerous duo for belts
Lint buildup restricts airflow and causes the dryer to work harder to reach the desired temperature. The extra run time increases belt heat exposure, softening the rubber and softening adhesive bonds that join the belt to pulleys. Over time, this heat cycling contributes to cracks and separation. If you’ve ever asked what causes dryer belt to break, consider the lint trap’s condition, the exhaust vent’s cleanliness, and the overall dryer airflow.
The role of pulleys and bearings in belt health
A belt’s life isn’t determined by the belt alone. Worn idler pulleys, damaged drum bearings, or a misaligned belt can all cause additional stress, leading to premature belt failure. If a pulley has rough spots, hard edges, or wobble, it will bite into the belt surface and increase wear. Regularly inspecting the pulleys and bearings for smooth operation helps ensure the belt lasts longer and keeps the drum turning reliably.
Common myths debunked: belt replacement alone isn’t enough
Many homeowners think a belt replacement solves all dryer issues. In reality, a belt failure is often a symptom of deeper problems such as worn bearings, clogged vents, or a misaligned drum assembly. Replacing only the belt without addressing the root cause will likely result in another belt failure. The best practice is to inspect the entire drive system when assessing belt health.
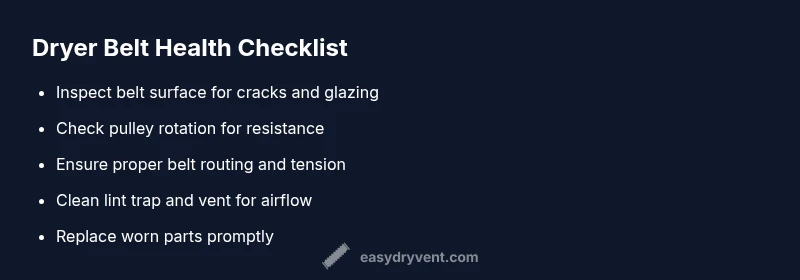
Quick maintenance mindset: what to check monthly
- Inspect the belt for cracks, glazing, or fraying
- Check belt tension and pulley rotation for smooth motion
- Clean the lint filter and vent for improved airflow
- Listen for unusual noises during operation and note when they occur
By integrating these checks into a monthly routine, you’ll typically catch issues before they escalate to a belt break. Easy DryVent’s guidance emphasizes proactive maintenance to keep your dryer operating safely and efficiently.
How a belt break affects performance and safety
A broken belt means the drum cannot rotate, and clothes won’t dry. It can also create a dangerous situation if metal parts overheat or rub together. If a belt breaks, you may notice a dramatic change in dry times, unusual heat, or burning smells. Addressing the issue promptly reduces the risk of electrical or fire hazards and minimizes downtime.
Quick-start checklist for suspected belt failure
- Unplug the dryer and disconnect the vent if accessible
- Open the access panel and inspect the belt visually
- If frayed or cracked, plan a replacement
- While you’re at it, inspect pulleys and bearings for wear
- Reassemble, replace the belt, and test with a few light items
Following these steps helps you verify belt health and prepare for safe replacement.
Real-world scenarios and lessons learned
Homeowners report belt failures after moving heavy blankets or towels in the dryer. Another common cause is a jam at the belt path, where lint or small items lodge between the drum and belt. These scenarios illustrate why regular maintenance, proper loading, and prompt belt replacement are essential for preventing dryer downtime. The takeaway is simple: routine checks beat unexpected breakdowns.
Summary: what causes dryer belt to break and how to prevent it
The leading culprits are wear, heat, overloading, and drive-system wear. Prevention hinges on clean vents, mindful loading, regular belt and pulley inspection, and timely replacement when signs appear. Following these practices under Easy DryVent’s guidance helps you maintain dryer reliability and reduce repair costs over time.
Steps
Estimated time: 60-90 minutes
- 1
Power down and access the belt path
Unplug the dryer, remove access panels, and locate the belt path around the drum and pulleys. This gives you a clear view of whether the belt is intact or needs replacement.
Tip: Take photos of each stage to aid reassembly. - 2
Inspect the belt condition
Look for visible cracks, fraying, glazing, or missing chunks. A glossy belt surface indicates glazing, which reduces grip and may fail soon.
Tip: Handle the belt gently to avoid snapping it further. - 3
Check pulleys and idler pulley
Rotate the pulleys by hand to ensure smooth, noise-free movement. Any roughness, wobble, or stiffness suggests replacement is needed.
Tip: If you hear squealing, the pulley may be seizing. - 4
Test belt tension and belt routing
Confirm the belt has the correct tension and sits properly on the pulleys and drum. Incorrect routing can cause premature wear.
Tip: Consult the dryer’s service manual or Easy DryVent’s guide for the exact belt path. - 5
Replace the belt if damaged
Install a new belt by routing it around the drum and pulleys as per your model. Ensure the belt is centered and seated on all pulleys.
Tip: Tension should be snug but not overly tight. - 6
Reassemble and test without load
Put back access panels, plug in the unit, and run a short test cycle with no clothes to verify drum rotation.
Tip: Listen for smooth operation and watch the belt’s motion. - 7
Check airflow after reassembly
Run a normal cycle with a light load and confirm proper drying and airflow; a blocked vent can still cause overheating.
Tip: Always clean the lint trap before each load. - 8
Document and schedule preventive checks
Create a quick maintenance routine: monthly lint check, quarterly belt inspection, and annual professional service if needed.
Tip: Set reminders to stay proactive.
Diagnosis: Dryer runs but drum does not rotate / unusual noises / burning odor
Possible Causes
- highWorn or broken belt
- mediumSeized idler pulley or motor pulley
- lowDamaged drum bearing or misaligned drum
- lowOverheating due to restricted airflow
Fixes
- easyDisconnect power and inspect the drive belt for cracks or fraying; replace if damaged
- mediumInspect pulleys for wobble or smooth rotation; replace worn pulleys
- easyCheck and clean the exhaust vent and lint screen to restore airflow
- hardIf belt and pulleys are intact but drum won’t turn, check drum bearings and alignment; consider professional service
Common Questions
How long should a dryer belt typically last?
A dryer belt generally lasts several years with normal use, but heavy loads and poor ventilation can shorten its life. Regular inspection helps you spot wear before it fails.
Belt life varies, but regular checks help you catch wear before failure.
Can I use any belt for replacement?
Only belts designed for your dryer model should be used. Check the model number and consult the manual or Easy DryVent’s compatibility guide before purchasing.
Always use the correct model belt to avoid issues.
What’s safer: DIY belt replacement or hiring a pro?
If you’re comfortable with basic appliance repair and follow safety steps, DIY belt replacement is doable. For complex drive systems or uncertain wiring, hire a professional to ensure safety and proper alignment.
DIY is possible for belt replacement, but get a pro for complex issues.
What are signs of a seized pulley?
A seized pulley will feel stiff, show resistance when turned by hand, and may cause the belt to slip or produce grinding noises during operation.
Stiff rotation and grinding noises point to a seized pulley.
How can airflow affect belt wear?
Poor airflow makes the dryer work harder and hotter, increasing belt wear. Cleaning the vent and lint trap reduces this risk.
Blocked vents mean hotter operation and faster belt wear.
Watch Video
Key Points
- Identify the belt wear signs early to prevent breakdowns
- Check both belt and drive pulleys during inspections
- Improve airflow to reduce heat stress on belts
- Follow a preventive maintenance schedule to extend belt life