Maytag Dryer Repair Near Me: DIY Guide and Safety Tips
Find practical steps to diagnose and repair your Maytag dryer near you. Easy DryVent provides safe, step-by-step guidance for DIY maintenance and vent checks.

This quick guide helps you identify common Maytag dryer problems and decide what you can safely DIY near you. You’ll learn how to spot overheating, poor drying, and noisy drums, verify vent and electrical issues, and know when it’s time to call a local pro. Use the step-by-step process for a practical, safe approach.
Understanding the Maytag repair landscape and search intent
If you’re facing a malfunction and search maytag dryer repair near me, you're looking for practical, nearby help that stays safe and affordable. According to Easy DryVent, most dryer problems come down to a few root causes: vent blockages, electrical faults, or worn mechanical parts. The goal of this section is to help homeowners triage symptoms, estimate what might be wrong, and decide whether to tackle the fix themselves or hire a local technician. In this guide, we'll outline common failure modes, how to verify safe operation, and the steps you should take to protect your home from fire hazards while a repair is underway. By understanding the typical failure modes, you can prioritize tasks that yield the biggest improvements first. With the right tools and approach, you can often improve safety, reduce turnaround time, and lower repair costs by addressing venting and simple electrical checks before deeper disassembly.
This section also frames expectations for local service options. Not every problem requires a full appliance replacement; many issues are solvable with targeted maintenance, proper vent cleaning, and sensible diagnostics. If you decide to search for a nearby professional, you’ll want to verify licensing, warranty coverage, and transparent pricing. Easy DryVent’s approach emphasizes safety-first checks and clear communication to help you make informed decisions quickly.
Common symptoms and quick checks
Dryers can fail in predictable ways, and spotting the symptom early saves time and money. Look for a dryer that does not heat, runs but takes longer to dry, or makes unusual noises. A drum that doesn’t tumble properly or a unit that trips the circuit breaker when starting are red flags. Start with quick, safe checks you can perform without tools:
- Check for a clogged lint screen and clogged vent path.
- Verify the outlet has power and the circuit breaker is not tripped.
- Inspect the drum for foreign objects that may impede rotation.
If symptoms persist after these checks, note the exact behavior and the mode of failure. Easy DryVent recommends documenting timing (how long it runs before it stops) and the environmental conditions (dryer vent length, bends, or recent lint buildup). These details help a technician reproduce the issue accurately and avoid unnecessary disassembly. Remember, some symptoms may stem from unfamiliar electrical components; when in doubt, pause and consult a professional.
Safety first: electrical and vent considerations
Electrical and vent safety are the two pillars of any dryer repair. A misdiagnosis or careless repair can cause shock, fire, or carbon monoxide hazards in some homes. Always start with unplugging the unit and disabling the outlet circuit if you suspect electrical faults. Vent-related problems are equally critical: a clogged vent reduces airflow, increases lint buildup, and raises fire risk. If the vent path includes long runs, sharp bends, or recent lint accumulation, plan for a vent cleaning step as part of any repair. Easy DryVent recommends wearing protective gloves and eye protection when inspecting wiring or opening access panels. Never bypass safety devices, such as thermal fuses, and never run a damaged appliance. When venting looks compromised or wiring appears frayed, prioritize professional service.
In addition to on-device checks, consider your home’s overall dryer environment. A dim or flickering indicator on the circuit breaker panel may signal an overloaded circuit. If you’re unsure about electrical safety, seek a licensed electrician or a qualified technician familiar with Maytag appliances.
When to DIY vs when to call a pro
Many dryer issues are approachable for confident DIYers, especially those involving vent cleaning, lint trap maintenance, and simple belt inspection. However, certain components carry higher risk, such as heating elements, thermal fuses, and exposed wiring. If you encounter burnt smells, unusual odors, buzzing sounds during startup, or your dryer trips the breaker repeatedly, stop and call a professional. For complex diagnostics, such as verifying heating element continuity or replacing a thermal fuse, a properly equipped workspace, the right parts, and safety protocols are essential. This guide emphasizes a staged approach: start with vent and lint remediation, then advance to basic electrical verification, and only then consider disassembly. Easy DryVent’s guidance aims to help you save time and avoid costly mistakes while keeping your family safe.
Repair workflows you can perform safely
Below is a practical workflow you can follow to diagnose and address common dryer issues without specialized tools. If you reach the limits of your comfort level, pause and seek professional help.
- Power down and unplug the dryer to prevent shock or accidental energizing of components.
- Inspect the lint screen and vent path; clean or replace lint traps as needed to restore airflow.
- Check the door switch and start switch for proper operation; a faulty switch can prevent startup.
- Test drum rotation and belt tension by turning the drum manually; listen for squeaks or uneven movement.
- If you have training and equipment, inspect the heating element and thermal fuse for continuity; replace if damaged.
- Reassemble, plug in, and run a short test cycle to verify heat, airflow, and drum movement. If issues persist, consult a pro. Images or diagrams can help you track parts during disassembly and reassembly.
Note: When performing these steps, wear eye protection and gloves, and work in a well-ventilated area. If you’re unsure about interpreting multimeter readings or verifying wiring, stop and seek professional assistance.
Preventive maintenance and long-term care
Regular maintenance dramatically reduces the chances of unexpected dryer failures. Schedule routine vent cleaning every 6 to 12 months, depending on usage and the presence of pets or long-haired occupants. Clean the lint trap before every load and inspect the vent hose for kinks or crushing. Periodically check the drum seals and door gasket for wear, and listen for unusual noises as early warning signals. When you adopt a proactive maintenance routine, you’ll improve efficiency, shorten drying times, and lower energy costs. Easy DryVent recommends logging maintenance dates and any parts replaced to track the dryer’s health over time. Keeping a maintenance notebook helps you spot trends that might predict a failure before a breakdown occurs.
AUTHORITY SOURCES
For safety guidelines and best practices, consult authoritative sources:
- https://www.energy.gov/energysaver/appliances/clothes-dryers
- https://www.cpsc.gov/Safety-Education/Safe-Products/Clothes-Dryers
- https://www.nfpa.org/Public-Education/By-topic/Clothes-Dryer-Safety
Tools & Materials
- Multimeter(Test voltage and continuity on 120V circuits; set to AC for most dryer work)
- Screwdriver set (Phillips & flat)(For access panels and terminal blocks)
- Nut driver/socket set(Lid panels and fasteners; keep track of small screws)
- Vent cleaning brush(Use a flexible brush to reach bends; avoid metal bristles)
- Flashlight(Inspect dark interior areas and behind panels)
- Safety gloves and eye protection(Protect hands from sharp edges and debris)
- Vacuum with hose attachment(Clean lint from vents and behind access panels)
- Replacement parts kit (as needed)(Thermal fuse, heating element, drum belt, depending on diagnosis)
Steps
Estimated time: 60-120 minutes
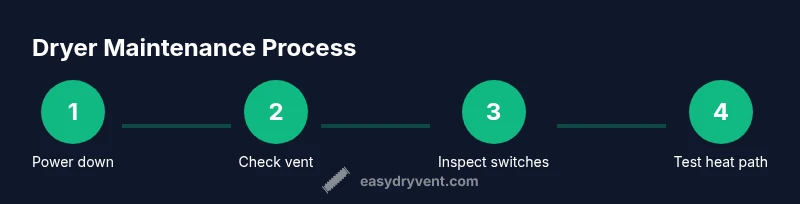
- 1
Power down and unplug
Disconnect the dryer from the electrical outlet and remove any power sources to minimize shock risk. Verify with a non-contact tester before touching wires.
Tip: Always ensure power is off before removing any panels. - 2
Access panels and inspect the lint path
Remove the access panels to check the lint screen housing and vent duct for blockages. Clean lint accumulation with the vent brush and vacuum.
Tip: Lint buildup is the leading cause of reduced efficiency and fires. - 3
Check door switch and start switch
With power still off, test the door switch and start switch for continuity. A defective switch can prevent the drum from starting or heat from engaging.
Tip: If you hear a click when pressing the start switch, the switch may still be faulty if power doesn’t reach the motor. - 4
Inspect drum belt and rotation
Manually rotate the drum to confirm smooth motion; look for signs of a worn belt or misalignment that could hinder tumbling.
Tip: A loose belt can cause the drum to stall or produce squeaking sounds. - 5
Check heating element and thermal fuse
If you’re comfortable with basic electronics, test the heating element and thermal fuse for continuity. Replace if open-circuit or visibly damaged.
Tip: A blown fuse is a common true cause of no-heat conditions. - 6
Reassemble and test run
Put panels back in place, restore power, and run a short cycle to observe heat, airflow, and drum rotation. Stop if you notice abnormal smells or smoke.
Tip: Keep a log of outcomes to compare against future repairs.
Common Questions
What are common Maytag dryer symptoms that indicate a repair is needed?
Common signs include no heat, clothes not drying, excessive run time, and unusual noises. If you notice these, start with vent cleaning and basic electrical checks before moving to component diagnostics.
Common signs are no heat, long drying times, and strange noises. Start with vent cleaning and basic checks before moving to more complex diagnostics.
Can I fix a dryer that won’t heat myself?
Some heat issues result from simple issues like a blown thermal fuse or a faulty heating element. If you’re not comfortable testing electrical components, seek professional help to avoid hazards.
Heat issues can sometimes be fixed with simple parts, but if you’re unsure about electrical components, it’s safer to call a pro.
Is it safe to run a dryer with a clogged vent?
Running a dryer with a clogged vent increases fire risk and reduces efficiency. Clean vents regularly and schedule professional vent maintenance if there are multiple bends or long runs.
A clogged vent is unsafe and inefficient. Clean it or get a service check if there are long, kinked ducts.
How much does Maytag dryer repair typically cost?
Repair costs vary by part and labor. Expect ranges based on typical parts like thermostats, fuses, and belts plus labor, but consult local technicians for precise quotes.
Repair costs depend on parts and labor; local quotes are best for exact figures.
When should I replace the dryer rather than repair?
If the unit is old, frequently failing, or requires expensive core components, replacement may be more cost-effective in the long run. Compare repair costs to a new unit with energy-efficient features.
If repairs cost more than a new unit or the dryer is old, replacement may be wiser.
Do Maytag dryers require special venting?
Maytag dryers use standard venting; use smooth metal ducting and avoid PVC or flexible plastic ducts. Ensure vent length does not exceed manufacturer recommendations.
Use proper metal venting and avoid flexible plastics to maintain safe airflow.
Watch Video
Key Points
- Verify safety before starting
- Clean vent path regularly
- Call a pro if electrical components are involved
- Document maintenance for future reference