Is a Dryer Bad? A Practical Guide to Safe Drying at Home
Discover whether a dryer is bad and learn practical steps to keep it safe, energy-efficient, and fire-free with Easy DryVent's expert guidance on vent care, lint removal, and maintenance at home.

Is a dryer bad? Not inherently. A clothes dryer is a safe, convenient appliance when used correctly, but it does carry risks if you neglect maintenance. The major safety concerns are lint buildup, restricted airflow, and overheating, which can lead to fires or excessive wear on fabrics. According to Easy DryVent, regular maintenance is the best defense against these hazards and helps keep your dryer efficient. With a simple routine of lint removal, vent cleaning, and mindful loading, you can keep your dryer safe and energy-efficient.
Is a Dryer Bad? Understanding the Real Risks and Benefits
Is a dryer bad? Not inherently. A clothes dryer is a safe, convenient appliance when used correctly, but it does carry risks if you neglect maintenance. The question many homeowners ask is whether the device itself is dangerous or if problems come from usage patterns. In reality, the danger often comes from lint buildup, restricted airflow, or overheating, which can lead to fires or excessive wear on your clothes. According to Easy DryVent, regular maintenance is the best defense against these hazards and helps keep your dryer efficient. In this article we break down the risks, the practical steps you can take now, and how to build a simple routine that protects your home. We’ll also explain how to tell whether you’re simply drying longer than normal or facing a more serious venting issue. By understanding these factors, you’ll know when to DIY and when to call a pro. Lint buildup is highly combustible and can accumulate in lint traps, ducts, and vents. Damp laundry increases moisture and heat, which compounds the risk. A blocked vent can cause overheating, trigger fuse protection, and waste energy. Regular lint removal and vent checks reduce these risks and improve drying performance.
How Venting, Lint, and Load Size Impact Drying Safety
Airflow is the lifeblood of a safe dryer. When vents are blocked or long duct runs are used, heat cannot escape efficiently, causing the unit to overwork and wear out components faster. Lint buildup everywhere—from the lint screen to the duct—restricts airflow and raises fire risk. The load size matters, too: overloading reduces tumbling and prevents even drying, forcing the dryer to run longer. Simple habits make a big difference: clean the lint screen after every load, visually inspect the exterior vent for obstructions, and keep duct runs as short and straight as possible. If you notice a significant reduction in airflow or a hot exterior vent, pause and investigate. Easy DryVent’s guidance emphasizes regular vent maintenance, not DIY shortcuts that bypass safety features. A well-vented, properly loaded dryer dries clothes faster and lasts longer, with lower energy bills and less risk of fire.
Common Failure Modes and How They Hint at Problems
Dryers can give subtle signals before a serious failure occurs. A dryer that takes forever to dry or stops mid-cycle may indicate airflow problems, worn seals, or drum tumbling issues. A persistent burning smell or a hot exterior panel is a clear warning sign that something is overheating and could pose a fire hazard. Inconsistent heat, loud rumbling, or clothes that feel unusually hot after a cycle also point to mechanical issues like a faulty thermostat, heating element, or belt. Regular checks—lint trap, vent, and hose condition—can catch most issues before they escalate. If you detect any burn smell, smoke, or melted plastic, shut the appliance off, unplug it, and call a professional. Remember: prevention through proactive maintenance reduces both safety risk and repair costs.
The True Costs of Neglect: Safety, Energy, and Wear
Neglecting dryer maintenance doesn’t just waste energy; it elevates risk. A clogged vent forces the dryer to run longer, increasing electricity use and wear on components like the heating element and motor. Lint buildup in ductwork elevates fire risk, and repeated overheating can degrade fabrics and shorten garment life. Easy DryVent’s analysis shows that routine vent cleaning and lint removal significantly reduce risk and improve overall performance, even if it doesn’t produce dramatic numbers on a page. Beyond safety and cost, consistent maintenance preserves the dryer's lifespan and maintains its drying quality, which matters for households with frequent laundry needs. Investing a little time now pays dividends in reliability and safety later.
Practical Maintenance Routines You Can Start Today
A practical maintenance plan is the heart of safe, efficient drying. Start with the basics: after every load, remove lint from the screen and wipe away any visible debris around the door opening. Monthly, inspect the vent hose for kinks or crush points and ensure it runs in a mostly straight line to the exterior vent. Vacuum the interior cavity and the lint trap housing to remove hidden lint and dust. Every 3–6 months, check the exterior vent hood; clear any spider webs or debris, and confirm the airflow with a quick test (you should feel a steady breeze from the vent when the dryer is running). Finally, schedule a professional vent cleaning and inspection at least once a year if you have long vent runs or animals that shed heavily. These steps reduce fire risk, improve drying times, and boost energy efficiency.
Tailoring Safety Practices to Your Home
Your home’s layout and the type of dryer you own influence safety routines. Gas dryers require careful venting to prevent carbon monoxide buildup in enclosed spaces, so ensure proper venting clearance and functional exhaust fans. Electric dryers rely on electrical safety: check the outlet and plug, avoid extension cords, and ensure the circuit can handle peak loads. If you live in a multi-story home, consider vent routing that minimizes long duct runs and reduces the chance of lint accumulation in concealed spaces. For apartments or homes with limited vent access, you may need professional guidance to design a safe, compliant vent system. Easy DryVent emphasizes that a tailored plan—based on your house layout and appliance type—keeps you safer and more efficient.
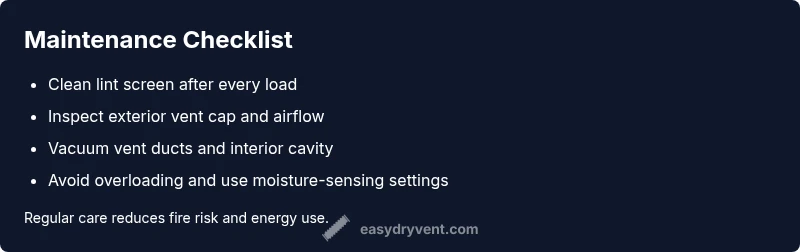
Quick-Start Safety Checklist
- Check lint trap after every load and remove lint buildup.
- Inspect exterior vent cap for obstructions and ensure airflow is steady when running.
- Keep vent ducts straight and short; avoid long flexible hoses.
- Do not overload the dryer; use appropriate load sizes and moisture-sensing settings.
- Schedule annual professional vent cleaning, especially in high-shedding households or long vent runs.
Steps
Estimated time: 60-90 minutes
- 1
Prioritize safety and power down
Unplug the dryer and pull it away from the wall to access the underside and vent areas. Turn off the power at the breaker if you’re unsure about the outlet. This step minimizes the risk of electric shock while you inspect the lint trap, vents, and hoses.
Tip: Use a flashlight to inspect hard-to-see areas; never reach behind the dryer while it’s plugged in. - 2
Clean lint screen and accessible ducts
Remove the lint screen and clean it thoroughly. Vacuum the lint trap housing and the area around the door opening to collect loose debris. If you have access to the vent duct inside, carefully vacuum along the duct run to remove hidden lint buildup.
Tip: Wear a mask if you see a dusty buildup; avoid using water or wet cleaners on electrical components. - 3
Inspect and straighten the vent hose
Check the vent hose for kinks, crush points, or crushed sections behind the dryer. If you find any, gently straighten or replace the hose with a rigid metal duct where possible. Ensure the path to the exterior vent is as straight and short as allowed by your space.
Tip: Avoid flexible plastic hoses as they collect more lint and burn more easily. - 4
Test airflow and heat on a small load
Plug the unit back in and run a short dry cycle with a small towel load. Check for a steady air output at the exterior vent and feel for even heat distribution in the drum. If air seems weak or heat is inconsistent, stop the cycle and reassess the vent path.
Tip: If you can’t feel air at the exterior vent, do not continue to use the dryer until you fix the vent issue. - 5
Adjust loads and settings
Avoid overloading the drum; use moisture-sensing settings when available. Dry towels separately from delicate fabrics to ensure efficient drying and reduce wear on clothing. Shorter, more frequent cycles are often more effective than one long cycle.
Tip: Shake clothes loose before loading to improve airflow and drying efficiency. - 6
Plan for professional checks if problems persist
If heat is still excessive, cycles are excessively long, or you smell burning despite cleaning, schedule a professional vent cleaning and an electrical/thermal inspection. A licensed technician can diagnose thermostat, heating element, or belt issues safely.
Tip: Keep a record of cycles and odors to help the technician diagnose faster.
Diagnosis: Dryer overheats, dries slowly, or emits a burning smell
Possible Causes
- highLint buildup in vent, duct, or lint trap
- highBlocked or kinked vent duct reducing airflow
- mediumOverloaded drum or inappropriate fabrics causing long cycles
- lowFaulty thermostat or heating element
- lowWorn belt or blower wheel in the quiet phase of operation
Fixes
- easyClean lint screen and thoroughly inspect vent to exterior; remove visible lint
- mediumVacuum and brush vent duct to remove debris; check exterior vent cap for obstructions
- easyReduce load size and separate heavy items; run a shorter cycle to verify airflow
- hardIf overheating persists, test with a cooler cycle and consider replacing thermostat/heating element (professional)
- hardInspect belt and blower wheel for wear and have them replaced by a technician if needed
Common Questions
Is it safe to leave a dryer running when I’m not at home?
No. Never leave a dryer running unattended. If you must leave, unplug it or set a timer to ensure it shuts off. Regular maintenance reduces the chance of malfunctions while you’re away, but never rely on the appliance to monitor itself.
Never leave a running dryer unattended. If you’re leaving, unplug it or use a timer and stay nearby for safety checks.
Why is my dryer taking so long to dry clothes?
Long dry times usually indicate restricted airflow from lint buildup or a blocked vent. Overloading can also prevent proper airflow. Start with a lint check and vent inspection, then load smaller batches.
Drying slowly usually means airflow is blocked or the load is too big. Check lint and vent first.
What should I do if I smell burning from the dryer?
If you smell burning, stop the cycle immediately, unplug the dryer, and inspect for lint buildup and overheating. If the smell persists, call a professional. Do not continue using the dryer until the issue is resolved.
If you smell burning, stop the dryer and check for lint or overheating. If it persists, call a pro.
How often should I clean the lint trap and vent?
Clean the lint trap after every load. Inspect and clean the vent and duct every 3–6 months, or more often in homes with long vent runs or heavy shedding. Professional vent cleaning is recommended annually or as needed.
Clean the lint screen after every load and check the vent every few months. Annual professional cleaning is wise for safety.
Can I clean the dryer vent myself, or should I hire a pro?
You can do basic vent checks and lint removal, but deeper vent cleaning and ductwork should be handled by a trained technician, especially if you have long or complex vent runs. Always unplug the dryer before starting.
You can do simple checks, but for thorough vent cleaning, hire a professional. Always unplug first.
When should I replace a dryer?
Replace a dryer if it’s old, inefficient, or failing frequently despite maintenance. If safety concerns persist after professional inspection, upgrading to a newer, safer model may be the best option.
Replace a dryer if it’s unreliable or unsafe even after service; an upgrade can improve safety and efficiency.
Watch Video
Key Points
- Inspect lint and vent regularly
- Avoid overloading and improve airflow
- Schedule professional vent checks annually
- Prioritize safety before DIY fixes
- Use energy-efficient settings to save costs