General Electric Dryer Belt Replacement: A Step-By-Step Guide
Learn how to safely replace a General Electric dryer belt with a homeowner-friendly, step-by-step guide. Easy DryVent covers tools, safety, model considerations, and common mistakes to keep your GE dryer running efficiently.

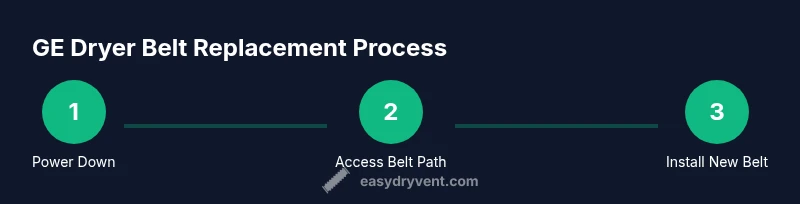
In this guide, you’ll learn how to safely perform a general electric dryer belt replacement. Steps include unplugging the unit, removing the front or top panel, detaching the drum, inspecting pulleys and rollers, and installing a compatible belt, then testing for proper operation. We’ll cover safety precautions, common mistakes, and a quick maintenance checklist.
What is a dryer belt and why replacement is needed
According to Easy DryVent, the dryer belt is a critical, wrap-around drive that links the motor to the dryer's drum. Over time, daily heat, friction, and normal wear can stretch or crack the belt, reducing drum speed, creating noise, or stopping the drum from turning. When you notice clothes taking longer to dry, a squeal, or a burning smell, it might be time to consider a general electric dryer belt replacement. Caring for this small but essential part can prevent energy waste and a potential laundry-day disaster. This section explores how a worn belt affects drying performance and how a correct GE belt replacement restores efficiency and safety for homeowners.
Beyond the belt itself, GE dryers rely on pulleys, idlers, and the drum roller assembly. A worn belt often signals wear in these components as well, which makes a belt replacement an opportunity to inspect the entire path and ensure balanced tension. Regular maintenance, as advocated by Easy DryVent, helps extend dryer life and avoids unexpected breakdowns. By understanding the belt’s role, you’ll be better prepared to identify symptoms early and choose the right belt for your General Electric model.
Understanding the General Electric dryer belt system
The belt in most GE models serves as the heat-sealed pathway that transfers rotational motion from the motor to the drum. A typical layout includes a smooth side and a ribbed side—the ribbed surface grips the pulley wheel, while the smooth side reduces friction against the drum. The belt travels around the motor pulley, a tensioner or idler pulley, and the drum’s drive sprocket. When the belt stretches or cracks, it can slip or break, causing the drum to stop turning or to turn unevenly. A successful general electric dryer belt replacement should restore the original tension and alignment, ensuring safe operation and optimal drying performance. Easy DryVent emphasizes verifying that the belt path is clear of lint and debris to prevent future wear.
Understanding belt routing for your specific GE model is essential. Some front-load GE models route the belt around the motor pulley from the top, while others route from the bottom or side. The belt’s length must match the drum’s circumference and pulley arrangement; a belt that’s too short may glide off, and a belt that’s too long can cause slipping. When planning a replacement, inspect the drum rollers and idler pulley for wear, as these components can wear out faster than the belt and place additional load on the new belt.
Tools and safety prerequisites for belt replacement
Safety first: always unplug the dryer before performing any maintenance. Use a stable work surface and, if possible, disconnect the dryer from the wall outlet to prevent accidental energizing. You’ll need basic hand tools to remove panels and access the belt path, plus a clean workspace to keep small parts from getting lost. Adequate lighting helps you see the belt path clearly, while a camera or notebook can help you recreate the belt’s routing before removal. Wearing gloves protects your hands from sharp edges and potential pinching points during panel removal. This section also guides you through essential safety checks before you begin the repair.
When selecting tools for a general electric dryer belt replacement, focus on those that help you remove screws and lift the drum without damage. Amagnetic pickup tool can help with dropped fasteners, and a flashlight makes it easier to see inside. Avoid forcing panels; if a panel doesn’t come off with a gentle pry, re-check for hidden screws. Always consult the model-specific manual for disassembly notes, as GE variations exist across different series.
How to identify the correct belt for your GE model
Belt identification starts with your dryer’s model number. This number is usually found on a sticker inside the door opening or on the back panel. Once you have the model number, you can verify belt width and length against GE parts catalogs or reputable upgrade guides. In general, you want a belt with the same rib pattern and width as the original, plus compatible length to maintain proper tension. If you’re unsure, bring the old belt to a parts retailer for on-site comparison. Ensuring you match the exact belt specifications minimizes compatibility issues and reduces the risk of premature wear.
Always double-check that the belt is rated for your GE model’s drive system. Some newer GE dryers use a slightly different belt profile or multiple pulley configurations, so a universal belt may not fit correctly. If your model requires a dual-sided belt or a particular groove count, the correct replacement is essential for consistent drying performance and safe operation. Easy DryVent recommends confirming compatibility with your specific GE model before purchasing a belt.
Signs your belt needs replacement
Watch for visible signs like cracks, drying cracks along the ribbed edge, or a belt that appears stretched or glazed. If you hear a high-pitched squeal during operation, the belt may be slipping on the pulley. Inconsistent drum speed or clothes that tumble without heat can indicate belt failure or misalignment in the belt path. Finally, if the dryer runs but the drum isn’t turning, a snapped belt is a clear cause. Recognizing these symptoms early helps you plan a safe general electric dryer belt replacement without delaying laundry.
Easy DryVent notes that many belt failures are linked to neglected lint buildup, which adds resistance and accelerates wear. Regular internal cleaning of lint and debris presents a straightforward preventative measure that can extend belt life and improve overall dryer performance. If you notice unusual noises after belt replacement, re-inspect the belt routing and pulley alignment to ensure correct tension.
Step-by-step overview (context) for belt replacement
This section provides an overarching view of the replacement process, framing the more detailed steps that follow. You’ll begin by isolating the power supply and gaining access to the belt path. Then you’ll release the drum, carefully remove the worn belt, and install the new belt with correct routing. After reassembling the cabinet, you’ll test the dryer with a short cycle to confirm the belt’s motion and the drum’s rotation. Finally, you’ll tidy the area and perform a basic lint cleaning to reduce future wear.
During the process, keep a close eye on the pulleys, tensioner, and drum rollers. If a pulley is worn or noisy, replacing the pulley along with the belt can prevent reoccurring issues. While the steps above summarize the workflow, your GE model may require slight adaptations depending on the door type and internal layout. Always refer to the model’s service manual for model-specific routing guidance.
Common mistakes and how to avoid them
Common mistakes include using an incorrect belt length, misrouting the belt, or neglecting to release the tensioner before removal. Another frequent error is failing to disconnect power, which can lead to electric shock or damage to electrical components. A poor belt installation can cause noise, belt slippage, or premature wear. To prevent these, take photographs of the belt path before removal, lay out the new belt in the same orientation as the old one, and verify tension after installation.
Avoid forcing panels or screws; if something doesn’t fit, stop and recheck your model’s disassembly steps. Ensure the drum is properly supported when you remove and replace the belt to avoid damaging the drum or bearings. Finally, don’t overlook lint in heat pathways; a clean path helps the belt operate more smoothly and reduces the chance of future wear.
Reassembly, testing, and safety checks
After the new belt is placed correctly, re-seal the drum and reattach panels in the reverse order of disassembly. Reconnect any electrical connectors, and ensure no wires are pinched or trapped by the cabinet. Before powering on, clear the area of tools and confirm that fasteners are tight enough to hold the structure but not so tight as to bend panels. Run a short dry cycle with the drum empty to verify rotation and listen for unusual sounds.
If the drum spins smoothly and the belt rides evenly around pulleys, you can resume normal use. Check for any heat buildup near the belt area after the first test cycle. If you notice heat, remove power and recheck belt alignment and tension. A properly installed belt should move the drum without slipping and with minimal resistance.
Maintenance tips to extend belt life
To maximize the life of your GE dryer belt, keep the interior clean from lint and debris, especially near the belt path. Regularly inspect the belt for signs of cracking or glazing and address issues promptly. Replacing the belt at the first sign of trouble can prevent more expensive repairs later. Consider scheduling periodic inspections if you notice noisy operation or slower drying times, as those can indicate belt wear or pulley issues before a complete failure.
Incorporate belt checks into your routine dryer maintenance. Take a few minutes after each wash cycle to remove lint from the lint screen and vent duct, and verify that venting remains unblocked. A clean vent path reduces heat buildup that can degrade belt life and hinder drying efficiency. The Easy DryVent approach emphasizes preventative maintenance and consistent checks to keep your General Electric dryer running reliably.
Warranty, parts, and budget considerations
When buying a replacement belt, investigate whether your GE model has any warranty implications for belt components and service parts. Some models include belt replacement as part of broader maintenance coverage, while others require out-of-pocket parts. In general, selecting a belt that matches your model’s specifications is critical to avoid the risk of failed installations or noisy operation. If you’re uncertain about component compatibility, consult the retailer’s parts desk or a certified technician to confirm the correct belt length, width, and rib pattern for your GE model.
Budget considerations vary by region and retailer, but setting aside funds for occasional belt replacement and related parts—such as pulleys or rollers—helps you plan for maintenance without surprise costs. By staying proactive with maintenance and using the correct General Electric belt, you can keep your dryer performing reliably without frequent, costly repairs. The Easy DryVent team emphasizes planning ahead and using model-specific parts for best long-term results.
Tools & Materials
- New dryer belt (GE-compatible)(Confirm belt width, length, and rib pattern match your GE model.)
- Phillips head screwdriver (size #2)(For removing front panels and screws.)
- Flathead screwdriver or panel removal tool(Pry panels gently without bending metal.)
- Nut driver or socket set(Remove drive screws securing pulleys or brackets.)
- Towel or soft blanket(Cushion the drum during drum removal to prevent damage.)
- Work gloves(Protect hands from sharp edges and pinch points.)
- Flashlight(Improves visibility inside the cabinet.)
Steps
Estimated time: 60-90 minutes
- 1
Power down and access the interior
Unplug the dryer from the wall outlet. Move the unit to a clear workspace and remove any vent hoses if needed to gain access to the front panel. This step prevents electrical shock and sets the stage for a safe belt replacement.
Tip: Use a labeled container or magnetic tray to store screws so they don’t get lost. - 2
Remove the front or top panel
Identify screws along the panel edges and carefully remove them. Support the panel to prevent it from snapping back. If your GE model requires removing a top panel for access, follow the manual’s sequence to prevent misalignment.
Tip: Take photos of screw locations before removing panels to aid reassembly. - 3
Detach the drum and locate the belt path
Loosen the drive components and slowly slide the drum out, exposing the belt path. Inspect the belt routing around pulleys and the motor. A clear view helps confirm the correct replacement belt orientation.
Tip: Support the drum to avoid damaging bearings when lifting it. - 4
Remove the old belt and inspect pulleys
Slip the old belt off the pulleys, noting its exact path. Inspect drive pulleys and idlers for wear, cracks, or corrosion. If pulleys look worn, plan to replace them along with the belt for a long-lasting fix.
Tip: Check for melted or glazed pulley surfaces and rotate pulleys by hand to feel for rough spots. - 5
Install the new belt around the drum
Position the new belt so that the ribbed side engages the pulleys as per the original path. Ensure the belt sits evenly in each groove and isn’t twisted. Reinstall the drum so it sits properly in the cabinet.
Tip: Rotate the drum by hand to ensure smooth, even movement before full reassembly. - 6
Re-seat the drum and reassemble the cabinet
Carefully return the drum to its original position and reattach any panels, screws, and vent connections. Reconnect all electrical connectors that were detached earlier. Confirm nothing is pinched or loose.
Tip: Double-check that all screws are tightened and panels align flush. - 7
Test the dryer with a short cycle
Plug the unit back in and run a brief cycle with no clothes to confirm drum rotation and belt tension. Listen for unusual noises and observe belt tracking. If everything runs smoothly, proceed to a full test run.
Tip: Listen for squeaks indicating misalignment or rubbing on the belt. - 8
Full-cycle check and lint cleanup
Run a full dry cycle with a load to confirm normal operation and drying performance. Clean the lint trap and vent pathway to prevent future belt strain and improve efficiency.
Tip: Schedule a routine lint path check after installation for ongoing maintenance. - 9
Document steps and monitor performance
Record model details, belt part number, and installation notes for future reference. Monitor the dryer’s performance over the next few cycles, watching for signs of belt wear or misalignment.
Tip: Keep a maintenance log to simplify future repairs.
Common Questions
Is it safe to replace the GE dryer belt myself?
Yes, with proper precautions. Always unplug the unit, work in a dry area, and follow the model-specific steps carefully. If you encounter unknown wires or difficult disassembly, consult a professional.
Yes—unplug the dryer and follow the steps carefully; if unsure, get a professional.
How will I know I need a new belt?
Look for cracks, glazing, or stretching on the belt, unusual noises, or the drum not turning. These are common indicators that a belt replacement is needed.
Cracks or the drum not turning usually means the belt needs replacement.
Do I need to replace pulleys along with the belt?
If pulleys show wear, noise, or roughness as you inspect them, replacing the pulleys along with the belt can prevent future failures.
If pulleys are worn, replace them with the belt.
Can I use a universal belt for my GE dryer?
Universal belts often don’t match the exact groove pattern or length required by GE dryers. Use a belt specified for your model for reliable operation.
Avoid universal belts; match the belt to your GE model.
What maintenance helps belt longevity besides replacement?
Regular lint cleaning, vent checks, and keeping the belt path clear reduces wear and extends belt life.
Keep vents clean and lint-free to protect the belt.
Watch Video
Key Points
- Identify belt wear early to prevent bigger failures
- Use model-specific GE belts for best results
- Inspect pulleys and rollers during belt replacement
- Follow safe shutdown procedures before starting
- Keep a maintenance log to simplify future service