Replace Dryer Belt: A Homeowner’s Step-by-Step Guide
Learn how to replace a dryer belt safely and efficiently. This Easy DryVent guide covers identifying belt type, disconnecting power, removing the drum, installing a new belt, and testing for proper operation.

You're going to learn how to replace a dryer belt safely and effectively. The guide covers identifying the correct belt for your model, disconnecting power, removing the drum, installing the new belt, and testing the dryer to confirm proper operation. With the right tools and careful steps, most homeowners can complete this task.
Understanding Dryer Belts and Common Failures
A dryer's belt is the long loop that drives the drum, letting your clothes tumble and dry evenly. When the belt wears, cracks develop or the belt stretches, causing the drum to turn slowly or not at all. You might hear squealing, feel a thump, or notice that drying times have lengthened. This section explains why belts fail and when a replacement is necessary, emphasizing safe handling and restoring dryer performance through a proper belt replacement. By understanding the role of the belt, you’ll recognize symptoms early and avoid second-guessing whether replacement is needed. The phrase replace dryer belt is a practical diagnostic cue that signals you’re ready to take action and return to reliable laundry days.
Types of Dryer Belts and How to Identify Yours
Most residential dryers use a single, flat or ribbed belt that travels around a drive pulley, an idler pulley, and the drum. Belt type is model-specific, so identification starts with the dryer's model number and manual. If your belt shows cracks, fraying, or glazing, it’s a clear sign to replace. Before purchasing a replacement, confirm the belt width and length, as incorrect sizing can slip or fail prematurely. The belt path can vary by design, but accuracy matters: a correctly matched belt reduces wear and noise while maintaining efficient drying.
Safety First: Preparing to Replace the Belt
Safety comes first when replacing a dryer belt. Unplug the appliance from the wall outlet and, if possible, switch off the circuit breaker. Move the dryer away from the wall to access panels and internal components. Wear gloves to protect hands from sharp edges and use a flashlight to illuminate the work area. Having your model number handy ensures you buy the correct belt and minimizes returns or mis-orders. This preparation step protects you and helps ensure a smooth, successful belt replacement.
Tools, Materials, and Prep Steps
Gather the replacement belt and the basic toolkit before you begin. Essential items include the replacement dryer belt, a screwdriver set (Phillips and flathead), a nut driver or socket set, pliers, a flashlight, and gloves. Optional but helpful items include a small magnetic tray to hold screws and a camera or notebook to document the belt route before disassembly. Clear the work area, lay down a cloth, and work calmly to avoid dropping parts or bending panels. Preparation reduces frustration and keeps the repair on track.
Understanding the Belt Path and Drum Access (Overview)
To replace the belt correctly, you must route it along the drum and pulleys in the proper sequence. In most dryers, the belt travels under the drum and over the drive pulley, then around idler pulleys. Before you touch anything, consult the model's service manual or a trusted guide and use a photo you took earlier to verify the path. This orientation check ensures you don’t reinstall the belt twisted, which would cause poor performance or damage. The overview prepares you for the actual removal and reinstallation steps that follow in the step-by-step section.
Maintenance and Prevention Post-Repair
After replacing the belt, perform a thorough test run with no clothes to listen for abnormal sounds and ensure the drum spins freely. Clean the vent system and lint screen, and avoid overloading the dryer, which can put extra strain on the belt. Consider periodic belt inspections as part of routine maintenance, especially for older units. Proper care reduces future belt failures and keeps your laundry schedule on track, saving time and energy in the long run.
Tools & Materials
- Replacement dryer belt(Choose the correct length and width for your model; check the dryer's model number and service manual.)
- Screwdriver set (Phillips and flathead)(Have several sizes on hand for fast panel access.)
- Nut driver or socket set(Common sizes are 1/4" to 3/8"; helps remove screws securing panels.)
- Pliers(Use for belt maneuvering and pulley adjustments.)
- Work gloves(Protect hands from sharp edges inside the cabinet.)
- Flashlight(Bright light helps inspect pulleys and path clearly.)
- Magnetic tray or small container(Keeps screws organized during disassembly.)
- Rag or cloth(Wipe away dust and lint from internal parts.)
- WD-40 or silicone spray (optional)(Lubricant for pulleys if they feel stiff; avoid overuse.)
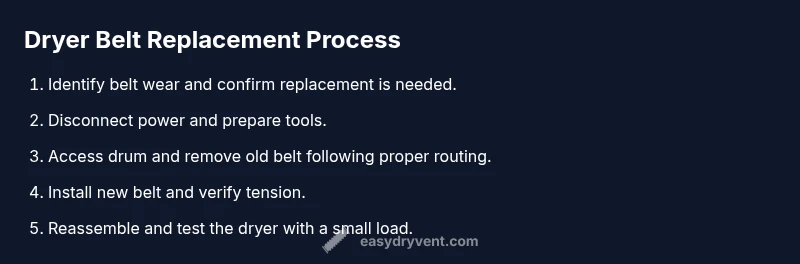
Steps
Estimated time: 45-90 minutes
- 1
Power down and unplug
Unplug the dryer from the wall and switch off the circuit if possible. Move the appliance to access panels with clear space around it. This initial safety check prevents electrical shock and ensures you can work comfortably.
Tip: Double-check the circuit is off by testing a simple outlet with a voltmeter before touching any wires. - 2
Access the belt path
Remove the back or top panel to locate the belt path around the motor pulley and idler pulley. Take a moment to study how the belt travels before removing anything. A photo taken beforehand will simplify reassembly.
Tip: Keep screws organized by location; a magnetic tray helps prevent losing tiny fasteners. - 3
Release the drum and belt
Gently release the drum spacers or clips as required by your model, supporting the drum so it doesn’t fall. Loosen tension on the belt and slip it off the pulleys. Inspect the pulleys for wear or damage while you have access.
Tip: Do not force the drum; if it won’t move with light pressure, recheck panel access and mounting points. - 4
Remove the old belt and inspect components
Take out the worn belt and examine the motor pulley, idler pulley, and drum support for wear or damage. Replace any worn components if needed and confirm there are no cracks or glazing on the pulley surfaces. This reduces the chance of rapid belt failure after installation.
Tip: If you find a damaged pulley, replace the affected part or consult a professional before proceeding. - 5
Install the new belt and route properly
Place the new belt around the drum per the identified path, then seat it on the drive and idler pulleys. Ensure the belt is not twisted and sits evenly in grooves. A quick test by turning the drum with your hands confirms correct seating before final assembly.
Tip: Use the pre-take photos to guide the correct belt routing if your model isn’t this straightforward. - 6
Reassemble, test, and finalize
Reattach the drum, panels, and exhaust connection if you removed it. Plug the dryer back in and run a short test cycle with no clothes to listen for unusual noises and verify the drum spins smoothly. If all sounds normal, run a small load to confirm full operation.
Tip: Record a quick note about the belt type and replacement date for future maintenance.
Common Questions
Do I need to unplug the dryer before replacing the belt?
Yes. Always unplug the dryer and turn off the circuit breaker before beginning any maintenance. This prevents electrical shock while you work inside the cabinet.
Yes, unplug the dryer and switch off the circuit breaker before starting any belt replacement.
Can I replace the belt on both front-load and top-load models?
Yes, belt replacement can be done on many models, but the steps differ by design. Check your model’s service manual for the correct belt routing and panel access.
Yes, but follow your model’s manual for the exact steps and belt path.
What are common signs that the belt needs replacement?
Cracking, fraying, glazing on the belt, squealing noises, or the drum not turning properly are all indicators that the belt is worn and should be replaced.
Look for cracks, fraying, squeals, or a drum that won’t spin.
Is it safe to reuse an old belt if it looks okay?
No. Even if it looks fine, a worn belt can fail suddenly. Replacing with a new belt is the safer option and reduces the risk of damage.
Avoid reusing a worn belt; replace it for safety and reliability.
How long does a belt replacement typically take?
Most DIY belt replacements take about 30 to 90 minutes, depending on the dryer's design and accessibility of panels.
Most people complete it in about 30 to 90 minutes.
Should I replace other parts along with the belt?
Inspect the pulley and drum rollers for wear and replace if needed. While not always required, addressing worn pulleys can prevent future belt failure.
Check pulleys and rollers; replace worn parts to prevent future issues.
Watch Video
Key Points
- Identify the correct belt for your model before purchase.
- Unplug and prepare the workspace to prevent injuries.
- Route the belt accurately to avoid misalignment and rapid wear.
- Test the dryer with and without a load to ensure proper operation.