Fix Your Dryer Near Me: DIY Maintenance Guide
Learn practical, safe steps to fix common dryer issues near you with Easy DryVent's DIY maintenance guide. Clean vents, inspect belts, and test heat for safer, faster drying.

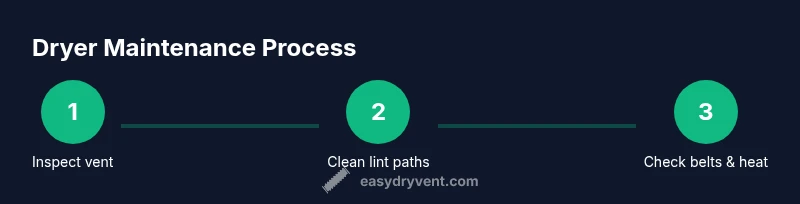
You can tackle many common dryer problems locally with a DIY approach. This guide walks you through safety checks, basic diagnostics, vent and lint maintenance, belt and drum inspections, and when to call a professional—so you can fix a dryer near you with confidence. Start with the basics and proceed step by step.
Why DIY dryer repair is practical for homeowners
Fixing a dryer near you often saves time and money, especially for common, non-technical issues. Homeowners can tackle lint buildup, vent restrictions, and simple part wear with basic tools and a careful, safety-first approach. Easy DryVent advocates a measured, methodical process that emphasizes prevention and safe operation. By learning core maintenance habits, you reduce downtime and keep your laundry routine on track. The goal is to empower you to diagnose and address issues promptly, without jumping to expensive service calls. Remember: not every problem is safe to fix yourself, but many routine tasks are well within reach for a capable DIYer who follows best practices.
According to Easy DryVent, a well-maintained dryer not only dries faster but also lowers energy usage and reduces fire risk. Keeping the dryer in good shape means you spend less time waiting for loads to finish and less money on repeated repairs. Use this guide as a practical reference for typical fixes you can do at home, especially when you search for “fix dryer near me.”
Safety considerations before you start
Working on a dryer involves electricity, moving parts, and high heat. Always unplug the unit before you touch any components. If the dryer is gas-powered, turn off the gas supply per the manufacturer’s instructions and ensure adequate ventilation. Wear safety glasses to protect your eyes from sharp edges and debris, and use gloves when handling hot surfaces after a test run. Work in a well-lit area and keep children and pets away from the workspace. If you smell burning insulation or see damaged wiring, stop immediately and seek professional help. Prioritize safety at every step to ensure you can complete tasks without incident.
Quick diagnostic checks you can perform
Begin with simple, non-destructive diagnostics that reveal the most common culprits. Check the lint screen and vent for blockages, then remove the vent hose and inspect the internal ducting for lint buildup. Listen for unusual noises when the drum spins and feel for heat with caution after a brief test run. If the dryer runs but doesn’t heat, the problem is often the heating element, thermal fuse, or cycling thermostat. If it tumbles but doesn’t dry, the belt or drum support may be worn. Document symptoms to match them with likely causes and plan safe fixes.
Cleaning and maintaining lint traps, ducts, and vent hoods
Lint is the primary enemy of dryer efficiency and safety. Start with a thorough lint trap cleaning after every load. Vacuum lint from the dryer cabinet opening and use a vent brush to clear the ductwork. Inspect the vent hood outside the home to ensure airflow isn’t blocked by debris or nesting animals. Regular cleaning reduces drying time and lowers fire risk. Establish a routine, such as monthly for vent cleaning in low-use homes or quarterly in high-use households. Always reassemble and test after cleaning to confirm airflow restoration.
Inspecting exterior and interior components for wear
Exterior components like the drum door seal and front panel should be visually inspected for cracks or gaps. Inside, check the drive belt for cracks or fraying and inspect pulleys and idlers for smooth operation. If you notice a wobbly drum, unusual squeaks, or the belt slipping, note the symptoms and plan a replacement or professional assessment. Wear on these parts is common as the dryer ages, but timely replacement minimizes risk and prevents further damage that could lead to a bigger repair bill.
Electrical safety and plug/cord inspection
Always start by unplugging the dryer and verifying the outlet is not live. Inspect the power cord for cracks, cuts, or burn marks. If you find damage, replace the cord or have a qualified technician examine the outlet and wiring. For gas models, ensure the gas line is shut off during any internal work and never bypass safety devices. Never operate a damaged appliance; electrical faults can cause shocks or fires, so treat suspected issues as a high-priority safety risk.
Diagnosing common failure modes: not heating, not tumbling, long dry times
Not heating often points to a failed heating element, thermal fuse, or control board. Not tumbling can be belt or motor related. Long dry times may indicate restricted airflow, worn drum seals, or improper vent sizing. Use symptom-focused checks: test airflow, inspect belts, and verify that the drum spins freely. Document the exact behavior to guide decisions about cleaning, part replacement, or professional service. This symptom-based approach helps you decide whether a DIY fix is practical or if a pro is needed.
Replacing safe-to-handle components: belts, fuses, and thermostats
Many home repairs involve replaceable, user-serviceable parts. A worn belt or a failed thermal fuse can cause heat loss or no heat at all. When replacing parts, always disconnect power, verify compatibility with your model, and follow the manufacturer’s disassembly steps. Use a parts diagram or the manual to locate the correct components. After replacement, reassemble carefully and run a short test cycle to verify proper operation. If you’re unsure about any step, pause and seek professional guidance.
When to call a professional for dryer repairs
Some issues require specialized tools, testing equipment, or pressure and safety protocols beyond DIY scope. If you smell gas, see burning or arcing, hear loud grinding, or encounter persistent overheating after vent cleaning, schedule a professional diagnosis promptly. Additionally, if you’re dealing with electrical wiring, gas connections, or non-standard parts, a licensed technician ensures safety and code compliance. Knowing when to escalate helps protect your home and avoid unsafe repairs.
Tools & Materials
- Phillips head screwdriver set( assorted sizes for screws on panels and brackets)
- Flat-head screwdriver( used for prying or prying clips)
- Nut driver / socket set( for removing vent clamps and fasteners)
- Needle-nose pliers( grasping small parts and clips)
- Vacuum with brush attachment( for lint and debris in cabinet and ducts)
- Vent cleaning brush / duct brush( reach inside ducts and via vents)
- Flashlight or headlamp( inspect dark cabinet areas)
- Multimeter (optional)( test continuity and voltage if you have the skills)
- Replacement parts (as applicable)( dryer belt, thermal fuse, cycling thermostat, door seal)
- Work gloves( protect hands from sharp edges)
- Safety glasses( protect eyes from debris)
Steps
Estimated time: 60-120 minutes
- 1
Power down and unplug the dryer
Completely disconnect the dryer from the power source and, if applicable, shut off the gas supply. Confirm the outlet is de-energized using a tester if available. This primer step prevents shocks and accidental activation while you inspect components.
Tip: Always handle cords by the plug, not the cord itself to avoid insulation damage. - 2
Access the vent path
Remove the front panel or toe-kick access to reach the lint path. Clear any visible lint around the opening. If you can safely access the duct, detach the vent hose to inspect the interior for lint buildup.
Tip: If clips resist, don’t force them—use gentle wiggles and proper tools to avoid panel damage. - 3
Clean lint trap and ducts
Clean the lint trap thoroughly and vacuum the interior. Use a vent brush to travel through duct sections and clear lint. Reattach once clean and ensure the vent outside is free of obstruction.
Tip: Regular cleaning is the most effective maintenance to prevent long dry times and fires. - 4
Inspect drive belt and drum components
Look for cracks on the belt and signs of wear on belt tensioners. Rotate the drum by hand to check for smooth motion and listen for rubbing or grinding noises. Replace worn parts following the manufacturer’s instructions.
Tip: Take a photo before disassembly to help with reassembly if you’re uncertain. - 5
Check heating element and safety devices
If the dryer runs but doesn’t heat, examine the thermal fuse and cycling thermostat for continuity with a multimeter if you’re comfortable. If testing isn’t conclusive, consult the model’s service diagram to target the right component.
Tip: Some models require disassembly to access the heating element—don’t bypass safety protections. - 6
Test the unit after partial reassembly
With components reinstalled, plug the dryer in and run a short cycle to test heat and tumbling. Observe any abnormal sounds or smells. If the problem persists, review symptoms and decide whether a part replacement is needed.
Tip: If you smell burning, power off immediately and re-check wiring and connections. - 7
Replace safe-to-handle parts if needed
If you identified worn belts or faulty fuses, replace them with compatible parts. Follow the model diagram and ensure all screws are snug but not overtight. Re-test after replacement to confirm improvements.
Tip: Keep old parts as reference even after replacement for future maintenance notes. - 8
Assess electrical safety post-repair
Reinspect cords, plugs, and outlets for damage or heating signs. If you notice melted insulation or scorch marks, stop and call a professional. Electrical issues can escalate quickly if ignored.
Tip: Use a dedicated outlet and avoid power strips for dryers. - 9
Document and schedule preventive maintenance
Record dates of lint cleaning, vent inspections, and part replacements. Set a maintenance calendar to reduce future failures and maintain safe operation.
Tip: A simple calendar reminder helps keep maintenance on track.
Common Questions
Can I fix a dryer not heating by myself?
Not always. A not-heating dryer may involve a faulty heating element, thermal fuse, or relay. If you’re comfortable with electrical testing and model-specific diagrams, you can inspect or replace these parts. If you smell burning or see exposed wiring, stop and call a pro.
A not-heating dryer can sometimes be fixed at home if you’re comfortable with basic electrical tests, but stop if you smell burning or see damaged wires.
How often should I clean the lint trap and vent?
Clean the lint trap after every load. Do a vent and duct inspection every 3–6 months depending on usage. Regular cleaning reduces fire risk and keeps drying time short.
Clean the lint trap after every load and check the vent every few months based on usage.
Is it safe to run the dryer after I’ve cleaned the vent?
Yes, once you’ve cleared lint and verified airflow from both ends, run a test load to confirm airflow is normal. If airflow remains restricted or the dryer still takes too long, recheck for obstructions or consider professional service.
After cleaning, run a short test cycle to confirm airflow; if airflow is restricted, recheck or call a pro.
What basic tools should I have for at-home dryer maintenance?
Keep a screwdriver set, a vacuum with brush attachment, a vent brush, pliers, and a flashlight. These tools cover most routine tasks like lint removal, panel access, and simple belt checks.
A screwdriver set, a vacuum with brush, a vent brush, pliers, and a flashlight are the essentials for at-home dryer maintenance.
When is professional service unavoidable?
Call a professional if you detect gas smells, electrical faults, or if disassembly requires specialized safety protocols. Complex control boards or damaged wiring also warrant expert service.
Call a pro if you smell gas, see electrical faults, or the repair involves complex electronics or wiring.
Can a clogged vent cause a fire?
Yes. Lint buildup in ducts can overheat and ignite. Regular cleaning reduces this risk and helps the dryer run efficiently.
A clogged vent can overheat and pose a fire risk; clean it regularly.
Watch Video
Key Points
- Start with safety and power down before any inspection
- Regular vent and lint maintenance improves efficiency and safety
- Different symptoms point to different causes—identify the likely component
- Know when to DIY and when to call a professional