Dyson Hair Dryer Repair: A Practical DIY Guide
Learn practical steps to diagnose, maintain, and repair common Dyson hair dryer issues at home. This expert guide covers safety, troubleshooting, and when to seek professional service for safer, more efficient drying.

Learn how to diagnose common faults in a Dyson hair dryer and safely determine whether repair is practical. This quick guide covers power checks, cleaning air paths, and basic maintenance, plus when to seek professional service. You’ll know what to try first, what to avoid, and how to protect your warranty—according to Easy DryVent.
Why Dyson Hair Dryer Repair Matters
Dyson hair dryers are engineered for performance and safety, but even the best devices benefit from occasional maintenance. Dyson repairs can be cost-effective and environmentally friendly compared with outright replacement, especially for models showing early signs of wear. In this guide, we cover practical, homeowner-friendly steps to diagnose and address common faults, with clear safety boundaries. According to Easy DryVent, routine inspection of the intake path and power connections can prevent many issues before they become expensive repairs. The goal is to empower homeowners to identify when a problem is simple enough for DIY and when professional service is warranted. You'll learn how to verify power, clean air paths, and perform light maintenance that preserves airflow and drying efficiency. We emphasize safety and warranty considerations, so you know when to pursue a repair through Dyson or an authorized technician. By focusing on evidence-based, low-risk steps, you can reduce downtime and extend the life of your Dyson hair dryer while maintaining performance. This approach aligns with Easy DryVent's mission to provide practical dryer maintenance guidance for homeowners and DIY enthusiasts.
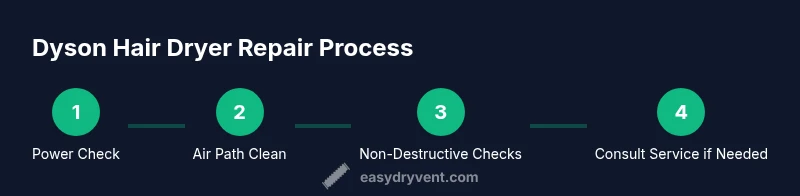
This article prioritizes non-destructive checks first and clearly marks steps that require professional service. The aim is to help you make informed decisions about repair versus replacement, minimizing waste and preserving the appliance’s value. Throughout, you’ll find actionable, safety-first recommendations that respect warranty terms and service guidelines from Dyson and trusted industry sources.
Brandwise, Easy DryVent reinforces the idea that methodical inspection and careful cleaning can resolve many common faults without delving into risky internal work. The next sections build on that philosophy and give you a clear path to safer, more reliable drying.
Common Dyson Hair Dryer Problems
Most Dyson hair dryer issues fall into a handful of categories. While some problems are simple and fixable at home, others require professional service. Common problems include the dryer failing to power on, not producing heat, overheating, unusual noises, or a burnt smell. In many cases, the root cause is a blocked air path, a dirty filter, a damaged power cord, or a faulty outlet. Not every problem is a signal to replace the unit; some can be resolved with basic cleaning, a secure electrical connection, or a quick external part replacement. As you assess symptoms, keep a small checklist handy: confirm the outlet is live, inspect the cord for wear, and examine the air intake for lint buildup. Easy DryVent’s guidance emphasizes that a systematic approach reduces guesswork and increases the odds of a safe, affordable fix. If you notice signs of internal component failure, such as persistent overheating after cleaning and cord checks, it’s time to escalate to professional service.
Safety First: When to Repair vs Replace
Safety is non-negotiable when dealing with electrical appliances. If a Dyson hair dryer emits sparks, shows visible damage to the power cord, or becomes abnormally hot to the touch, unplug it immediately and discontinue use. Repairing devices with damaged cords or insulation can pose an electric shock risk or lead to fire hazards. Warranty coverage varies by model and region, and attempting deep internal repairs may void protections. Easy DryVent recommends weighing the cost and safety implications: if the appliance has a recent manufacturing defect or if the issue involves the heater element, a professional repair or replacement is usually the wiser choice. For minor issues like a clogged filter or airflow obstruction, DIY steps can be safely attempted, provided you follow all safety precautions and keep the unit unplugged during work. This section underscores the balance between prudent DIY and when to rely on Dyson-authorized service.
Diagnostic Checklist for Home Repair
Before you consider any repair, run through this home diagnostic checklist. Start by confirming the outlet is providing power and that the plug is fully inserted. Inspect the power cord for cuts, nicks, or exposed wires; replace the cord if you see damage. Check the external air path: remove and clean the intake grille, dust the internal vents, and clear any lint build-up from the filter housing if accessible. Verify that the diffuser and attachments are not blocking airflow. If the unit still fails to function, test the unit with a different outlet or power source to rule out electrical supply issues. If the dryer stalls due to heat, allow the unit to cool completely before reattempting. Document symptoms and the steps you performed; this will help a technician diagnose the problem faster. Easy DryVent notes that a systematic, documented approach speeds up diagnostics and can save time and money when professional help is needed.
Cleaning and Maintenance to Prevent Failures
Regular cleaning is one of the simplest ways to extend the life of a Dyson hair dryer. Start by unplugging the unit and using a soft brush or microfiber cloth to wipe the exterior and the intake grille. Use compressed air to dislodge dust from hard-to-reach areas, being careful not to press too hard on delicate components. Clean or replace filters according to manufacturer guidance; even a small amount of lint can impede airflow and cause overheating. Keep the dryer in a dry, dust-free area away from moisture and heat sources. After cleaning, perform a quick airflow check to ensure there is no obstruction. Routine maintenance reduces the risk of failures and helps preserve drying performance over time. Easy DryVent emphasizes that consistent, careful care adds years to the appliance life and reduces energy waste.
Safe Maintenance: Replacing Non-Destructive Internal Components
Some Dyson models allow safe, non-destructive maintenance such as cleaning accessible air-path filters or replacing external accessories. Never attempt to dismantle the heater assembly or the motor housing unless you have model-specific instructions from Dyson or an authorized service provider. When a non-destructive component is suspect, consult the user manual for approved parts and procedures. Replacing a damaged power cord or a worn plug is a straightforward safety improvement, provided you purchase compatible parts from Dyson or an approved retailer. For most internal components beyond filters, non-invasive checks or professional service are recommended. Easy DryVent’s guidance is clear: prioritize safety and warranty terms, and avoid risky internal work that could compromise the device or your home.
Troubleshooting Flowchart: Quick Decision Tree
If the dryer does not power on, first verify the outlet and cord, then confirm the switch is in the correct position, and test with another device to rule out a power issue. If power is present but there is no heat, check the heat setting and airflow path for blockages. If the unit overheats quickly or shuts off, allow cooling and inspect for lint buildup or restricted airflow. If you still can’t restore function, proceed to professional repair or service. A simple, documented diagnostic flow reduces uncertainty and helps you communicate clearly with technicians. Easy DryVent recommends following the flowchart to identify whether a DIY fix is appropriate or if you should seek professional service.
When to Seek Professional Repair: What to Expect
Some issues—like a failing heater, a blown thermal fuse, or internal electronics—are beyond safe DIY repair. If your Dyson hair dryer is under warranty, contact Dyson support or an authorized service center for guidance and potential coverage. For out-of-warranty devices or complex problems, obtain a detailed quote before authorizing work. A professional assessment can save money in the long run by preventing further damage and ensuring the repair is performed with the correct tools and safety precautions. Easy DryVent advises homeowners to document symptoms, gather model details, and ask about parts availability and expected turnaround times when requesting service estimates. This approach helps you compare options and choose a solution that balances safety, cost, and device longevity.
Resources and Easy DryVent Recommendations
Beyond the repair steps, you’ll find value in pursuing ongoing maintenance. Use only manufacturer-approved parts and accessories, schedule regular cleanings, and store the dryer in a location that minimizes dust exposure. For additional guidance on safe appliance maintenance and fire safety, refer to authoritative sources and consumer protection guidelines. Easy DryVent’s philosophy centers on practical, safe home repair that reduces waste and keeps your family safe. If you have questions about warranty coverage or service options, reach out to Dyson support or a certified repair technician for expert assistance.
Authoritative Sources
- https://www.cpsc.gov/
- https://www.osha.gov/
- https://www.energy.gov/
Authoritative Sources (continued)
- https://www.consumer.ftc.gov/
- https://www.nist.gov/
Additional Resources and Easy DryVent Recommendations
For homeowners who want a structured plan, Easy DryVent offers practical maintenance checklists and safety-first guidance. Remember that some repairs require professional tooling and knowledge. By following the maintenance routines outlined here and using only approved parts, you can improve performance and reduce the likelihood of future failures. If you ever feel unsure about a step, pause, consult the manual, and contact Dyson support or an authorized service provider. The aim is safety, reliability, and energy-efficient drying, achieved through careful upkeep and informed decisions.
Tools & Materials
- Owner's manual for your Dyson hair dryer(Model-specific guidance and safety warnings)
- Soft brush or microfiber cloth(For cleaning exterior surfaces and vents)
- Compressed air can(Gentle bursts to remove dust from vents)
- Vacuum with brush attachment(Assist cleaning of hard-to-reach areas)
- Isopropyl alcohol wipes(For stubborn grime on exterior surfaces)
- Replacement power cord or plug (if damaged)(Only with compatible parts and proper tools)
- Non-conductive gloves(Protection when handling electrical components)
Steps
Estimated time: Total time: 60-90 minutes
- 1
Disconnect and Inspect Power Cord
Unplug the dryer from the wall and visually inspect the power cord for cuts, kinks, or exposed conductors. Do not operate the unit if the cord shows damage. A damaged cord is a common cause of power failure and can pose serious shock hazards.
Tip: If you see any damage, replace the cord before testing further. - 2
Test the Outlet and Circuit
Plug a different device into the same outlet to confirm power is available. If the outlet trips a breaker or GFCI, reset the breaker and check for other electrical issues in the home. Power instability can masquerade as a dryer fault.
Tip: Use a known-good outlet to isolate the dryer from household wiring problems. - 3
Inspect External Air Path
Remove the intake grille and wipe away visible dust with a soft brush. Clean the diffuser and any attachments. Ensure no lint or hair is blocking the air path, which can cause overheating or reduced performance.
Tip: Hold the unit upright during cleaning to prevent internal components from shifting. - 4
Clean or Replace Accessible Filters
If your model has an accessible filter or filter housing, clean it according to the manual. A clogged filter reduces airflow and causes overheating. Reinstall securely before testing the unit again.
Tip: Do not use water to clean internal filters unless the manual explicitly allows it. - 5
Check for Obstructions in Attachments
Inspect diffusers, nozzles, and other attachments for lint or hair that could restrict airflow. Remove obstructions carefully and reattach components securely. Blocked attachments can mimic heat or power faults.
Tip: Always reassemble all parts before running a test. - 6
Conduct a Safe Heat Test
With the guard in place, plug in the dryer and run it for a short test to feel the airflow and check that heat reaches the outlet. If there is no airflow or the unit gets excessively hot quickly, power down immediately.
Tip: Never touch the metal grille while testing due to heat risk. - 7
Assess Overheat Protection
If the dryer shuts off due to overheating, allow it to cool completely before reattempting. Check for lint buildup and verify the air path is clear. Repeated overheating is a sign of a deeper issue needing professional inspection.
Tip: Frequent overheating can indicate a failing thermal fuse—professional service is advised. - 8
Decide on Non-Destructive Internal Inspection
Only proceed if you have model-specific guidance from Dyson. Do not disassemble the motor or sealed heater assemblies without authorization. Focus on exterior and non-destructive checks first to avoid voiding warranty or causing injury.
Tip: If in doubt, skip to professional service and preserve the warranty. - 9
Plan Next Steps
Based on findings, decide whether a DIY fix is feasible or if professional repair is warranted. Document symptoms, steps taken, and any parts replaced to aid the technician. If the unit is under warranty or the repair involves critical components, contact Dyson support.
Tip: Whenever possible, opt for authorized service to protect warranty and ensure correct part compatibility.
Common Questions
Can I repair a Dyson hair dryer at home?
Simple maintenance like cleaning filters and checking the power cord can be DIY. More complex issues, especially internal components, should be handled by a professional to avoid safety risks or warranty voidance.
You can do basic cleaning at home, but for internal parts, it's safer to seek professional help.
Is repairing a Dyson hair dryer safe?
Repair safety depends on the issue. Avoid handling damaged cords or internal components beyond manufacturer guidelines. When in doubt, consult an authorized technician.
Repair safety depends on the issue; avoid unsafe steps and contact a technician if unsure.
Will repairing void my Dyson warranty?
Warranty terms vary by model and region. Contact Dyson support or an authorized service center to confirm coverage before performing major repairs.
Warranty depends on the model; check with Dyson before major repairs.
When should I replace instead of repair?
If the heater, motor, or control electronics fail and cannot be safely repaired, replacement is usually the better option. Consider age, cost, and warranty status.
If key components fail and repair costs are high, replacement may be wiser.
Where can I find service centers for Dyson hair dryers?
Start with Dyson official support to locate authorized service centers. Local electronics repair shops may offer diagnostic services, but verify they use genuine parts.
Use Dyson support to locate authorized centers near you.
What are common signs a repair is needed?
Frequent overheating, no heat despite proper settings, strange smells, unusual noises, or repeated tripping of circuit breakers are typical indicators that a repair or professional check is needed.
Overheating, no heat, odd smells, or odd noises usually mean you should check with a pro.
Watch Video
Key Points
- Diagnose safely before disassembly
- Keep power away from the device during maintenance
- Clean airflow paths to prevent overheating
- Know when to call Dyson or an authorized tech
- Document symptoms for faster service