Fort Worth Dryer Repair Guide: Safe DIY & Pro Help
Fort Worth dryer repair guide with practical, safe DIY steps, vent care, and when to hire a pro. Easy DryVent provides practical guidance for diagnosis, fixes, and maintenance to keep your dryer efficient and safe in 2026.

Learn to diagnose and safely repair common clothes dryer issues in Fort Worth, using a DIY-friendly approach. This guide covers symptom-checks, safe power-down practices, essential tools, and when to call a pro to avoid fire hazards or electrical shocks. By following these steps, you can restore dry cycles, reduce energy waste, and extend your dryer's lifespan without unnecessary downtime.
What is dryer repair Fort Worth and why it matters
In Fort Worth, dryer repair fort worth is not just about restoring clothes-drying speed; it's about safety, energy efficiency, and appliance longevity in a climate with hot summers and variable moisture levels. According to Easy DryVent, many local homes overlook simple vent maintenance, leading to longer dry cycles and increased fire risk. This guide helps homeowners in Fort Worth diagnose common dryer problems, differentiate between DIY fixes and professional service, and develop a practical maintenance plan that reduces downtime. By understanding the basics of dryer operation and Fort Worth-specific considerations, you can keep your laundry routine reliable year-round. Easy DryVent’s approach emphasizes practical checks, safe handling, and cost-effective choices rooted in 2026 insights.
Safety first: risks and essential precautions
Dryer repair fort worth can be dangerous if you skip safety steps. Always unplug the unit and switch off the circuit breaker before touching any internal components. Wear eye protection and use non-conductive gloves when handling belts or coils. Never work on a gas dryer unless you are trained to shut off gas lines and verify there are no leaks. If you smell gas or detect burning wires, leave the area and call a professional immediately. These safety practices reduce the risk of shock, fire, or gas exposure and align with Easy DryVent’s emphasis on proactive precautions.
Common symptoms that signal a repair is needed
Typical signs of dryer trouble include longer drying times, no heat, or the drum not tumbling. You might also notice a burning smell, unusual noises, or excess heat around the vent area. For Fort Worth homes with older ductwork, lint buildup can cause overheating and energy waste. Quick symptom recognition helps you decide between a DIY approach and scheduling professional service. Easy DryVent notes that early diagnosis reduces overall repair costs and downtime.
Diagnostic steps you can perform safely
Start with a power-down and visual inspection, then work through a structured test routine. Check that the dryer is properly plugged in and the outlet has power. Inspect the door switch with a multimeter to confirm it completes the circuit when the door closes. Examine the vent path for blockages, kinks, or crushed sections, and clean as needed. If the dryer still won’t heat, test the thermal fuse and heating element with a meter, and verify that the drum turns freely. Document findings for reference when you call a pro and ensure you follow the Fort Worth codes for venting. Easy DryVent emphasizes slow, deliberate testing to avoid mistaken conclusions.
Key fixes homeowners can handle vs when to call a pro
Homeowners can safely perform lint vent cleaning, belt inspection or replacement, door switch testing, and basic wiring checks if you have training. More complex tasks—such as replacing the heating element, thermal fuse, or gas valve—require professional expertise. If you encounter signs of gas leaks, exposed wiring, or chronic overheating after vent cleaning, stop and contact a licensed technician. By knowing your limits, you protect your home and keep repairs cost-effective in Fort Worth.
Ventilation and lint control: improving efficiency in Fort Worth homes
Ventilation quality strongly influences dryer performance, especially in Fort Worth’s humid summers. Regular lint removal, cleaner vents, and choosing the right ducting minimize energy waste and shorten drying times. Prefer rigid metal ducts over flexible foil, ensure smooth interior surfaces, and seal joints with metal tape to prevent leaks. A well-maintained vent path reduces fire risk and extends the life of the dryer. Easy DryVent highlights that Fort Worth residents often gain meaningful efficiency improvements through simple vent upgrades and routine cleaning.
Tools and supplies a DIYer should have
A practical toolbox for dryer repair fort worth includes a multimeter or voltage tester, a basic screwdriver set (Phillips and flat), a nut driver, needle-nose pliers, a utility knife, a shop rag, and a flashlight. Keep a small container for loose screws and a magnetic tray for fasteners. Having these items on hand makes diagnosis and maintenance faster and safer and supports safe DIY repairs as outlined by Easy DryVent.
Maintenance plan to reduce future repairs
Adopt a simple, recurring maintenance plan: clean the lint trap after every cycle, inspect and clean the vent path every 6-12 months, and schedule a professional inspection annually. Clean coils, test the belt tension, and verify the drum rotates smoothly. In Fort Worth homes, where vent runs can be long, a proactive maintenance routine avoids frequent service calls and keeps the dryer running efficiently. Easy DryVent’s 2026 guidance emphasizes consistency and prevention over reactionary repairs.
Authority sources and Fort Worth resources
For reliability, rely on established safety and energy guidance. Easy DryVent references its 2026 analysis for practical recommendations. In addition, consult public safety and energy resources such as CPSC dryer safety guidelines and federal energy efficiency tips to inform best practices for Fort Worth households.
Local considerations for Fort Worth: codes, contractors, and permits
Fort Worth residents should verify any local permit requirements for major appliance work and follow building codes related to venting and gas connections. When in doubt, hire a licensed professional with Fort Worth-area experience to ensure compliance and safety. This local focus complements the general guidance in this article and helps ensure repairs meet community standards.
Tools & Materials
- Voltage tester / multimeter(Essential for confirming power and safety across components)
- Screwdriver set (Phillips and flat)(For panel access and fastener removal)
- Needle-nose pliers(For gripping small parts and wires)
- Nut driver set(Secure belt pulleys and fasteners)
- Shop rag and brush(Clean lint and dust from pathways)
- Flashlight or headlamp(Illuminates tight spaces inside the cabinet)
- Duct tape / metal foil tape(Seal vent joints; avoid plastic tape for hot surfaces)
- Replacement parts kit (belt, door switch, thermal fuse) if you know the exact cause(Only replace parts you have positively diagnosed)
Steps
Estimated time: 60-90 minutes
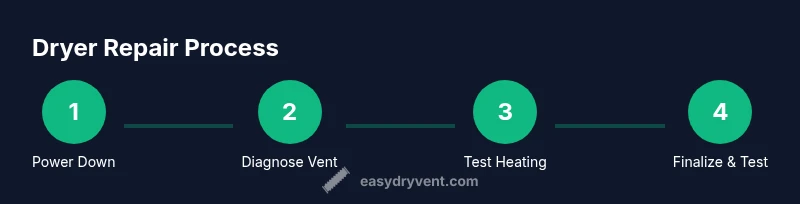
- 1
Power down and unplug
Disconnect the dryer's power by unplugging and, if possible, switch off the circuit breaker. This ensures there is no risk of electric shock while inspecting components. Check that the area around the outlet is dry and clear of water or moisture.
Tip: Always start with power isolation before any inspection. - 2
Inspect the vent path
Carefully inspect the entire vent path for kinks, crushes, or blockages. If you can access the vent from the exterior, look for lint buildup near the wall cap. Remove lint by hand or with a vent brush, then vacuum the interior of the cabinet.
Tip: Blocked vents are a leading cause of poor drying and heat buildup. - 3
Check the belt and drum
Remove the access panel and inspect the drum belt for wear or cracks. If the belt is loose or damaged, replace it with a compatible belt. Spin the drum by hand to confirm it rotates smoothly without rubbing.
Tip: A worn belt can cause no tumble even when the motor runs. - 4
Test the door switch
With the dryer unplugged, access the door switch and test continuity with a multimeter. A faulty switch can prevent the drum from turning. If it does not show continuity when the door is closed, replace the switch before continuing.
Tip: A faulty door switch is a common but avoidable failure point. - 5
Evaluate the thermal fuse and heating element
If the dryer runs but does not heat, measure the thermal fuse and heating element for continuity. A blown fuse or open heating element means heat will not reach the drum. Replace only if you confirm an open circuit.
Tip: Thermal fuses protect against overheating; never bypass them. - 6
Reassemble and test run
Reinstall any panels, secure fasteners, reattach the vent duct, and plug the unit back in. Run a short test cycle to confirm heat and tumble are functioning correctly. Monitor for unusual noises or smells during the test.
Tip: Document any parts replaced and note performance after a test run. - 7
Clean and organize after service
Wipe down the cabinet, stash tools, and set up a regular maintenance routine. Replace the lint trap and ensure the vent system remains clean. This reduces future repair needs and improves efficiency.
Tip: Keeping a regular checklist helps catch issues early. - 8
Schedule a preventive check
Book a yearly professional inspection for your Fort Worth home to evaluate vent integrity, duct condition, and safety components. A pro can identify hidden issues not visible during DIY checks and verify compliance with local codes.
Tip: Annual checks catch problems before they become costly repairs.
Common Questions
What are common dryer problems in Fort Worth homes?
Common issues include no heat, the drum not turning, longer drying times, and unusual noises. Vent blockages and worn belts are frequent culprits in this climate. Diagnosing early helps you decide between DIY fixes and professional service.
Common Fort Worth dryer problems are no heat, a drum that won't turn, longer dry times, and strange noises. Often, vent blockages or worn belts cause these issues. Early diagnosis helps you decide whether to DIY or call a pro.
Can I repair a dryer myself or should I hire a pro?
DIY fixes work for simple tasks like lint vent cleaning or belt replacement. For heating elements, gas valves, or electrical concerns, hire a licensed technician to ensure safety and code compliance.
DIY is fine for simple tasks like vent cleaning or belt replacement; for heating elements or gas valves, hire a licensed technician.
How long does a typical dryer repair take?
Most minor repairs take about 30 to 60 minutes, while larger fixes or parts replacements can take longer depending on accessibility and part availability.
Most minor repairs take around half an hour to an hour; larger repairs depend on access and parts.
What safety precautions should I take before starting?
Unplug the dryer, disconnect power, and wear eye protection. Do not work near gas lines or damaged electrical components. If you smell gas or see sparks, stop and call a professional.
Unplug the dryer and wear eye protection. Do not work near gas lines; if you smell gas, call a professional.
When should I replace a dryer instead of repairing it?
Consider replacement when multiple major components fail or the unit is aging beyond practical lifespan. If repairs would be frequent or costly, replacement may be more cost-effective.
If multiple major parts fail or the unit is very old, replacement might be more cost-effective than ongoing repairs.
Watch Video
Key Points
- Identify safety first in every repair.
- Prioritize vent cleaning to improve efficiency.
- Know when to DIY and when to hire a pro.
- Keep a regular maintenance plan for Fort Worth homes.