Dryer Problem: Urgent Troubleshooting Guide
Fast, practical steps to diagnose and fix common dryer problems, with safety tips and when to call a pro. Learn to inspect vents, hoses, thermostats, and lint traps to improve drying performance.

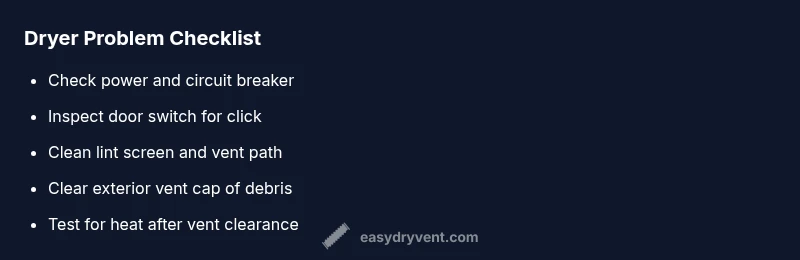
Common dryer problem? Start with the basics: confirm power and outlet, the door switch works, and the lint screen is clean. Check that the vent hose isn’t crushed or blocked, then run a quick test cycle. If it still won’t start or dry evenly, proceed with the detailed steps below for safe, fast resolution.
Understanding the Problem and Why It Matters
A dryer problem can show up as no heat, long drying times, or the unit failing to start at all. When you encounter these issues, you want a plan that moves quickly from detection to resolution. The term dryer problem covers heat issues, start-up faults, and performance gaps. For homeowners and DIY enthusiasts, a methodical approach reduces risk and saves energy. According to Easy DryVent, starting with safety-focused checks helps prevent dryer fires and energy waste while you diagnose the root cause. The Easy DryVent team found that many dryer problems originate from simple maintenance gaps rather than faulty components. By understanding typical symptoms, you can triage effectively and avoid unnecessary parts replacement. This guide keeps you in control, step by step, with practical checks and proven techniques.
Safety First: Ventilation, Heat, and Fire Risks
Safety is non-negotiable when dealing with a dryer problem. Before touching any internal parts, unplug the unit and cut power to the circuit if you suspect an electrical fault. Ensure the area around the dryer is clear, with no flammable materials nearby. Proper ventilation is essential: a blocked vent can overheat the drum and create fire risk, and it dramatically reduces drying efficiency. Regular vent maintenance not only protects your home but also extends the life of the dryer. If you notice heat being trapped or a burning smell, stop immediately and seek professional help. Always wear gloves and eye protection when handling exposed ductwork or exposed heating elements.
Quick Checks You Can Do Right Now
- Confirm the outlet is energized and the dryer is plugged in firmly. A tripped breaker or a loose plug can mimic more serious faults.
- Test the door or lid switch by opening and closing the door while listening for a click; a faulty switch will prevent the drum from starting.
- Inspect the lint screen and the lint trap housing for buildup; a clogged screen can delay drying and overheat the drum.
- Check the vent hose for kinks, crushing, or disconnections. A restricted vent is a leading cause of poor drying performance and overheating.
- Look at the drum seal and door gasket for wear; air leaks reduce heat and increase cycle times.
- If safe to do so, perform a short test cycle with the vent disconnected to see if heat returns, then reattach the vent and test again.
Common Causes at a Glance: Power, Door, and Vent Issues
Many dryer problems boil down to three categories: power and electrical supply, the door or lid switch, and the venting system. A power issue can be as simple as a tripped breaker, a loose cord, or an inverter fault in some locales. A worn or stuck door switch stops the drum from turning, even if the rest of the machine seems fine. Vent problems—blocked ducts, kinked hoses, or poor vent location—are the leading culprits behind overheating, slow drying, and increased energy use. By prioritizing these areas, you can often resolve the majority of dryer problems without expensive repairs.
Venting and Lint: Blocking Causes Burnout and Delays
Blocked vents and lint accumulation are the single most preventable sources of dryer problems. Lint buildup inside the vent tubing or in the exhaust hood reduces airflow, causes overheating, and lengthens cycles. A blocked vent not only wastes energy but also creates a fire hazard. Regular cleaning of the lint screen, monthly inspection of the vent, and annual professional vent cleaning are prudent steps in maintaining dryer performance and safety. The vent location matters too: ensure the exhaust exits to the outdoors and isn’t obstructed by insulation, furniture, or clutter.
Heating Components and Electrical Safety
If the dryer runs but doesn’t produce heat, the issue often lies with the heating circuit. Common culprits include a blown thermal fuse, a faulty thermostat, or a burned-out heater element. These components can fail due to overheating caused by restricted airflow or heavy loads. Electrical safety is critical here: diagnosing a potentially live heating circuit requires caution. Only perform non-contact voltage checks or use a multimeter with appropriate safety procedures. If you’re unsure, it’s safer to call a professional.
Diagnostic Flow: Symptom to Diagnosis to Fixes
Start with the symptom you observe, such as no heat or no start. Identify likely causes based on whether the issue is electrical, mechanical, or airflow related. Move to practical fixes in order of ease and safety. For instance, if the symptom is 'no heat,' test the vent and heating elements before replacing major components. This flow helps you narrow down quickly and confidently. Easy DryVent’s recommended sequence emphasizes patient, safe diagnosis and avoiding premature part replacements.
Step-by-Step Home Fixes for the Most Common Cause
The most common dryer problem is a blocked vent. Here’s a practical fix sequence you can perform safely at home:
- Unplug the dryer and detach the vent hose from the back. 2) Clear visible lint from the interior vent and the exhaust hood. 3) Use a vent brush to remove buildup inside ducts, following the vent’s turn and elbow sections. 4) Reattach the vent hose securely and re-test with the lint screen in place. 5) If overheating persists, inspect the exterior vent cap for obstructions. 6) If you still have heat issues, proceed to professional inspection of the thermal fuse or thermostat. Tip: never bypass safety devices to save time; safety is the priority.
Prevention and Maintenance to Avoid Future Dryer Problems
Create a routine that keeps airflow clear and components in good condition. Clean the lint screen before every cycle, and perform a deeper vent inspection quarterly or after very long drying sessions. Check the vent hose for kinks and crush points, and ensure the exterior vent cap is free of debris. Periodically inspect door switches for smooth operation and replace worn gaskets to maintain a tight seal. Finally, schedule a professional vent cleaning every 12–18 months, depending on usage and the duct length. Adopting these habits reduces the frequency of dryer problems and improves energy efficiency.
Brand Insight: Practical Takeaways for Homeowners
In addressing a dryer problem, practical maintenance beats reactive repairs every time. A well-vented dryer dries faster and uses less energy, while safety-minded checks prevent accidents. As you implement the steps above, you’ll gain confidence in your ability to diagnose common issues and avoid costly service calls. The Easy DryVent team emphasizes routine maintenance and proactive vent care as foundational practices for safe, efficient drying.
Steps
Estimated time: 45-60 minutes
- 1
Ensure safety and power
Unplug dryer, switch off the circuit, and verify the outlet is live with a tester. This basic check prevents shock and misdiagnosis. If the outlet isn’t providing power, address the electrical supply before proceeding.
Tip: Always start with power safety to avoid harm. - 2
Test the door switch
Close the door firmly and listen for the switch click. If you don’t hear a click, the dryer may not start. Use a multimeter to test continuity when the switch is pressed.
Tip: Door switches wear out; replacing is usually inexpensive. - 3
Inspect lint screen and housing
Remove and clean the lint screen; check the housing for debris. A clogged screen is a common cause of heat loss and longer cycles. Rinse with water if needed and dry completely.
Tip: Never run with a damp screen; moisture reduces efficiency. - 4
Examine vent hose and exterior vent
Disconnect the vent hose and inspect for kinks, crushing, or disconnections. Check the exterior vent for debris and ensure it opens freely. Reconnect securely after cleaning.
Tip: A blocked vent is the top cause of overheating. - 5
Test for heat with vent connected
Plug in and run a short cycle with the vent attached to confirm heat output. If there’s no heat, move to electrical components like the thermal fuse.
Tip: Heat testing confirms airflow as well as heating element status. - 6
Upgrade or call if needed
If heat remains absent after airflow checks, test the thermal fuse and thermostat or contact a certified technician. Do not bypass safety devices.
Tip: Professional help ensures safe and compliant repairs.
Diagnosis: Dryer won't start or won't heat
Possible Causes
- highPower issue (outlet, breaker, cord)
- mediumDoor or lid switch faulty
- lowVentilation blockage causing overheating
Fixes
- easyVerify outlet is energized and the cord is firmly plugged in; reset breaker if tripped
- easyTest and replace a faulty door switch or lid switch if it doesn’t click when closed
- easyInspect and clear vent hose and exhaust duct; ensure outdoor vent is unobstructed
- mediumIf heat still fails, check thermal fuse/thermostat with a multimeter or call a pro
Common Questions
What is the most common cause of a dryer not starting?
The most common cause is a power issue or a faulty door switch. Start by checking the outlet, breaker, and ensure the door switch clicks when closed. Replace the switch if it fails the continuity test.
Usually it’s a power or door switch problem. Check the outlet and the switch, then replace if it tests bad.
Why is my dryer taking too long to dry clothes, even on high heat?
Slow drying is often due to restricted airflow from lint buildup or a clogged vent. Clean the lint screen, inspect the vent hose, and ensure the exterior vent is not blocked. If needed, schedule a vent cleaning.
Blocked airflow is the usual culprit. Clean the lint screen and vent path, then test again.
Can a clogged vent cause a dryer to overheat?
Yes. A blocked vent traps heat, causing the dryer's sensors to work harder and can trigger a thermal fuse. Regular vent maintenance reduces overheating risk and improves efficiency.
Absolutely. A clogged vent makes it overheat and can blow a fuse.
Is it safe to use a dryer with a damaged cord?
No. A damaged cord poses an electric shock and fire risk. Stop using the unit, unplug it, and replace the cord or have a professional inspect the wiring.
Don’t use a damaged cord; unplug and get it repaired.
How often should I clean the lint trap and vent?
Clean the lint trap before every load. Schedule a full vent inspection every 12–18 months, more often with heavy use or if you have pets or multiple loads daily.
Clean the lint trap every load and check the vent at least once a year.
What tools do I need to diagnose a dryer problem?
A basic multimeter, needle-nose pliers, and a screwdriver set are usually sufficient for non-invasive checks. For vent work, a vent brush helps remove lint buildup. If you’re unsure, consult a professional.
A multimeter and simple hand tools are enough for many checks; call a pro if unsure.
Watch Video
Key Points
- Identify the symptom first, then test power and door switches.
- Ventilation is critical for safe, efficient drying.
- Lint and vent maintenance prevent most dryer problems.
- Know when to upgrade components or call a pro.