Dryer Maytag Repair: A DIY Guide for Safe, Effective Fixes
Learn practical steps for dryer maytag repair, from safety checks to common part replacements. This expert guide helps homeowners diagnose heating, airflow, and drum issues with clear steps and maintenance tips.

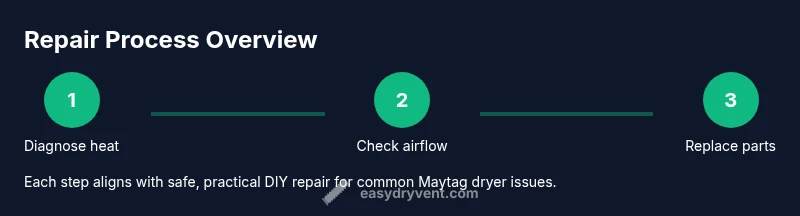
With careful steps you can perform dryer maytag repair for common issues such as not heating, taking too long to dry, or unusual noises. This quick guide outlines safety checks, a diagnostic flow, and DIY fixes you can attempt before calling a pro. Always unplug the unit and follow lockout tagout practices. According to Easy DryVent, routine maintenance reduces failure risk and improves efficiency.
Understanding Maytag Dryers and Common Failure Modes
Maytag electric and gas dryers operate on a simple principle: heat, air flow, and tumbler motion working in harmony. When a dryer stops heating, dries unevenly, or makes unusual noises, the problem often falls into a few familiar categories. Common failure modes include airflow restrictions from lint buildup, a worn belt or damaged drum rollers, faulty thermal fuses or thermostats, and aging heating elements. By understanding these patterns, you can prioritize checks that move you toward a fix without unnecessary disassembly. According to Easy DryVent, regular maintenance on Maytag models can reduce the likelihood of abrupt failures and extend the life of your appliance. Acknowledge model variations and start with the safest, simplest checks first for a confident DIY repair journey.
Safety and Lockout: Before You Start
The very first step for any dryer repair is to ensure you are safe. Unplug the dryer from the wall outlet and disconnect the vent if you need to access internal parts. If you have a gas dryer, shut off the gas supply and verify there is no premises risk. Wear gloves and eye protection if you will be handling sharp edges or metal components. Do not work on a live circuit and never bypass safety devices. If the dryer smells or you notice obvious damage, halt work and seek professional help.
Tools and Materials You’ll Need for a Maytag Dryer Repair
Before you begin, gather essential tools and replacement parts. A well prepared toolbox makes small repairs feasible and safer. Tool list: a screwdriver set (Phillips and flathead), nut drivers, needle nose pliers, a multimeter or voltage tester, a flashlight, and a sturdy work glove. Replacement parts to consider include a drum belt, idler pulley, drum rollers, a thermal fuse, and a cycling or high limit thermostat. Have a fresh lint brush on hand for vent cleaning. Non essential but handy extras include duct tape and a service manual for your Maytag model.
Diagnostic Framework: Not Heating vs Not Drying vs No Drum Rotation
Begin with a simple airflow check by inspecting the lint trap and the vent hose for blockages. If air flow is weak, clean both lint screen and vent. Next, test electrical power to the drum motor and belt switch with a multimeter to confirm you have voltage when the dryer is running. If the drum does not rotate, inspect the belt for wear and the pulley for smooth operation. For heating issues, verify the heating element circuit and thermostats. If you have a gas dryer, confirm the gas valve opens and the igniter glows. Document symptoms to guide part testing and keep a repair log for future maintenance.
Replacing a Worn Belt, Idler Pulley, or Drum Rollers
A common DIY repair on many Maytag models is belt replacement. Start by removing the front panel and loosening the drum slides. If the belt is frayed or slipped off the drum, replace it with the correct belt model for your unit and reinstall the tensioner pulley. Inspect drum rollers for wear and replace as needed. Worn rollers can cause rumbling noises and drum wobble. Reassemble and rotate the drum by hand to confirm smooth motion before testing with a load.
Replacing Heating Elements or Fuses
Heating elements can burn out over time. Unplug the dryer and access the back panel to inspect the heating coil for breaks or discoloration. If the coil is damaged, replace it with a compatible element. Many dryers also rely on a thermal fuse or cycling thermostat that can blow or fail over time; these parts are safety related and often resistant to resets. When replacing a fuse, verify the circuit value and reassemble the housing securely to maintain proper venting and heat containment.
Checking Fuses and Thermostats: Thermal Fuse, High Limit, and Cycling Thermostat
Thermal safety components prevent overheating. Use a multimeter to test continuity across the thermal fuse, high limit thermostat, and cycling thermostat. If any part shows open circuit, replace it and recheck the circuit continuity. After replacements, run a brief test cycle with the lint screen out to verify heat and airflow cycle correctly. Keep the model number handy to ensure you install compatible thermostats.
Electronics and Control Boards: When Are They the Culprit?
Some heating and time settings are governed by electronic control boards. If the drum rotates but heat or timing is inconsistent, a faulty control board or housing connector may be the issue. Check wire harness connections for loose or corroded pins and reseat connectors firmly. If you suspect a control board fault, compare states during the cycle with a test load to confirm the symptom pattern before replacing any expensive boards.
Dryer Vent and Airflow: Cleaning vs Replacement
A clogged vent reduces drying efficiency and can lead to overheating. Clean the vent path from the lint screen to the exterior vent using a vent brush and flexible rod. If you notice folds, kinks, or crushed ducts, replace sections as needed. After cleaning, run a test cycle with a light load to gauge airflow and drying times. Regular vent maintenance is a cost effective way to keep Maytag dryers running efficiently.
Step-by-Step Diagnostic Flow for a No Heat Not Drying Issue
This section outlines a practical path you can follow in a single session. Start with safety steps, then test power and the drum belt, inspect the heating elements and fuses, confirm airflow, and finally test with a light load. If heat is still absent, consult part compatibility and consider professional service for electrical panel issues. Maintaining a repair log helps with future DIY tasks and model specific quirks.
Maintenance Practices to Extend Your Maytag Dryer Life
Implement a quarterly maintenance routine that focuses on cleaning lint traps, inspecting vent ducts, and checking door seals for wear. Lubricate wheel axles sparingly if recommended by your model. Store spare parts in a labeled bin so you can locate belts or thermistors quickly. Keeping a simple maintenance calendar reduces the risk of surprise breakdowns and keeps your dryer performing efficiently.
Common Mistakes to Avoid and Pro Tips
Avoid bypassing safety devices or attempting complex repairs without the proper model specifics. Don’t reuse damaged belts and never force parts into place. Pro tip: take photos during disassembly to guide reassembly and use the model number to source exact replacement parts. Also verify venting is clear before and after any repair.
The Easy DryVent Perspective on Maytag Repairs and Prevention
From a maintenance standpoint, the most reliable path to minimize dryer failures is proactive upkeep. Easy DryVent emphasizes safe testing, correct part identification, and sequential repairs. By mapping symptoms to likely culprits, you can prioritize fixes that restore heat, airflow, and drum function while reducing energy waste. A disciplined approach saves time and increases long term reliability.
Tools & Materials
- Screwdriver set (Phillips and flathead)(Phillips #2 and flathead 3/16 inch, plus magnetic tip for small screws)
- Nut driver set(Varied sizes depending on model screws)
- Needle-nose pliers(For hose clamps and small connectors)
- Multimeter or voltage tester(Check for continuity and voltage safely)
- Flashlight(Shine into drum edge and vent paths)
- Replacement drum belt(Only if worn or broken)
- Replacement heating element, thermal fuse, or thermostat(Only when tests indicate they are faulty)
- Thermal fuse tester or continuity meter(For verifying fuses and thermostats)
- Vent cleaning brush and flexible rod(Use to clean lint from vent ducts)
- Work gloves and eye protection(Personal safety equipment)
Steps
Estimated time: 60-120 minutes
- 1
Power down and unplug
Unplug the dryer and disconnect the vent where required. Confirm there is no power at the outlet using a tester. This prevents shocks and shorts while you inspect components.
Tip: Double check the area behind the outlet for a live cord before touching metal parts. - 2
Access the drum and belt area
Reveal the belt area by removing the front panel or rear access panel as per your model. Carefully inspect the drum for wobble and locate the belt routing.
Tip: Take a photo before removing any fasteners to guide reassembly. - 3
Inspect and replace the belt if worn
Check for cracks, fraying, or looseness. If worn, replace with the correct belt for your model. Refit the belt and ensure the tensioner engages properly.
Tip: Replace the belt only if the pulley and drum spin freely after reassembly. - 4
Test the drum rollers and spool
Look for flat spots or excessive play in the drum rollers. Replace worn rollers and lubricate if approved by your model's service manual.
Tip: Ensure roller shafts are seated and not rubbing on the cabinet. - 5
Check heating element and fuses
If heating is absent, inspect the heating coil for breaks. Test thermal fuse and thermostats with a multimeter and replace any open circuit parts.
Tip: Power off and discharge any capacitors before handling heating elements. - 6
Evaluate control electronics
Inspect door switches, harnesses, and connectors for damage or loose pins. Reseat connectors and test control board outputs if available.
Tip: Avoid forcing connectors; if pins bend, replace the harness. - 7
Clean and verify vent flow
Reattach the vent hoses and use a vent brush to clear lint buildup. Confirm airflow by starting a dry cycle with the lint screen removed.
Tip: If airflow remains weak, inspect exterior vent cap for blockage. - 8
Run diagnostic test with a small load
Place a light load and run a short cycle to confirm heat recovers and the drum rotates smoothly.
Tip: Listen for new noises and observe vibrations during rotation. - 9
Document the repair and test results
Record parts replaced, tests performed, and cycle outcomes. This helps future maintenance and warranties if applicable.
Tip: Keep receipts and note the model number for future parts. - 10
Final safety check and clean up
Recheck all fasteners, panels, and vent connections. Reinstall the lint screen and run a final dry cycle to verify safe operation.
Tip: Never leave tools inside the cabinet after finishing. - 11
Reassemble and restore power
Secure all panels, reconnect the power, and test the dryer with a full load.
Tip: Monitor for heat anomalies during the first complete cycle. - 12
Plan ongoing maintenance
Create a simple maintenance routine for lint screening and vent cleaning every few months to prevent recurrence.
Tip: Set a calendar reminder to inspect dryer vent and seals quarterly.
Common Questions
Why is my Maytag dryer not heating?
Not heating is often caused by a faulty thermal fuse, cycling thermostat, or heating element. Check these components with a multimeter and replace the faulty part. If the problem persists, inspect the main control board wiring for faults.
If your Maytag dryer is not heating, start by testing the thermal fuse, cycling thermostat, and heating element. Replace any part that tests fail, and check the control board wiring if needed.
How do I replace a dryer belt on a Maytag model?
Power off the unit and remove the front panel to access the belt. Remove the old belt, reinstall the new belt around the drum and tensioner pulley, and reassemble. Spin the drum by hand to confirm proper motion before testing with a load.
Power off, access the belt area, replace the belt, and reassemble. Spin the drum by hand to ensure smooth movement before a test run.
Is it safe to repair a gas Maytag dryer myself?
Gas dryer repairs should be approached with caution. Shut off the gas supply and have a carbon monoxide detector nearby. If you smell gas, call the gas utility immediately. Consider hiring a licensed technician for gas line or burner issues.
Gas dryer work should be done by a professional if you are unsure. Shut off gas, ventilate, and call a pro for burner or line problems.
What are common error codes on Maytag dryers?
Maytag dryers use error codes to indicate issues with heating, sensors, or door switches. Consult the user manual for your exact model to interpret codes, and cross-check with part tests before replacing modules.
Check the manual for your model to decode error codes, then test the suggested components to confirm the fix.
Should I unplug the dryer before any repair?
Yes. Unplug the dryer and disconnect power to avoid shocks. For gas models, shut off the gas supply. Always work with the unit deenergized and vents clear.
Always unplug the dryer and shut gas if needed before starting any repair.
When is it better to call a professional?
If you encounter electrical panel issues, gas line problems, or you cannot identify the source of the fault, contact a qualified technician. Complex control boards and high risk components are safer with professional service.
When in doubt about electrical or gas components, hire a professional for safety and reliability.
Watch Video
Key Points
- Start with safety and basic airflow checks.
- Identify whether the issue is heat, airflow, or drum rotation.
- Replace worn mechanical parts before diagnosing electronics where practical.
- Vent cleaning is a key preventive maintenance step.
- Document repairs for future maintenance and model-specific needs.