Dryer is Not Turning On: Urgent Troubleshooting Guide
Fast, structured steps to diagnose and fix a dryer that won’t start. Power, door interlock, and control issues are common; this guide helps homeowners safely restore operation and prevent future outages.

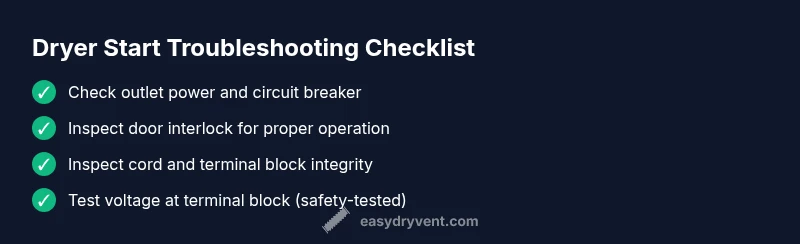
Dryer is not turning on? Start with simple checks: verify the outlet has power, confirm the door interlock engages, and ensure the start switch works. If it still won't start, inspect the power cord, outlet, and circuit breaker, then test for voltage at the terminal block. Use a safe, step-by-step diagnostic to restore operation quickly.
Why a Dryer Might Not Turn On
If your dryer won’t start, you’re facing a problem that’s often simpler than it looks. Most start-up failures fall into a handful of categories: an electrical power issue, a safety interlock or door switch problem, or a fault in the control circuitry. By focusing on these areas in a logical order, you can quickly identify the culprit without calling a tech. According to Easy DryVent, many starting problems are due to power or door interlock issues rather than expensive components. By understanding the system and following a structured approach, you can pinpoint the cause and restore drying power.
A non-start can also be influenced by the dryer’s safety features: if the door isn’t fully closed or the interlock won’t engage, the machine will not attempt to start for safety. Similarly, a failed switch or compromised wiring can fool the control board into staying silent. Keeping a calm, methodical mindset helps you avoid unnecessary repairs and keeps you out of hazardous situations. Throughout this guide, we’ll keep the steps practical and safety-focused so you can make informed decisions about repairs.
Safety First: Immediate Steps
Safety is the top priority when a household appliance won’t start. Before touching any internal components, disconnect the dryer from power. If you suspect a wet or damp environment, wait until it’s dry and avoid using adapters or extension cords. Wear protective gloves if you’re going to inspect wiring, and never work inside the appliance while it’s plugged in. The goal is to rule out obvious hazards and confirm you’re addressing a true electrical or interlock issue, not a user error. The Easy DryVent team emphasizes that many failures can be resolved by safe, initial checks rather than dives into complex diagnostics. If you smell burning, hear buzzing, or see arcing, stop immediately and seek professional help.
Quick Checks You Can Do Without Tools
- Verify the outlet provides power with a known working device. If the outlet is dead, reset the circuit breaker and inspect for a tripped double-pole breaker.
- Inspect the dryer cord and its connection to the terminal block inside the back panel. A loose or damaged cord can prevent power from reaching the motor.
- Ensure the door is closing fully and the door interlock engages correctly when you press the start button. A faulty interlock will prevent the dryer from starting even if other components are fine.
- Check for a blown fuse in the dryer’s internal fuse block (if accessible) and confirm the plug and circuit are properly grounded. If you’re uncomfortable with any of these steps, skip ahead to Step-by-Step fixes and consider professional help.
Diagnostic Flow: Systematic Troubleshooting
Symptom: Dryer is not turning on. Causes:
- Power supply issue (no outlet power, tripped breaker, or blown fuse) — likelihood: high
- Faulty door interlock or on/off switch — likelihood: high
- Failed start switch or control board — likelihood: medium
- Damaged power cord or terminal block — likelihood: low
Fixes:
- Confirm power at the outlet and reset the circuit breaker — difficulty: easy
- Test the door interlock and replace if necessary — difficulty: medium
- Inspect/replace the power cord or terminal block — difficulty: medium
- If basic fixes fail, check the thermal fuse and control board — difficulty: hard
Step-by-Step: Most Common Fixes
- Power check and outlet verification.
- Ensure the dryer is unplugged. Use a different known-good outlet or circuit to test if power is reaching the unit. Restore power by resetting the breaker if needed. Pro tip: test the outlet with a lamp to confirm voltage before proceeding.
- Tip: Never bypass safety features. Keep the door closed and the unit unplugged when inspecting wiring.
- Door interlock test.
- Close the door firmly and press the start button. If the dryer still does not start, test the interlock switch with a multimeter for continuity and replace it if it’s defective.
- Pro tip: For safety, remove the front panel only if you’re comfortable with basic electrical work.
- Inspect the power cord and terminal connections.
- Check the cord for cracks, cuts, or loose connections at the plug and at the terminal block inside the back panel. Replace any damaged cord and secure all connections.
- Pro tip: Use a pincer to avoid pulling on fragile wires and apply strain-relief clamps to prevent movement.
- Check for voltage at the terminal block.
- When the dryer is plugged in and the door is closed, carefully measure between L1 and L2 with a voltmeter. If you don’t see 120V, the issue is upstream of the dryer. Call a professional if you’re unsure.
- Pro tip: Only test live components if you’re trained; if not, skip this step and proceed to professional help.
- Thermal fuse and control board checks.
- A blown thermal fuse can stop the motor from starting. If you suspect this, inspect for continuity and replace the fuse if necessary. A faulty control board can also stop startup; replacement should be performed by a technician.
- Pro tip: Use OEM replacements when possible to ensure compatibility.
- Reassemble, test, and confirm operation.
- Reconnect any panels you removed, plug the unit back in, and run a short dry cycle with no clothes to verify that the motor starts and stops correctly.
- Pro tip: If the dryer runs but overheats or shuts off during operation, stop and check vents and lint buildup.
- When in doubt, seek professional help.
- If you’re not comfortable with electrical testing or the problem persists after these steps, a licensed appliance technician can safely diagnose and replace faulty components.
- Pro tip: Keep a record of what you tested and observed to speed up the diagnostic process.
- Document maintenance for future reliability.
- After restoration, note the parts replaced and establish a simple maintenance routine to prevent future failures.
- Pro tip: Schedule annual vent cleaning and lint removal to reduce electrical stress on the system.
When to Call a Professional
If you’re encountering any of the following, don’t continue troubleshooting yourself: persistent electrical smells, burning or melted components, buzzing sounds, or a dryer that still won’t start after basic checks. These signs indicate a higher risk of fire or electric shock. Easy DryVent recommends consulting a professional for complex testing, such as meter-based voltage checks beyond your comfort level or suspected control-board faults.
Prevention Tips to Keep Your Dryer Ready
- Schedule regular lint and vent cleaning to prevent airflow restrictions that can cause overheating and electrical faults.
- Periodically inspect power cords and outlets for wear; replace damaged cords immediately.
- Use a dedicated circuit for your dryer to reduce nuisance tripping and ensure stable voltage.
- Keep the dryer area dry and free from moisture that could cause electrical shorts.
- Log maintenance tasks so you can track patterns and plan proactive fixes.
Steps
Estimated time: 60-90 minutes
- 1
Verify power at the outlet
Unplug the dryer and check the outlet with a known-good appliance or tester to confirm power. If the outlet is dead, reset the circuit breaker and retry. This is the first and easiest check and often resolves the issue.
Tip: Pro tip: Use a non-contact voltage tester for safety. - 2
Inspect the door interlock
With the dryer unplugged, inspect the door interlock for cracks or misalignment. Use a multimeter to test continuity when the door is closed. Replace a faulty interlock to restore the start sequence.
Tip: Pro tip: Do not bypass the interlock; it’s a critical safety feature. - 3
Check the power cord and connections
Examine the power cord for cuts or scorch marks. Remove the back panel and check the terminal block for loose or damaged terminals. Replace damaged cords and tighten connections.
Tip: Pro tip: Replace the cord and strain-relief to prevent future loose connections. - 4
Test for voltage at the terminal block
With caution, power the unit and measure between L1 and L2 at the terminal block. You should see ~120V. If you don’t, the issue is upstream and may require a professional.
Tip: Pro tip: If you’re unsure about live testing, skip this step and contact a pro. - 5
Evaluate the thermal fuse and control board
A blown thermal fuse can prevent startup. Check continuity and replace if necessary. If the control board is suspected, this typically requires professional service.
Tip: Pro tip: Use OEM parts to ensure compatibility and safety. - 6
Reassemble and run a test cycle
Reconnect any panels, plug in the dryer, and run a short cycle with no clothes. Confirm the motor starts, runs, and stops normally without overheating.
Tip: Pro tip: If the dryer still won’t start, document observations and escalate to an expert. - 7
Document and plan preventive care
Record parts replaced and steps taken. Schedule regular vent cleaning and lint removal to reduce starting faults due to airflow issues.
Tip: Pro tip: A simple maintenance log helps catch patterns early.
Diagnosis: Dryer is not turning on
Possible Causes
- highPower supply issue (no outlet power, tripped breaker, or blown fuse)
- highFaulty door interlock switch or lid switch
- mediumFailed start switch or control board
- lowDamaged power cord or terminal block
Fixes
- easyReset circuit breaker and test outlet with a known-good device
- mediumTest and replace door interlock or lid switch if it’s defective
- mediumInspect and replace damaged power cord or terminal block
- hardTest the control board or start switch and replace if faulty
Common Questions
Why won’t my dryer turn on even though the outlet has power?
A dryer failing to start with power at the outlet often points to a faulty door interlock or a bad start switch. It can also be upstream wiring or a blown thermal fuse. Systematic testing will pinpoint the issue.
If the outlet has power, check the door interlock and start switch; the problem is likely in the interlock or switch, or in the dryer's control circuit.
Could a tripped circuit breaker prevent the dryer from starting?
Yes. A tripped breaker can cut power to the dryer. Reset the breaker and test again. If it trips again, there may be a broader electrical issue in your home or a short in the dryer circuit.
A tripped breaker can stop the dryer from starting; reset and test, and if it trips again, get it checked.
Can a faulty door switch prevent starting the dryer?
Absolutely. The door interlock must register a closed door for the dryer to start. Test continuity with a multimeter and replace if faulty. This is one of the most common non-start causes.
A bad door switch is a common culprit; test and replace if needed.
Is it safe to bypass the door switch for testing?
No. Bypassing safety switches can create a fire or shock hazard. Use proper testing methods and only bypass small, non-safety components if you know what you’re doing.
Don’t bypass safety switches. Use safe testing methods or call a pro.
How long does it take to replace a thermal fuse on a dryer?
Replacing a thermal fuse is feasible for a DIY with basic wiring experience, but involves disassembling the dryer and testing for proper operation afterward. If uncertain, contact a professional.
Thermal fuse replacement is doable for a confident DIYer, but consider a pro if unsure.
Watch Video
Key Points
- Start with power and safety checks.
- Test the door interlock and power cord first.
- Use a logical, step-by-step approach.
- Know when to call a professional.