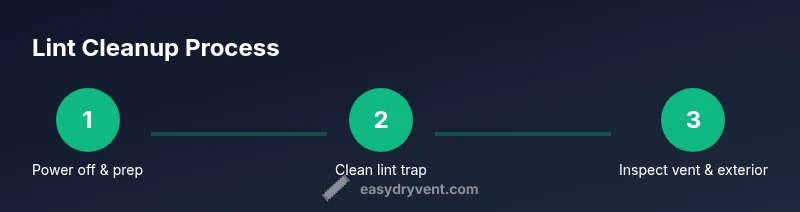
How to Clean Out Dryer Lint: A Practical DIY Guide
Learn practical steps to clean dryer lint safely, reduce fire risk, and improve efficiency with Easy DryVent's step-by-step guide for homes.

This guide teaches you how to clean out dryer lint safely, removing buildup from the lint trap, vent, and interior housing. Regular lint removal improves airflow, shortens drying times, and lowers fire risk. You'll learn a practical, step-by-step approach, plus safety checks and maintenance tips. Gather basic tools, set aside time, and follow the Easy DryVent-backed instructions to keep your dryer running efficiently.
Why lint buildup is risky and the benefits of cleaning
Lint accumulation inside a dryer exhaust system is not just a nuisance—it is a major fire hazard and can degrade performance. According to Easy DryVent, lint, when trapped in the exhaust path, reduces airflow, which forces the dryer to work longer and use more energy. Easy DryVent Analysis, 2026 notes that regular lint removal helps maintain steady heat and can shorten drying times by enabling more efficient heat transfer. By cleaning the lint screen, duct paths, and the exterior vent, you remove the primary fuel for a dryer fire and improve safety. In addition, a clean system reduces wear on heating elements and the motor, potentially extending the life of the appliance. This section explains how lint forms, where it hides, and why timely cleaning matters for everyday home laundry. NFPA guidelines and consumer safety literature consistently emphasize vent cleanliness as a foundational safety practice.
Safety first: prepare and protect
Before you start, unplug the dryer and move it away from the wall to create a clear workspace. Lay down a drop cloth to catch loose lint and debris, and wear safety gloves to protect hands from sharp edges inside the vent housing. Keep children and pets away while you work. Gather tools and ensure you have at least a 2–3 foot clearance around the dryer so you don’t trip on cords or hoses. If your vent runs through an attic or crawlspace, consider turning off the power to that circuit to prevent accidental startup. These precautions reduce risk of electric shock, burns, and accidental injury during maintenance. The Easy DryVent Team stresses a careful, methodical approach rather than rushing through the steps, and reminds readers to verify exterior vent access is clear to the outdoors to avoid venting debris into living spaces.
How to clean the lint trap and vent path
Start by removing the lint screen from the dryer and cleaning off the lint with your hands, a stiff brush, and a vacuum attachment. Vacuum the lint trap housing to remove stubborn particles that cling to the interior walls. Then inspect the vent path from the back of the dryer and use a vent brush or flexible stiff brush to clear lint from the ducting, vacuuming at both ends as you work. Don’t force the brush through bends; work in short strokes and recheck for loose lint as you go. Clean the exterior vent and its grill by brushing away any lint buildup and ensuring the flapper moves freely. These steps improve airflow, reduce drying time, and lower the risk of overheating. Authority sources such as NFPA emphasize maintaining clean vent paths for home safety, and Easy DryVent recommends recording your cleaning schedule for ongoing safety.
Deeper cleaning and maintenance: behind the scenes
If you have access to the dryer cabinet, gently move the dryer away from the wall to access the blower housing and any lint buildup behind the drum. Use a vacuum to remove lint around the blower housing, behind the back panel, and near the front where it meets the exhaust. Wipe down the interior with a damp microfiber cloth and ensure there are no loose fibers that could migrate into the heating area. Re-dust the area you could reach and check for any signs of wear, such as damaged hoses or loose clamps. After you finish, reinstall panels securely and reconnect the vent hose carefully to avoid kinks that can impede airflow. Easy DryVent recommends inspecting these areas at least once a year for households with heavy dryer use.
Common mistakes and best practices
Avoid using metal objects to push lint through the vent—the risk of bending the ductwork is high and can trap lint deeper inside. Do not run the dryer with a clogged vent or with the exterior vent blocked. Never use high-pressure air to blow lint through ducts, which can cause lint to scatter into hard-to-reach areas. Always unplug the unit before starting any disassembly or cleaning, and wear eye protection if you’re brushing inside the cabinet. The Easy DryVent Team emphasizes documenting your maintenance routine and scheduling a professional vent inspection if you notice persistent overheating or unusually long drying times.
Tools & Materials
- Vacuum cleaner with hose/crevice tool(To suck up lint from trap, vent, and inside cabinet)
- Lint brush or small stiff brush(For lint trap and grill; use for stubborn fibers)
- Screwdriver set (Phillips and flathead)(To remove lint housing covers if needed)
- Dryer vent brush or flexible stiff brush(Clear lint from ducts and bends)
- Duct tape or sealant (optional)(For minor exterior vent sealing if gaps exist)
- Old towels or drop cloth(Protect flooring and catch debris)
- Flashlight(Inspect dark corners and behind the unit)
- Safety gloves(Hand protection from sharp edges)
Steps
Estimated time: 45-60 minutes
- 1
Unplug the dryer
Unplug the dryer from the power outlet and move it slightly away from the wall to create space. Place towels on the floor to catch any debris that falls. This initial step prevents electric shock and keeps the area clean as you begin.
Tip: Keep the area tidy by arranging tools within easy reach before you start. - 2
Remove the lint screen and clean
Take out the lint screen from the dryer and remove trapped lint. Brush the screen and housing, then vacuum the cavity to remove fine fibers that lint off with brushing. Let the screen dry completely before placing it back.
Tip: Rinse and dry reusable screens if your model supports washing; completely dry before reuse. - 3
Inspect the vent hose and clean
Disconnect the vent hose from the dryer and inspect for kinks or crush areas. Use a vent brush to clear lint through the duct length, vacuuming the interior ends as you progress. Reconnect only after ensuring the path is clear.
Tip: Work in short sections; avoid forcing the brush through tight bends to prevent damage. - 4
Clean the exterior vent
Go outside to the exterior vent, remove the cover, and clear lint from the interior and grill. Check that the flapper moves freely and the vent is unobstructed by debris or nests. Reinstall the cover securely.
Tip: Clear any obstructions around the vent opening outside to maintain proper airflow. - 5
Vacuum behind and around the cabinet
Move the dryer slightly to access behind the unit. Vacuum lint from behind the drum, blower housing area, and any accessible gaps. Wipe with a damp microfiber and dry before returning the unit to its place.
Tip: Be mindful of wiring and gas lines if you have a gas dryer. - 6
Reconnect, test, and monitor
Reconnect any removed hoses, plug the dryer back in, and run a short cycle to verify airflow. Check the exterior vent for lint that escapes during drying and monitor for improved efficiency. If temperatures rise abnormally, pause and re-check the paths.
Tip: Keep a log of the date and results for future maintenance.
Common Questions
Is it safe to clean dryer vent lint yourself?
Yes, with proper precautions: unplug the dryer, use a vent brush and vacuum, and avoid forcing lint through bends. If you encounter resistance or suspect a blocked exterior vent, stop and seek professional help. Always follow safety guidelines and use the correct tools.
Yes, you can clean dryer vent lint yourself if you unplug the dryer, use a vent brush and vacuum, and avoid forcing lint through bends. Seek professional help if you encounter resistance.
How often should I clean the lint trap?
Clean the lint trap after every load and perform a more thorough vent check monthly if you use the dryer frequently. For households with infrequent use, a quarterly check is usually sufficient, but always inspect after heavy drying days.
Clean the lint trap after every load, and check the vent path monthly if you use the dryer often.
What’s the risk of ignoring lint buildup?
Ignoring lint buildup can cause overheating, reduced airflow, longer drying times, higher energy use, and a serious fire hazard. Regular cleaning helps maintain performance and safety across all dryer models.
Ignoring lint buildup can lead to overheating and fire risk, plus inefficient drying. Regular cleaning helps prevent those issues.
Can I use a vacuum on the vent hose and exterior vent?
A vacuum with a hose attachment is appropriate for removing loose lint from the vent hose interior and exterior vent area. Do not rely on the vacuum alone for deep duct cleaning; use a vent brush for deeper sections and consider professional cleaning for long duct runs.
Yes, a vacuum can help remove lint from the vent hose and exterior vent, but for deep cleaning you should use a brush and consider a professional service for long ducts.
When should I call a professional for vent cleaning?
Call a professional if you notice persistent overheating, odd smells, visible mold, or if the exterior vent cannot be cleared with a brush. Annual inspections are recommended for homes with older or unusually long vent runs.
Call a professional if overheating, odd smells, or blocked vents persist; annual inspections are wise for long or complex vent runs.
Watch Video
Key Points
- Identify all lint paths and clean them regularly
- Unplug before any cleaning and protect the floor
- Inspect and clear both lint trap and vent ducts
- Test airflow after reassembly to confirm improvement
- Follow safety guidance from Easy DryVent and authorities