Which Dryer Setting Is Low Heat: A Practical Guide
Discover which dryer setting provides low heat, how to identify it across brands, and how to best use it to protect fabrics and save energy. Practical tips, tests, and maintenance guidance from Easy DryVent.

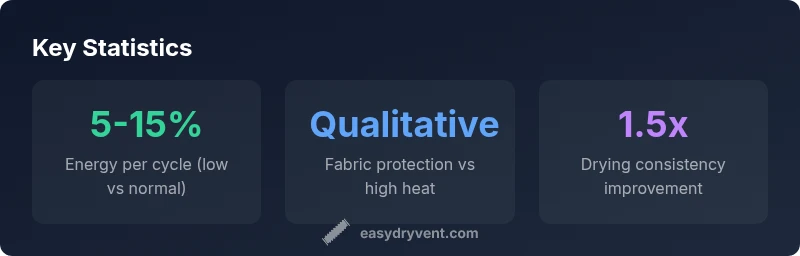
Which dryer setting is low heat? On most dryers, the low heat option is labeled Low, Delicates, or Air Dry. This setting uses gentler temperatures and a longer cycle to minimize fabric damage and shrinkage. Always check your manual, because labels vary by brand. Use low heat for delicate fabrics, synthetics, or garments with care labels that warn against high heat.
Understanding low-heat dryer settings
On most dryers, low heat is a specialty cycle designed to minimize heat exposure while still tumbling to dry fabrics. According to Easy DryVent, brands label this setting in a few common ways: Low, Delicates, or Air Dry. The underlying mechanism is simple: reduce the temperatures that the heating element or gas burner uses, and often extend the cycle time to achieve the same level of dryness. This approach helps prevent fiber damage, fading, and shrinkage, particularly for fragile materials such as synthetics, lightweight knits, and delicate blends. Remember that even within a single brand, there can be subtle differences in how the cycle operates (e.g., heat progression, moisture sensing, and drum speed). The Easy DryVent team emphasizes checking the cycle details on your model to ensure you’re truly running on the intended low-heat option.
Beyond labeling, the actual impact of low heat depends on factors like your drum size, moisture sensor effectiveness, and the fabric load. A small load often dries more quickly on low heat than a full load, because there’s less air resistance to overcome. Likewise, high-efficiency models with accurate sensors tend to optimize the balance between heat, time, and fluff. If your dryer lacks a dedicated low-heat cycle, look for a Delicates or Air Dry option, and consider toggling the heat to the lowest setting available while using the sensor-based dry time. The goal is to achieve a safe dryness level with minimal heat exposure while preserving fabric integrity.
For homeowners, the practical takeaway is to start with the lowest labeled heat and add time if you still observe dampness toward the end of the cycle. It’s better to run a longer, gentle cycle than to repeatedly subject fabrics to high heat, especially for items with care labels that specify air drying or flat-dry hints. Early experiments with similar fabrics can help you map out how your specific dryer behaves on low heat and prevent over-drying or under-drying in future loads.
How to identify the correct low-heat setting on your model
Locating the right setting starts at the control panel. Look for names such as Low, Delicates, or Air Dry, and note any labels like “Eco,” “Gentle,” or “Sensor Dry.” If you can’t find a clear Low option, consult the user manual, the manufacturer’s app, or the dryer’s online support page. If your model uses color-coded dials or a digital screen, map the setting to the closest available option and perform a quick test with a small load to confirm dryness without overheating. When comparing across brands, remember that a “Low” on one model might be closer to a medium heat on another, due to differences in temperature thresholds and sensor calibration. A quick workflow is to dry a delicate fabric item (like a satin blouse or silk scarf) on the labeled Delicates or Air Dry setting for 15–20 minutes, then check for dampness and fabric feel. If it’s not dry, extend the cycle by a few minutes on the same setting and re-check. With practice, you’ll build a mental map of which variant on your dryer provides the gentlest heat while achieving acceptable dryness within your typical load sizes.
For households with mixed fabrics, consider separating delicate items from heavier textiles to prevent overexposure to heat. Always verify the cycle’s final dryness using the moisture indicator or fabric test, and remember that thread wear and color fading are cumulative effects of repeated heat exposure over time. By building a simple labeling habit (e.g., keeping a small note near the dryer indicating which settings you used for typical loads), you can consistently choose low heat without second-guessing.
If you’re unsure about a given model, reach out to customer support with your exact dryer model number and a photo of the control panel. They can point you to the correct setting or provide model-specific guidance that aligns with your care labels and fabric mix. The key is to treat low heat as a tool for fabric preservation and energy efficiency rather than a one-size-fits-all solution.
How to test and verify the low-heat setting
Once you’ve identified a candidate low-heat setting, run a small test batch with several items that reflect your usual loads: a synthetic blend shirt, a delicate scarf, and a terry towel. Start on the low-heat cycle and set the cycle time to a conservative duration (e.g., 20–30 minutes on a sensor-based dryer, or the default length for Delicates). After the cycle ends, check several indicators: dryness (or dampness) of each item, fabric feel (is there heat damage or fiber distortion?), and any visible signs of wear or fading. If dampness remains, either run an additional short low-heat cycle or temporarily switch to a slightly longer setting before rechecking. If any fabric shows signs of heat distortion, reduce the cycle length or consider a shorter load with a gentler setting. Sensor-based dryers can automatically fine-tune the time, but manual checks ensure you aren’t relying solely on the machine’s estimation. Keep a simple log of which items dry on which settings and how long they take. Over time, you’ll have a reliable playbook that minimizes heat exposure while meeting your drying needs.
Practical usage tips:
- Always separate delicate items from heavy towels or denim when possible.
- Use a lower tumble speed if your model offers it on the low-heat setting; this minimizes friction that can cause pilling.
- For towels or cotton blends that tend to stiffen, consider adding a brief fabric-softener-free cycle or letting the air chill for a few minutes at the end to relax fibers.
- If your dryer supports moisture sensing, enable it to optimize drying time and reduce unnecessary heat exposure.
Common mistakes with low-heat settings and how to avoid them
- Assuming low heat will dry any load in the same amount of time as high heat.Reality: drying time often increases; plan for longer cycles to avoid damp items.
- Not separating fabrics. A single mixed load can cause delicate items to overheat while heavy items under-dry. Separate loads by fabric type and care labels for better results.
- Ignoring care labels. Some garments require air drying or lay-flat dry only. Respect the label, even if the fabric seems hardier.
- Relying solely on the machine’s dryness indicator. Sensor readings are helpful but not perfect—always verify dryness by touch and, if possible, by a moisture meter.
- Overlooking lint-trap and vent maintenance. A clogged vent reduces airflow and can force the dryer to work harder, increasing heat exposure on all cycles.
Fabric-specific quick-start guide for low heat
Delicate synthetics (polyester, nylon): Use Low/Delicates or Air Dry. These fabrics benefit from gentler heat to minimize pilling and fiber fraying. Wool and wool blends: Prefer Air Dry or a very gentle Delicates setting with low tumble. Heat can cause shrinkage and felting, so monitor closely. Cotton blends: For lightly woven cottons and blends, a short Delicates cycle can prevent excessive wrinkling while preserving shape. If you need quicker results, test a slightly longer run on the same setting. Silk and satin: Highest caution; always use the lowest heat option and consider a hand-wash approach for the finest garments; for machine drying, place items in a mesh bag. Activewear and moisture-wicking fabrics: Generally respond well to Low or Delicates with extended times, maintaining elasticity and color. If pilling occurs, reduce cycle time or switch to Air Dry.
Maintenance tips to keep low-heat performance strong
- Clean the lint filter before every load to maximize airflow and reduce dryer strain.
- Inspect the vent hose for kinks and obstructions; a clear vent improves efficiency and reduces the need for higher heat.
- Check drum seals and door gaskets for wear; degraded seals can cause heat loss and longer cycles.
- Periodically run a sensor-dry calibration if your model supports it, ensuring the dryness indicators align with actual moisture.
- Use the correct cycle names on your model and keep a quick-reference note near the dryer to minimize decision time during busy weeks.
Common dryer settings and their general fabricCompat guidance
| Setting | Fabric Type | Best Use | Notes |
|---|---|---|---|
| Low (Low heat) | Delicates, synthetics | Delicate fabrics, shrink-prone items | Gentler heat; longer cycle |
| Medium | Most cottons, blends | Everyday wear | Balanced dryness and care |
| High heat | Heavy cottons | Speed drying for sturdy fabrics | Not for delicate items; risk of shrinkage |
Common Questions
What fabrics are best dried on low heat?
Delicate synthetics, lace, rayon, silk blends, and items with shrink-prone care labels typically fare best on a low-heat setting. Always verify the fabric care label and test a small sample if you’re unsure.
Delicate fabrics like synthetics and silk blends usually dry well on low heat. Always check the care label and test a small piece if you’re unsure.
Is Air Dry the same as Low heat?
Air Dry and Low heat aim to minimize heat exposure, but Air Dry relies more on ambient air movement and can take longer. If your dryer offers both, compare fabric outcomes on a test load to choose the best option.
Air Dry uses cooler air and can take longer, while Low heat uses gentle warmth. Test a small load to see which keeps fabrics safest.
How can I tell if a garment is shrinking?
Measure a small, representative garment before washing. After drying on a low-heat cycle, re-measure. If dimensions change, adjust future cycles or switch to air dry for that item.
Check size before and after drying. If it shrinks, use a gentler method next time.
Does low heat save energy?
Low heat often uses less energy per cycle, especially for delicate loads. Sensor-based cycles can optimize time, reducing overall energy use compared to high-heat drying for similar fabrics.
Yes, low heat can save energy, especially when matched with your dryer's sensors and the right fabric.
Can I use low heat on towels?
Towels generally tolerate higher heat better than delicate fabrics. For fluffy towels, consider a medium cycle with a short final cool-down, or a separate high-heat towel cycle if your label permits.
Towels can take higher heat, but you may prefer medium heat for quick results and fluff.
What should I do if I don’t see a Low heat label?
If there’s no explicit Low heat option, use the Delicates or Air Dry setting and reduce cycle time. You can also dry a similar fabric on a low-heat manual setting if your model allows manual temperature control.
If there’s no Low label, try Delicates or Air Dry and watch the time closely.
How often should I inspect the vent?
Inspect vents and lint filters monthly and clean as needed. A clean vent improves airflow, supports effective low-heat drying, and reduces fire risk.
Check the vent and lint filter monthly to keep low-heat drying efficient and safe.
Can low heat cause damp clothes if misused?
Yes, if you overload the dryer or select a cycle that’s too short for the fabric mix. Always separate loads and verify dryness before removing items.
Overloading or short cycles can leave clothes damp; separate loads and test dryness.
“Using the right low-heat setting consistently protects fabrics and reduces energy use over time. Pair this with regular vent and lint maintenance for best results.”
Key Points
- Match the setting to fabric care labels.
- Low heat minimizes damage and shrinkage.
- Delicates benefit most from low-heat cycles.
- Check labels; names vary by brand.
- Test small loads to map your dryer's behavior.