Where Does a Dryer Vent Go? A Practical Home Guide
Discover the correct dryer vent location for safety, efficiency, and code compliance. This Easy DryVent guide covers exterior routes, installation tips, and maintenance to prevent fires and improve drying performance.

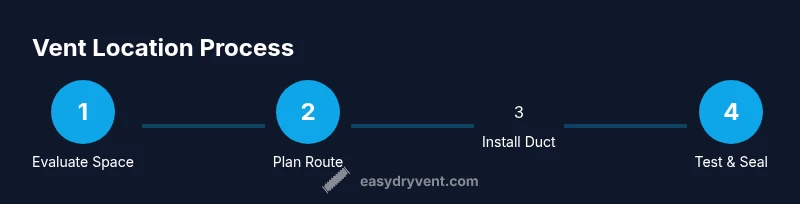
A dryer vent should terminate outside the home with a properly sized metal duct routing directly from the dryer to an exterior vent hood. The shortest, straight path with minimal bends reduces lint buildup and energy waste, while complying with local codes. Start by locating an exterior wall or a suitable vent opening and plan a safe route that avoids living spaces, attics, or crawlspaces.
The core question: where does dryer vent go and why it matters
For homeowners wondering where does dryer vent go, the answer isn’t simply 'outside.' The vent location affects safety, efficiency, and building code compliance. According to Easy DryVent, choosing the right vent location reduces the risk of lint buildup in living spaces and minimizes moisture problems that can lead to mold. A properly situated vent also yields faster drying times and lower energy use, because the dryer doesn’t have to work as hard to push hot air through long, convoluted ductwork. In this guide we outline the core principles: the vent must terminate outside, the route should be as straight and short as possible, and you should avoid routing through unconditioned spaces where lint can accumulate. We’ll also cover common layouts and the trade-offs of each. The question you should answer before you start is: what is the shortest, safest path from the dryer to an exterior vent that meets local codes? As you read, you’ll see how this decision impacts every downstream step of installation and maintenance. Easy DryVent’s approach emphasizes practicality, safety, and long-term performance.
Anatomy of a dryer vent system
A dryer vent system consists of a dryer exhaust connection, ductwork, and an exterior termination hood. The exhaust connection is typically 4 inches in diameter and made from rigid or semi-rigid metal ducting. Flexible plastic or foil ducts are discouraged due to fire risk and lint buildup. The duct should be as straight as possible with minimal bends to maintain airflow and prevent condensation. The exterior hood must have a backdraft damper to prevent gusts from re-entering the home and to reduce heat loss. Regular checks for secure clamps, intact joints, and clean exterior caps are essential for optimal performance. A well-designed system minimizes energy loss, shortens dry cycles, and protects indoor air quality by keeping lint and moisture outside the living space.
Vent location options and constraints
Vent locations vary by home design, local codes, and climate. Exterior walls are the most common termination points for houses with main living areas on one level, while multi-story homes may require rooftop or high-wall venting. Roof vents demand additional flashing and slope considerations to prevent leaks. Crawlspace termination is generally avoided unless the space is conditioned and accessible, because it can trap moisture and lint. Critical constraints include minimum clearances from doors, windows, fresh air intakes, and ignition sources. In dense urban settings, exterior vent placement may also be restricted by HOA rules or neighborhood aesthetics. When evaluating options, prioritize a short, direct run with the fewest possible elbows, using rigid metal ducting for reliability and safety.
Planning considerations and code expectations
Before cutting or drilling, review local building codes and the dryer’s installation manual. Codes typically require exterior termination that is clearly vented to the outdoors, with a properly sealed joint system and a backdraft damper. In many jurisdictions, a lint trap and the vent pathway should be inspected periodically, especially after renovations or changes to plumbing or electrical work. Ensure that the chosen route avoids attic or crawlspace spaces where lint can accumulate and where moisture can lead to mold growth. Maintain a clean path by avoiding sharp bends, compressed sections, or obstructed areas near the exterior vent hood. If you’re unsure, consult a licensed professional or your local building department for guidance.
Relocation scenarios and typical routes
Some homes require moving the dryer or vent for better airflow or to accommodate remodels. Common relocation options include moving the dryer closer to an exterior wall, rerouting the duct through an unoccupied attic crawlspace with proper insulation and access, or venting through an exterior basement wall. Each option has trade-offs in terms of labor, cost, and risk of leaks or lint buildup. In all cases, aim for a continuous metal duct, sealed joints, and a vent hood with an effective damper. If a full relocation is not feasible, consider installing a vent booster or a new trunk line that preserves the shortest possible distance between dryer and outdoor termination.
Verification, testing, and maintenance
After installation, test for airflow at the exterior hood using a piece of tissue or a smoke pen to observe how air exits the vent. Inspect indoors for any signs of lint buildup around joints, and verify that all connections are tight and sealed with high-temperature foil tape. Schedule seasonal inspections to ensure the damper is functioning and the exterior vent hood is free of leaves or obstructions. Routine cleaning of the lint screen and, if accessible, the duct interior reduces fire risk and improves efficiency. Remember to address any changes in weather or bird activity that could affect the vent’s exposure and performance.
Tools & Materials
- Measuring tape(To map route length and clearance.)
- Drill with metal drill bits(For making holes in exterior wall or lint access.)
- Rigid metal ducting (4-inch)(Preferred: smooth interior to minimize lint buildup.)
- Semi-rigid metal duct (if needed)(Use only where necessary; avoid long flexible runs.)
- Foil duct tape (high-temperature)(Seal all joints securely.)
- Duct clamps or foil tape fasteners(Keep duct sections tight and leak-free.)
- Exterior vent cap with damper(Ensure backdraft damper operates freely.)
- Quality caulk or high-temperature sealant(Weatherproof exterior penetrations.)
- Safety gear (gloves, goggles)(Protect hands and eyes during cutting and drilling.)
- Non-contact voltage tester(If relocating electrical connections near the vent.)
- Vacuum or lint brush(For pre/post-cleaning of lint near connections.)
Steps
Estimated time: 2-4 hours
- 1
Assess current vent location
Survey the room to identify an exterior wall nearby. Check for any obstructions, potential hot-work hazards, and the shortest practical path to the outside. Note any building features that may affect routing, such as studs, joists, or plumbing lines.
Tip: Take photos and measurements before starting to avoid mistakes later. - 2
Plan the route and measure clearance
Draw a simple map of the proposed duct path, listing bends and required supports. Confirm there is at least 12 inches of clearance from any combustible materials and that the path won’t violate code requirements.
Tip: Aim for 1-2 elbows maximum to keep airflow smooth. - 3
Prepare area and gather materials
Collect all tools and duct pieces. Clear the work area, protect floors, and turn off the dryer power if you will touch electrical components or the dryer cabinet.
Tip: Lay out components in order of assembly to speed up the install. - 4
Create exterior opening and routing
Drill and cut an exterior opening for the vent hood. Run the duct along the planned route using rigid metal sections whenever possible. Secure joints with foil tape and clamps, ensuring airtight connections.
Tip: Avoid crushed or kinked sections; use gentle bends. - 5
Seal and secure joints
Seal all joints with high-temperature foil tape. Attach the exterior hood securely and verify the damper moves freely with wind pressure.
Tip: Apply caulk around exterior penetration to prevent water intrusion. - 6
Test airflow and finalize
Turn on the dryer and check airflow at the exterior hood. Look for any signs of leaks or reduced performance, and address them before putting the area back together.
Tip: Run a short dry cycle and inspect for lint escape around joints.
Common Questions
Where should a dryer vent terminate on an exterior wall?
The vent should terminate on an exterior wall with a properly sealed hood and damper that opens only when the dryer is on. Avoid terminating into unconditioned spaces like attics or crawlspaces.
Vent outside through an exterior wall with a sealed hood and damper; avoid interior spaces.
Can I vent a dryer through the roof?
Roof venting is possible in some homes but requires careful flashing, slope, and moisture management. It’s often more complex and may be less convenient for inspections.
Roof venting is possible but more complex and requires careful sealing and maintenance.
What size is the standard dryer vent duct?
The standard residential dryer vent duct is 4 inches in diameter. Use rigid or semi-rigid metal ducting for best airflow and safety.
Most dryers use a four-inch duct for safe, efficient venting.
Is it safer to hire a professional for vent relocation?
DIY installation is possible for simple routes, but complex paths and code compliance often benefit from a licensed installer who can ensure proper duct sizing and sealing.
For tricky routes or code concerns, consider hiring a pro.
How can I test that the vent is venting properly?
Run a complete dry cycle and observe airflow at the exterior hood. Check for signs of restricted airflow or leaks and address any loose joints or damaged ducting.
Test by running a cycle and inspecting airflow at the outside vent.
What are signs of a clogged dryer vent?
Slow drying times, excessive lint buildup, and overheating or burning smells indicate a clogged vent. Inspect regularly and clean as needed.
Look for slow dries, lint buildup, or heat smells as warning signs.
Watch Video
Key Points
- Identify a shortest, straight vent path to outdoors.
- Use rigid metal ducting with airtight joints.
- Maintain exterior damper operation and clean the vent hood regularly.
- Follow local codes and manufacturer guidelines for safe installation.
- Schedule periodic maintenance to prevent lint buildup and fires.