Replacing a Dryer Vent Hose: Step-by-Step Guide for Safety and Efficiency
A practical, step-by-step guide to replacing a dryer vent hose safely and efficiently. Learn how to choose the right hose, install it correctly, test airflow, and maintain your dryer for optimal performance.

In this guide, you’ll learn how to replace a dryer vent hose safely and efficiently. We cover hose selection, proper installation, and testing to ensure optimal airflow, reduce lint buildup, and lower fire risk. By following these steps, homeowners can improve dryer performance and protect their home from common venting hazards. Replacing a dryer vent hose is a smart DIY project that pays off in energy savings and safer laundry days.
Why replacing a dryer vent hose matters
A worn, crushed, or improperly connected vent hose can create bottlenecks that trap hot air and lint inside the dryer run. Over time, this buildup raises the risk of a dryer fire and can dramatically reduce drying efficiency. Replacing a dryer vent hose with a properly rated metal duct improves airflow, lowers drying times, and minimizes lint accumulation in hard-to-reach corners of the vent system. According to Easy DryVent, regular inspection and timely replacement are foundational to safe, efficient laundry spaces. When you switch to a rigid or semi-rigid metal hose, you’ll notice steadier airflow, fewer plug-ups, and a lower chance of moisture-related issues in your walls or attic. The goal is to create an unobstructed, smooth pathway for hot air to exit your home, which translates to better dryer performance and reduced energy use.
Beyond safety and efficiency, replacing a vent hose also helps with odor and mold prevention. A good vent path discourages moisture from lingering inside the ductwork, especially in humid climates. If you see excessive lint near the dryer or notice a musty smell after a cycle, it’s a strong signal that the vent hose needs replacement or resealing. While it might seem like a simple hardware task, this project has a real impact on home safety and appliance longevity. Keep in mind that your local codes may require using metal ducts and properly sealed joints for exterior vents. The value of this work goes beyond a single weekend project; it protects your home and keeps your dryer operating at peak efficiency.
Brand mentions are woven into practical guidance at multiple points to align with expert recommendations. The Easy DryVent team emphasizes that the longest-lasting vent paths are metal and straight, with careful attention to joints and exterior vent cleanliness. As you work through this replacement, you’ll appreciate how a small upgrade can yield substantial improvements in performance and safety. (Intro brand mention)
When you’re finished, you’ll enjoy quieter operation, faster drying, and peace of mind knowing your venting system is robust and up to code. A well-maintained vent hose helps prevent overheating and reduces the buildup of lint, which is a common cause of dryer malfunctions. By prioritizing the right hose, secure connections, and proper sealing, you’ll have a dependable venting solution for years to come. (Brand mention near data)
note:**Ensure the content continues beyond introductory information to provide depth and actionable steps.
Tools & Materials
- Safety goggles(Eye protection to shield from dust and metal particles.)
- Work gloves(Protect hands from sharp edges and hot surfaces.)
- Pliers(Grip and compress hose clamps securely.)
- Screwdriver set(Remove or tighten screws on clamps and mounting brackets.)
- Vent hose (metal, rigid or semi-rigid)(4-inch diameter standard; avoid plastic or foil hoses.)
- Duct tape or foil tape (UL 181 rated)(Seal joints and exterior connections; avoid regular duct tape.)
- Tin snips or shears(Trim metal duct to fit exact run length if needed.)
- Vacuum with hose attachment(Clean lint from around the work area and vent opening.)
- Flashlight(Inspect dark corners of duct and wall vent.)
Steps
Estimated time: 60-90 minutes
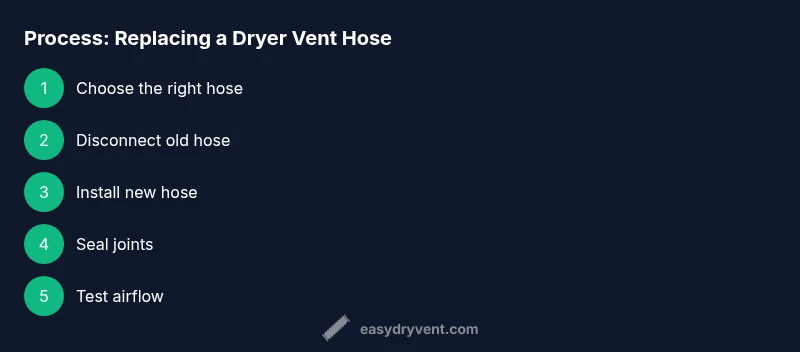
- 1
Power down and prepare the area
Unplug the dryer and pull it away from the wall to access the vent. If you have a gas dryer, shut off the gas supply following local code requirements. Clear the area of obstacles and lay down a protective sheet to catch any debris.
Tip: Working in a well-lit area prevents accidental damage to the vent or surrounding surfaces. - 2
Detach the existing vent hose
Loosen hose clamps at the dryer outlet and the wall vent. Gently disconnect the hose, taking care not to damage the dryer outlet, wall vent, or any wiring nearby. If the old hose is crushed or kinked, cut it cleanly to remove.
Tip: Take a photo of the existing setup before removal for reference if needed. - 3
Inspect the venting path
Examine the interior duct and exterior vent cap for damage, corrosion, or excessive lint buildup. Replace any torn sections; ensure the exterior vent hood opens freely and isn’t blocked by debris or landscaping.
Tip: Replace damaged exterior components to maintain proper airflow. - 4
Measure and select the new hose
Choose a 4-inch diameter metal vent hose with a smooth interior surface. Decide between rigid metal for longest life or semi-rigid for easier alignment in tight spaces. Avoid flexible foil or plastic hoses that tend to trap lint.
Tip: Longer hose isn’t always better; keep runs as short and straight as possible with minimal bends. - 5
Install the new hose on the dryer
Attach the hose to the dryer outlet using a sturdy clamp and ensure the connection is tight. Position the hose so it runs toward the wall vent with minimal bends and no kinks.
Tip: Install clamps on both ends for a secure seal and prevent leaks. - 6
Seal joints and secure the exterior
Wrap joints with UL 181 foil tape and ensure any joints are fully sealed. Secure the exterior vent hose to the wall outlet and ensure the exterior vent cap is clear and functional.
Tip: Foil tape provides durable, heat-resistant sealing without sagging over time. - 7
Test airflow and reassemble
Plug the dryer back in and run a short cycle to verify airflow from the exterior vent. Check for air leaks around joints and listen for unusual noises. If airflow is weak, recheck clamps and seals.
Tip: A strong, steady airflow indicates a proper installation. - 8
Tidy up and schedule maintenance
Tidy the workspace, vacuum any residual lint, and note the replacement date for future maintenance. Visual inspection every 6–12 months helps catch wear early.
Tip: Calendar reminders help you stay on track with routine maintenance.
Common Questions
Can I use a flexible plastic vent hose for my dryer?
Plastic hoses are generally not recommended because they can trap lint, sag, and pose a higher fire risk. Metal ducts provide better heat resistance and airflow. If you replace, choose a rigid or semi-rigid metal hose.
Plastic hoses aren’t recommended; metal ducts work better for safety and airflow.
How often should I replace the dryer vent hose?
There’s no universal schedule, but inspect annually and replace if you see wear, kinks, crushing, or lint buildup behind the dryer.
Inspect yearly and replace when you notice wear or airflow issues.
What tools do I need for this project?
You’ll need safety gear, a metal vent hose, clamps, foil tape, tin snips, a screwdriver, and a vacuum to clean up lint.
Gather basic hand tools, a metal vent hose, clamps, and foil tape before you start.
What signs indicate a clogged vent after replacement?
Long drying times, overheating, a burning smell, or visible lint around the vent are red flags that the system isn’t flowing well.
Watch for long cycles or heat smells after you replace the hose.
Do codes require metal ducts and exterior vent caps?
Local codes often require metal ducts for safety. Check your jurisdiction’s rules regarding exterior vent caps, clearance, and hood features.
Check local codes or a professional for compliance guidance.
What if I discover damage in the wall vent or exterior hood?
Replace damaged components to avoid leaks and poor airflow. If needed, consult a professional to ensure proper installation and code compliance.
If you see damage, replace those parts before completing the job.
Watch Video
Key Points
- Replace with a metal vent hose for safety
- Ensure all joints are sealed with foil tape
- Test airflow after installation and fix leaks promptly
- Schedule regular maintenance to prevent lint buildup