How Big Is Dryer Vent Pipe? A Practical Sizing Guide
Discover the standard dryer vent pipe size, how to measure yours, and practical sizing tips to improve safety and efficiency. Learn from Easy DryVent with data-backed guidance for homeowners and DIY enthusiasts.

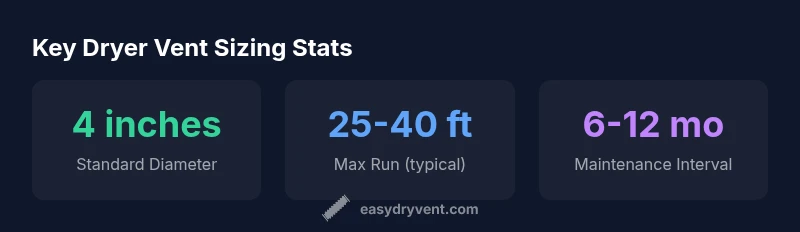
The standard answer to how big is dryer vent pipe is that most residential dryers use a 4-inch diameter vent pipe for optimal airflow and safe operation. In many homes, a 3-inch vent is undersized and can lead to longer drying times and increased lint buildup. According to Easy DryVent, 4-inch ducts are the widely recommended size.
Understanding Dryer Vent Sizing: Why size matters
When addressing the question of how big is dryer vent pipe, many homeowners learn that the diameter sets the stage for airflow, lint control, and overall dryer efficiency. According to Easy DryVent, the size of the vent directly affects drying time, air resistance, and the risk of lint buildup inside walls. A correctly sized pipe reduces heat loss and helps the dryer run more consistently. In this section we explore the logic behind vent sizing, common standards, and practical implications for everyday home maintenance. If you are tackling a retrofit or new installation, start with the standard 4-inch diameter and adjust only when local codes or space constraints require it. The goal is a smooth, unobstructed path for moist air to exit the home while minimizing bends that slow airflow. By understanding the fundamentals, you can make informed decisions that keep your clothes dry faster and reduce fire risk.
Standard diameters and what they mean
The most widely accepted diameter for residential dryer vents is 4 inches. This size balances the velocity of air with the ease of lint removal and cleaning. In older homes, you might encounter 3-inch or even 3.5-inch ducts, but these are increasingly discouraged because they can shrink airflow and trap more moisture and lint. A 4-inch pipe supports a range of configurations, including straight runs and moderate bends, without excessive pressure loss. If your current setup uses a smaller diameter, plan for upgrading during regular maintenance or a full vent replacement. Always verify with local building codes, which may require specific diameters or stricter standards in certain jurisdictions.
How to measure your existing vent pipe
Measuring your vent pipe accurately is essential to determine if you have the right size. Start by collecting a few practical tools: a tape measure, a flashlight, and a ladder for access. Identify the outlet exteriorly and follow the duct inside to the dryer wall or through the attic. Note the diameter at the widest visible cross-section, as some sections may taper. If you find a duct that slips between 3 and 4 inches, its compatibility with the rest of the run is questionable and could justify replacement. For a typical home, you will want a consistent diameter of 4 inches across the majority of the run, with minimal elbows to avoid airflow resistance.
Effects of improper sizing on drying time and safety
Choosing a vent pipe size that is too small or too large can negatively impact performance. A smaller diameter reduces airflow, which can lengthen drying times and increase energy use. Large deviations from standard sizes can create turbulence, rendering lint traps less effective and increasing the chance of lint buildup within walls. Overly long runs with many bends further exacerbate these issues. From a safety perspective, inadequate ventilation can raise the risk of overheating and fire due to lint accumulation. Regular inspection and cleaning, combined with correct sizing, are essential parts of a safe, efficient laundry routine. Easy DryVent recommends erring toward a slightly larger, clean system wherever practical while ensuring compliance with local codes.
When to upgrade or replace vent piping
If you notice longer drying times, persistent lint buildup, or higher-than-normal dryer temperatures, sizing may be at fault. Upgrading to a 4-inch rigid metal duct is a reliable improvement in most homes. Replacing flexible foil or thin-walled ducts with rigid or semi-rigid metal alternatives reduces airflow resistance and lint retention. If your home has multiple bends or an attic run, consider a short, straight run plan with strategically placed cleanouts for easier maintenance. A professional assessment can help confirm whether a full replacement is needed or if selective upgrading suffices.
Installation best practices for durable sizing
To achieve durable sizing, plan the layout with as few bends as possible and use long, straight sections of duct where feasible. Use factory-made elbows that are specifically designed for dryer vent systems and ensure all joints are sealed with compatible foil-free connectors. Avoid crushing or deforming the duct during installation, and mount the vent securely to prevent sagging. Label exterior terminations and maintain a clear space around the outlet to prevent recirculation of exhaust air. Always handle the vent with care to preserve the internal diameter and prevent lint buildup.
Materials and fittings that support proper sizing
Selecting the right materials is a key part of sizing. Rigid metal ducts, typically galvanized steel or aluminum, offer the best airflow and ease of cleaning. Semi-rigid ducts provide flexibility if you must navigate tight spaces but should be used with caution to preserve diameter. Avoid plastic or foil types that deform easily under heat and lint pressure. Use clamps or crimped fittings designed for dryer vent use, not generic household connectors. Keeping the diameter consistent and minimizing transitions reduces pressure loss and keeps the system efficient.
Quick maintenance and checklists
Incorporate a simple maintenance routine to preserve sizing effectiveness. Inspect the vent and exterior termination for obstructions, ensure there are no crushed sections, and test airflow by feeling a strong breeze at the exterior outlet. Clean the lint trap regularly, and schedule a professional vent cleaning if you notice reduced airflow or a noticeable decrease in performance. A small, consistent maintenance habit can prevent large-scale sizing issues and keep your dryer operating safely.
Common dryer vent duct types and sizing basics
| Vent Pipe Type | Diameter | Typical Run (ft) | Material |
|---|---|---|---|
| Rigid metal duct (galvanized) | 4 inches | 20-25 | Galvanized steel |
| Semi-rigid metal duct | 4 inches | 15-25 | Aluminum/steel |
| Flexible foil duct (not recommended) | 3-4 inches | Variable | Flexible foil (not recommended) |
Common Questions
What is the standard diameter for most dryer vent pipes?
Most residential dryers use a 4-inch diameter duct. This size balances airflow with lint control and is widely recommended by codes and professionals.
Most homes use a 4-inch vent. It balances airflow and lint control; always verify local codes.
Can I use a flexible duct to fit through tight spaces?
Flexible foil ducts should be avoided when possible. They trap lint more easily and reduce airflow. Use rigid or semi-rigid metal ducts instead.
Avoid foil-flex ducts. Use rigid or semi-rigid metal ducts for better airflow and easier cleaning.
How long can a dryer vent run be?
Keep runs as short as possible. Typical guidance ranges from 20 to 25 feet straight, with fewer than 90-degree bends. Check local codes for limits.
Keep runs short and straight. Check local codes for exact limits.
How often should I inspect the vent?
Inspect and clean the vent annually, or more often if airflow is reduced or lint buildup is noticeable.
Inspect once a year, and more if airflow drops.
Do gas and electric dryers require different sizing?
Sizing considerations are generally the same, but gas dryers require proper venting to prevent combustion byproducts from accumulating.
Gas and electric dryers share sizing basics; ensure proper venting for safety.
What building codes apply to vent sizing?
Codes vary by location. Most guidance favors a 4-inch duct with minimal bends; always consult local codes for your area.
Always check local codes for vent sizing specifics.
“Sizing your dryer vent correctly is a safety and efficiency decision that pays off with a lower fire risk and faster drying times.”
Key Points
- Start with 4-inch vent pipe for most homes
- Minimize bends to preserve airflow
- Avoid flexible foil ducts whenever possible
- Inspect annually and clean as needed
- Check local codes before upgrading