Dryer Vent Cover Replacement: A Practical DIY Guide
Learn how to replace a damaged or worn dryer vent cover safely and efficiently with this practical, step-by-step guide. Tools, installation tips, and maintenance for better dryer performance.

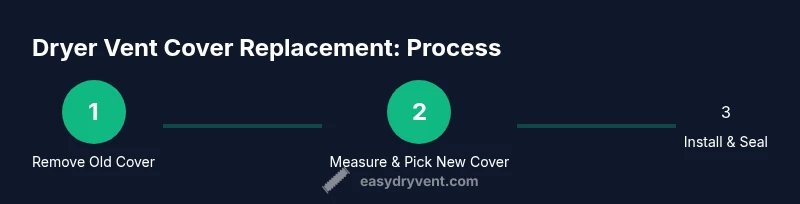
You can complete dryer vent cover replacement by removing the old cover, selecting a compatible exterior cover, securing it with screws, sealing joints, and testing airflow. Measure the vent opening, choose weatherproof material, and verify exterior clearance. This process protects against pests, drafts, and moisture while improving dryer efficiency.
Why dryer vent cover replacement matters
A worn or damaged dryer vent cover hinders airflow, invites pests, and can allow moisture and cold air into your home. Replacing a cover with a properly sized, weatherproof model helps maintain efficient drying performance, reduces lint buildup near the vent, and minimizes the risk of water intrusion in rainy seasons. According to Easy DryVent, a well-sealed vent cover also lowers energy waste by maintaining consistent exhaust paths and preventing drafts that can slow drying times. Regular replacement is a practical part of routine dryer maintenance and home safety.
Safety considerations before you start
Before you remove or install anything, unplug the dryer to avoid accidental operation. If you live in an area where the vent runs through an attic or crawl space, wear gloves and eye protection to guard against sharp metal edges and loose debris. Use a stable ladder and have a helper if your vent location is high or awkward to reach. Remember that exterior vent covers are exposed to weather; choose materials rated for outdoor use and verify the cover’s mounting is secure to prevent wind damage.
Tools, materials, and preparation
Gather the essentials before you begin: a replacement vent cover that matches your vent duct size (most homes use a 4-inch round or rectangular opening), exterior screws, a screwdriver or drill, caulk or weatherproof sealant, a sealant gun (optional), a utility knife, measuring tape, and protective gloves. If you need to seal gaps, silicone caulk or polyurethane sealant is a good choice for outdoor use. Keep a damp rag handy to wipe away excess sealant and ensure a clean surface for adhesion.
Understanding vent cover types and sizing
Vent covers come in several styles, including hinged, non-hinged, and louvered designs. Louvers help direct air while keeping rain out; hinged models simplify cleaning. The critical part is size: measure the duct opening (diameter for round vents, width by height for rectangular openings). For most residential dryers, a 4-inch vent opening is common, but always verify your exact dimensions. If your duct uses a non-standard size, look for universal adjustable covers that can accommodate multiple openings.
How to measure for the right replacement cover
First, locate the exterior vent opening and record its height and width (for rectangular vents) or diameter (for round vents). Next, check the thickness of the exterior wall and the mounting surface. Compare these measurements to the specs on the replacement cover packaging. If you plan to seal the edges, make sure the cover’s flange provides a sufficient surface area for a weatherproof seal without obstructing the vent.
Installation overview (high level, not step-by-step)
Installations vary by cover style, but the core steps are consistent: remove the old cover, clean the opening and mounting surface, align the new cover, secure it with appropriate screws, apply weatherproof sealant around the edges, and test airflow from the outside to confirm a clear path. Always ensure there’s no debris blocking the vent opening after installation. A correctly installed cover should shed rain and resist wind while allowing smooth exhaust.
Common mistakes and how to avoid them
Avoid over-tightening screws, which can warp the cover or crack the mounting surface. Don’t skip sealant in outdoor installations; moisture can seep in through gaps and promote mildew or wood rot. Ensure the vent opening is free of lint and obstructions before replacement; restricted airflow can cause overheating or reduced efficiency. Check for proper clearance around the exterior to prevent the cover from touching siding or other obstructions.
Maintenance after replacement
Periodically inspect the vent cover for damage, corrosion, or loose screws. Clean the vent opening from the outside to remove lint buildup, and reseal if you notice gaps. Replace weathered gaskets as needed and consider scheduling a yearly exterior inspection as part of your home maintenance routine. Keeping the area around the vent clean helps maintain airflow and prolongs the life of the cover.
Weatherproofing and long-term care tips
Choose a cover made of durable, corrosion-resistant materials like stainless steel or high-grade aluminum for longevity. Apply a continuous bead of exterior-grade sealant along the flange to prevent water intrusion. If your climate includes heavy snow or ice, verify that the design prevents snow buildup from blocking airflow and that the cover remains accessible for cleaning.
Tools & Materials
- replacement vent cover (matching vent size)(Common residential size is 4-inch; verify opening.)
- exterior screws(Stainless steel preferred for outdoor use)
- screwdriver or drill(Phillips head compatible with screws)
- weatherproof sealant(Silicone or polyurethane for exterior use)
- caulk gun (optional)(Helps apply sealant evenly)
- measuring tape(For accurate sizing)
- utility knife(Trim sealant or adjust gasket)
- gloves(Protect hands from sharp edges)
- safety goggles(Eye protection during installation)
- ladder or step stool(Reach exterior vent comfortably)
Steps
Estimated time: 60-90 minutes
- 1
Disconnect power and prepare
Unplug the dryer and gather your tools. Clear the area around the vent exterior, ensuring you can access the vent without bending awkwardly. This reduces the risk of accidents and keeps the workspace organized.
Tip: Always unplug first to prevent accidental operation. - 2
Remove the old vent cover
From outside, locate and remove the mounting screws. If the cover is painted shut or corroded, apply gentle pressure with a screwdriver to loosen, then pull the cover away from the wall. Clean the mounting surface as you remove it.
Tip: Be careful of sharp edges; wear gloves during removal. - 3
Clean and inspect the opening
Use a flashlight to inspect the duct opening for lint buildup or damage. Remove lint using a brush or vacuum designed for dry lint. Confirm there is no obstruction that could impede airflow.
Tip: A tidy opening prevents future clogs and ensures better performance. - 4
Measure and select a replacement cover
Measure the opening's width and height or diameter. Compare to the new cover’s specs to ensure a proper fit and compatible mounting style. If needed, select a universal cover that accommodates multiple sizes.
Tip: Choosing a slightly larger flange can improve sealing if gaps appear later. - 5
Apply weatherproof sealant
Run a continuous bead of sealant around the mounting flange where the cover will sit on the exterior wall. This keeps out moisture and drafts once the cover is installed.
Tip: Wipe away excess sealant for a clean finish. - 6
Mount the new cover
Align the new cover with the vent opening and secure it with stainless steel screws. Do not overtighten, which could crack the mounting surface. Check that the cover sits flush against the wall.
Tip: Hand-tighten first, then snug with a screwdriver to avoid overtightening. - 7
Test airflow and seal
Plug the dryer back in and run a short cycle to verify airflow. Observe from outside to ensure air exits freely and there’s no backdraft. If you see leaks, apply additional sealant and reseal.
Tip: Watch for any signs of moisture near the vent after a cycle. - 8
Final inspection and maintenance plan
Inspect the cover after a weather event and at least quarterly thereafter. Clean the opening periodically and tighten screws if you notice any looseness. Keep gutters clear to prevent water pooling near the vent.
Tip: Add vent cover inspection to your seasonal home maintenance calendar.
Common Questions
What size vent cover do I need for my dryer?
Most homes use a 4-inch dryer vent opening. Always measure the actual opening (width x height for rectangular or diameter for round) and choose a cover that matches or accommodates that size.
Most dryers use a 4-inch opening; measure your vent and pick a cover that fits exactly.
Can I install the vent cover from inside the house?
Exterior vent covers are designed to be mounted from the outside, with the flange resting against the wall. If you cannot access the exterior surface safely, consult a professional rather than attempting risky alternatives.
Exterior covers mount on the outside wall; if you can't reach safely, get help.
Is replacing my vent cover a DIY-friendly task?
Yes, for most standard homes. Gather basic tools, measure accurately, and follow weatherproofing guidance. If you encounter structural damage or complex duct routing, seek professional assistance.
For most homes, it's DIY-friendly with the right measurements and tools.
How often should I replace a vent cover?
Replace when the cover is cracked, corroded, or warped, or if it doesn’t seal properly. Regular inspections can catch issues before they affect dryer performance.
Replace damaged covers promptly and inspect them periodically.
Will a replacement vent cover improve dryer efficiency?
A properly sealed, well-sealed cover reduces drafts and moisture intrusion, helping maintain consistent exhaust flow and potentially minor efficiency gains.
A good seal helps airflow and can support steady performance.
What safety checks should I perform after installation?
Ensure screws are tight, the seal is intact, and there is no lint accumulation near the vent opening. Run a quick test cycle to confirm safe operation.
Check tightness, seal, and test airflow after installation.
Watch Video
Key Points
- Inspect vent openings regularly for lint buildup.
- Choose a properly sized, weatherproof cover.
- Seal edges to prevent drafts and moisture intrusion.
- Test airflow after installation to confirm clearance.