Dryer to Wall Connection: Safe, Efficient Venting Guide
Learn how to connect your dryer to the wall vent safely with Easy DryVent's expert guidance. Step-by-step instructions, safety tips, and maintenance for lint-free, efficient drying.

In this guide you'll learn how to properly connect a clothes dryer's exhaust to the wall vent, ensuring safe venting and efficient drying. You'll need basic venting materials, a drill, and safety gear, plus follow local codes. This process reduces lint buildup and fire risk.
Why a proper dryer to wall connection matters
A proper dryer to wall connection is more than a tidy finish; it influences safety, efficiency, and your dryer’s lifespan. A poorly sealed or long, convoluted vent run can trap lint, increase backpressure, and reduce airflow, causing longer drying times and higher energy use. According to Easy DryVent, the right vent path starts with planning a short, straight route to the exterior and selecting a duct with a smooth interior surface. When you connect the dryer to the wall, every joint should be sealed with code-approved tape or clamps, and every elbow should be minimized. A well-designed connection also prevents backdrafts that draw in moist air from the attic or crawlspace, which can promote mold growth in the laundry area. In short, a safe, efficient dryer vent reduces fire risk, protects your home’s structure, and improves drying performance.
This is especially true in homes with tight crawl spaces or high humidity. Choosing the right duct material and limiting turns helps maintain consistent airflow, which translates to faster drying times and less energy use. Easy DryVent’s guidance emphasizes a straightforward run with minimal bends and regular inspections for any loose connections or corrosion. Remember that the wall connection is the single most important link in the entire vent system, so invest time in planning and proper installation from the start.
Key safety considerations before you begin
Before you touch the dryer, take a moment to plan for safety. Unplug the dryer to avoid shock while handling ducts, and if you have a gas dryer, shut off the gas supply following local codes. Wear eye protection and gloves to guard against sharp metal edges. Work in a well-lit area and avoid working in a cramped crawl space without a helper or proper lighting. Check the area for combustible materials near the vent path, and ensure a clear exit for the vent to the outdoors. Finally, verify local building codes or homeowners’ association rules; some jurisdictions require a permit for vent installation. Addressing these safety steps upfront reduces risk and sets the foundation for a successful connection.
If you’re unsure about local codes, consult a licensed professional early in the process. A correctly installed vent system not only meets safety standards but also performs consistently over time.
Materials and tools you'll need
To achieve a reliable dryer to wall connection, assemble the essential tools and materials before you start. This minimizes mid-project trips and reduces the chance of mistakes. You’ll be working with metal ducting, fasteners, sealants, and basic hand tools. Keep a clean workspace and label each duct segment to avoid mixing parts that don’t fit. A well-prepared setup helps prevent air leaks and makes it easier to verify that the run is straight and unobstructed. Easy DryVent recommends starting with a precise plan, then gathering parts in the exact sizes your vent path requires. This upfront work pays off with a safer, more efficient venting system.
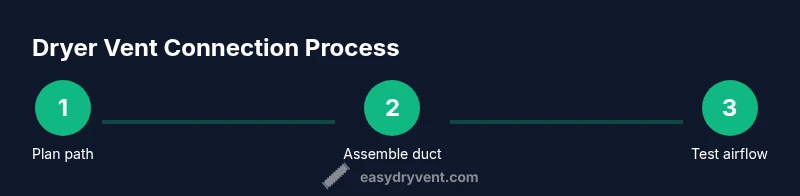
Step-by-step overview for connecting a dryer to the wall vent
This section provides a high-level walkthrough of the main actions involved in a dryer to wall connection. Plan the shortest, most direct path from the dryer to the exterior, avoiding sharp bends that increase resistance. Verify that interior joints are clean and free of lint buildup before you assemble. Use metal ducting with smooth interior surfaces and secure every joint with clamps or foil tape rated for dryer use. Install an exterior vent cap with a backdraft damper to prevent intrusions from pests and cold air. Finally, test the system by running the dryer briefly and checking for air leaks around joints and the wall opening. Always follow local codes and manufacturer instructions for best results.
Duct types explained: rigid, semi-rigid, and foil
Vent ducting for dryers comes in several forms, each with pros and cons. Rigid metal duct offers the best airflow, is easiest to clean, and resists crushing or kinking. Semi-rigid duct provides a compromise between flexibility and airflow but still requires careful handling to minimize bends. Foil or flexible foil duct is the most affordable option but is widely discouraged by professionals due to crumpling, fiber shedding, and increased fire risk. For a safe and efficient dryer to wall connection, prioritize rigid or semi-rigid metal ducts and keep the duct path as straight as possible with the fewest joints. Easy DryVent’s guidelines consistently favor metal ducts with smooth interiors to maximize airflow and minimize lint buildup.
Troubleshooting common issues with dryer-to-wall connections
Leaky joints and backdrafts are the most common problems in a poorly installed vent. If you notice a significant amount of lint around joints, air leaks, or a musty smell near the laundry area, inspect all connections and reseal as needed. If the dryer takes longer to dry clothes than usual, there may be reduced airflow due to a partial blockage, an overly long run, or an elbow that’s too tight. Pests can also gain entry through poorly sealed wall penetrations; install a backdraft damper and ensure all exterior openings are properly closed when not in use. Finally, test the system after any modification by running a short cycle and checking the exterior vent for a strong, steady airflow.
Maintenance and inspection schedule
Regular maintenance keeps your vent system performing at peak efficiency. Inspect interior ducting for kinks or crushed sections at least twice a year, and reseal joints if you notice tape wear or gaps. Clean the vent path from the dryer to the wall opening annually to remove lint buildup, especially in homes with pets or higher dryer usage. Use a vent brush or a vacuum attachment designed for ducts to avoid damaging the interior. If you spot rust or corrosion on metal duct sections, replace them promptly to prevent leaks and maintain airflow.
When to call a professional vs DIY
DIY vent installation is feasible for many simple installs, but some situations warrant professional help. If you have a gas dryer, if your vent run exceeds 25 feet including all elbows, or if you’re unsure about electrical or gas shutoffs, contact a licensed contractor. Structural challenges like inaccessible attic or crawl spaces, complicated exterior vent routing, or code compliance concerns also justify a pro. A professional assessment ensures the installation meets code requirements, maintains warranty, and guarantees optimal performance.
Quick start checklist before you start
- Confirm the exterior vent location and interior dryer outlet align.
- Gather metal ducting, clamps, foil tape, and a backdraft damper.
- Disconnect power and, if applicable, gas supply to the dryer.
- Inspect the space for obstructions and combustible materials.
- Plan the shortest, straight vent path with minimal elbows.
- Seal joints with metal tape and secure tightly.
This checklist helps you kick off the project with safety and efficiency in mind.
Authoritative sources
- OSHA dryer vent safety guidelines: https://www.osha.gov
- U.S. Department of Energy on vented clothes dryers: https://www.energy.gov
- NFPA guidelines for appliance venting safety: https://www.nfpa.org
Tools & Materials
- Rigid or semi-rigid metal vent duct (4-6 inch diameter)(Smooth interior, corrosion-resistant metal; avoid foil duct when possible)
- Wall vent collar and exterior vent cap(Cap with backdraft damper; weatherproof sealant recommended)
- Duct clamps and foil tape rated for high temperatures(UL 181 foil tape or equivalent; secure all joints)
- Backdraft damper(Prevents outside air and pests from entering when the dryer is off)
- Wall penetration sealant or exterior sealant(Use where air leaks are possible around the wall opening)
- Measuring tape(Accurate measurements for vent path and duct lengths)
- Marker or pencil(Mark cut lines on walls and ducting assembly)
- Safety gear (gloves, eye protection)(Protect hands from sharp edges and debris)
- Drill with appropriate bits(For mounting brackets and creating interior access holes)
- Vacuum with hose attachment or vent brush(Lint removal and clean-up during and after installation)
Steps
Estimated time: 60-120 minutes
- 1
Plan the vent path
Identify the shortest, straight route from the dryer outlet to the exterior vent. Check for obstacles like plumbing, electrical conduits, or cold air leaks. Mark the interior wall and exterior exit points so you can verify alignment from both sides.
Tip: Draft a simple diagram showing the route and where elbows will be placed to minimize resistance. - 2
Shut off power and prepare
Unplug the dryer and, if applicable, shut off the gas supply. Clear the area around the dryer and remove any obstructions behind it to access the existing vent connection.
Tip: Keep a flashlight handy for dim spaces and ensure kids or pets are clear of the work area. - 3
Install interior vent opening
If no interior wall vent exists, cut a clean round hole that matches the duct diameter. Install a vent box or collar as needed and frame securely to prevent movement.
Tip: Use a stud finder to avoid wiring and pipes; keep the cut clean to minimize air leaks. - 4
Mount duct and secure joints
Assemble the duct path from the dryer toward the exterior, minimizing elbows. Use clamps at each joint and seal with foil tape rated for dryers to ensure airtight connections.
Tip: Avoid crimped or crushed duct segments; an unobstructed interior surface maintains airflow. - 5
Install exterior vent cap with damper
Cut the exterior wall opening to fit the vent cap. Insert the cap and secure from the outside; ensure the damper moves freely and isn’t obstructed by insects or debris.
Tip: Seal around the exterior opening with weatherproof sealant to prevent leaks and drafts. - 6
Test airflow and seal leaks
Reconnect power and run the dryer on a short cycle. Check all joints with soapy water or a tissue to detect air leaks and reseal as needed.
Tip: Pay attention to the backdraft damper; if it doesn’t close properly, replace it before completing the install. - 7
Cleanup and final checks
Inspect the entire run for gaps, secure loose straps, and confirm the exterior vent is clear of obstructions. Document the vent path for future maintenance.
Tip: Take photos of the final setup to reference during inspections or future upgrades.
Common Questions
Do I need a professional to install a dryer vent to the wall?
Not always, but complex runs, gas dryers, or nonstandard walls may require a licensed installer. If you’re unsure about code compliance, consult a professional.
A professional isn’t always required, but for complex runs or gas dryers, hire a licensed installer.
Can I use a flexible foil duct for a dryer vent?
Foil ducts are generally discouraged due to lint buildup and fire risk. Use rigid or semi-rigid metal ducts whenever possible.
Foil ducts are not recommended; prefer rigid or semi-rigid metal ducts.
What is the best duct material for a dryer vent?
Rigid metal duct offers the best airflow and ease of cleaning. Semi-rigid is acceptable if kept straight with few folds, but avoid plastic or foil where possible.
Rigid metal duct is best for airflow and maintenance.
How often should I clean the dryer vent?
Inspect and clean the vent path at least annually, or more often for high usage or pets that shed lint. Regular cleaning reduces fire risk and improves drying efficiency.
Clean the vent at least once a year, more if you run the dryer frequently.
Will a longer vent run reduce drying efficiency?
Yes, longer runs with more elbows increase resistance and can extend cycle times. Aim for the shortest practical path and minimal turns.
Longer vents can reduce efficiency; keep the path short and straight.
Is a wall vent necessary for gas dryers?
Gas dryers require venting to the outside to safely exhaust combustion gases. Always follow the manufacturer’s instructions and local codes.
Gas dryers must vent to the outdoors and follow local codes.
Watch Video
Key Points
- Plan the shortest vent path with fewest turns.
- Use metal ducts with sealed joints for efficiency and safety.
- Test airflow and address leaks before finishing.
- Know when to call a pro for complex runs or gas dryers.