Are Dryers Hard to Install? A Practical Guide for Homeowners
Discover whether dryer installation is hard, what safety checks to perform, and a practical, code-compliant step-by-step guide for electric and gas models, tailored for homeowners.

Are dryers hard to install? For most homeowners, the task is doable with careful planning. According to Easy DryVent, the installation hinges on a safe electrical supply, proper venting, and clearances. The Easy DryVent team found that most challenges come from venting runs, wrong circuit capacity, or insufficient wall clearance—solvable with a little prep and the right tools.
Dryer installation: Is it hard? What determines difficulty
Installing a clothes dryer is often simpler than people expect, but the overall difficulty depends on your space, vent path, and electrical or gas supply. According to Easy DryVent, the most common hurdles are long vent runs, tight corners, undersized wiring, or inadequate wall clearance. With careful planning, however, you can complete a safe, code-compliant hookup in a weekend. This section breaks down the factors that influence difficulty and how to approach them with confidence.
Electric vs gas installation differences
Choosing between electric and gas dryers changes the scope of the project. Electric dryers typically require a dedicated 240-volt circuit and a properly grounded outlet, while gas dryers demand a gas supply line, a shut-off valve, and a venting path to the outdoors. Easy DryVent analysis shows that electric installations are usually straightforward if the home has the correct outlet and circuit capacity; gas installs introduce extra steps around gas line safety, leak checks, and local code permits. Readiness hinges on your home’s existing infrastructure and your comfort with basic plumbing and electrical tasks.
Venting path and building codes
Vent design is the heart of dryer performance and safety. The preferred path uses rigid or semi-rigid 4-inch metal ducting with minimal elbows to maximize airflow and minimize lint buildup. Plastic or flexible foil ducts are discouraged due to fire risk and performance loss. Ensure all joints are sealed with high-quality metal tape and clamps. Exterior venting should have a backdraft damper and proper clearance from any nearby openings. Local codes often require uninterrupted metal ducting, proper supports every 4 feet, and vent termination that prevents pests from entering the home.
Code compliance, permits, and safety checks
Before you cut holes or connect ducting, check with your local building department about permits and inspection requirements. Some jurisdictions treat gas dryer installations as more regulatory than electric hookups, requiring licensed professionals or gas-fit permits. Even for electric dryers, ensure the circuit amperage and wire gauge match the dryer's rating, and install a properly grounded outlet or hard-wired connection if required. Safety checks should include testing for leaks, verifying that the vent is flowing, and inspecting the lint path for obstructions. In short, compliance and safety are the backbone of a reliable install.
Common mistakes and how to avoid them
People often rush vent routing, reuse damaged ductwork, or neglect exterior vent maintenance. Avoid missteps by measuring path length before buying ducting, choosing rigid metal ducts over flexible ones, and avoiding sharp bends that slow airflow. Do not seal joints with regular duct tape; use aluminum foil tape designed for ducts. Finally, never ignore a damp laundry room, surprising heat, or excessive lint buildup—these indicate airflow problems that could become fire risks.
Quick-start prep for DIY installation
Before touching the dryer, assemble your checklist: measure available space, confirm vent path, and verify electrical or gas readiness. Gather tools and materials, including a 4-inch metal vent with clamps, exterior vent hood, foil tape, a voltage tester, and a level. Create a simple step-by-step plan and a safety first mindset. With careful planning and the right components, many homeowners can complete a code-compliant install that improves drying performance and energy use.
Tools & Materials
- Dryer with compatible vent kit(Ensure model includes rear vent and exhaust connection)
- 4-inch rigid metal vent duct(Preferred for safety and airflow; avoid plastic)
- Vent clamps (metal)(Secure joints every 24-48 inches)
- Exterior vent hood with flashing(Waterproofing and backdraft damper needed)
- Aluminum foil tape(Seal joints; avoid cloth-backed tapes)
- Duct tape (for temporary seals only)(Not recommended for long-term sealing)
- Measuring tape(1–2 meters long; verify clearances)
- Level(Keep vent path straight)
- Phillips and flat-head screwdrivers(For screws and duct connections)
- Pliers(Useful for tightening clamps)
- Drill with driver bit(If you need to create openings in drywall or cabinetry)
- Voltage tester (for electric dryers)(Verify 240V supply)
- Gas shut-off wrench (for gas dryers)(Only if you have a gas dryer; omit for electric)
- Lint trap brush(Useful for pre-install lint removal)
Steps
Estimated time: 90-120 minutes
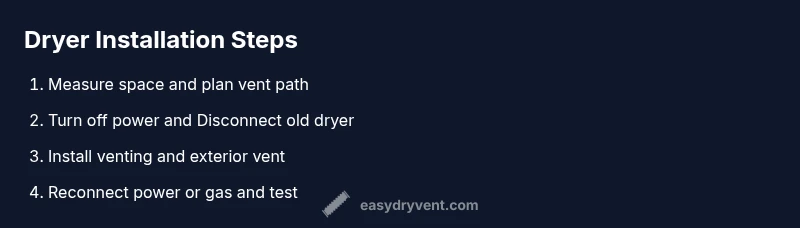
- 1
Measure space and plan vent path
Use a tape measure to confirm dryer width and clearance. Identify a straight vent path to the exterior and note potential obstacles. Plan for the fewest bends to optimize airflow. This upfront planning reduces surprises during install.
Tip: Choose a vent path with minimal 90-degree turns to maximize efficiency - 2
Shut off power and disconnect old dryer
Unplug the dryer and flip the circuit breaker to ensure zero energized lines. If replacing an existing unit, carefully detach the vent from the old exhaust and set the dryer aside without stressing the vent duct.
Tip: Double-check the power is off with a voltage tester before touching wires - 3
Prepare vent path and exterior opening
Install the exterior vent hood at the chosen location and cut or fit the wall opening as needed. Fit the 4-inch duct from the interior to the exterior, using rigid metal sections and clamps. Ensure all joints are straight and well supported.
Tip: Support ducts every 4 feet and at corners to prevent sagging - 4
Connect venting to the dryer
Attach the dryer exhaust outlet to the duct using a clamp; seal joints with aluminum foil tape. Keep duct runs as short and straight as possible and avoid kinks or crushed sections that reduce airflow.
Tip: Do not rely on duct tape alone for long-term sealing; foil tape lasts longer - 5
Reconnect power or gas and perform safety checks
For electric dryers, connect to a grounded 240V outlet or follow local code for hard-wired connections. For gas dryers, ensure the gas line is properly connected and leak-tested. Check that the vent is flowing by feeling for warm air at the exterior vent.
Tip: Test for gas leaks with soapy water at joints for added safety - 6
Test run and finalize
Run a short cycle to observe airflow and listen for unusual noises. Inspect for heat at the cabinet surfaces, verify lint path is clear, and ensure the exterior vent opens and closes correctly.
Tip: Clean the lint trap before every load for best performance
Common Questions
Are dryers hard to install for a typical home?
For many homes, installing a dryer is straightforward if you have measured space, the right venting, and a suitable electrical or gas supply. Complex layouts or local code requirements can add time and complexity.
Most homeowners can install a dryer with proper planning and following safety steps.
Do I need a permit to install a dryer?
Permit requirements vary by locality. In some areas electric hookups may not require a permit, but gas connections often do. Check with your local building department before starting.
Always verify permit needs before beginning, especially for gas installations.
How long does installation typically take?
A straightforward electric or gas dryer hookup with venting usually takes about 60 to 120 minutes, depending on layout and code requirements.
Expect roughly one to two hours if everything goes smoothly.
Can I reuse an existing vent?
Reusing a vent is possible if the duct is in good condition, meets code, and shows no cracks or lint buildup. Inspect carefully and replace damaged sections as needed.
Only reuse if it’s safe and code-compliant.
What safety signs indicate a poor dryer vent installation?
Noticeable lint buildup, excessive heat in the laundry area, or reduced airflow are signs of a problematic vent. Address these issues promptly to reduce fire risk.
Look for lint, heat, and airflow issues as warning signs.
How often should I clean the vent and lint trap?
Clean the lint trap after every load and inspect the vent path at least once a year. More frequent checks are recommended in high-use households.
Clean lint trap every load; schedule an annual vent check.
Watch Video
Key Points
- Plan space, vent path, and power early
- Use rigid metal ducting and seal joints properly
- Turn off power before handling the dryer
- Test airflow and safety before regular use